IDS - Integrated Disease Surveillance Installation Guide
This document includes an installation guide for the IDS aggregate package.
Idioma predeterminado del sistema: Inglés
Available translations: French
Visión general
Los archivos de referencia de metadatos y los archivos json de metadatos proporcionan detalles técnicos sobre la versión y el contenido del paquete.
The metadata package consists of the following modules:
- Integrated Disease Surveillance
- Integrated Disease Surveillance (dashboard)
Instalación
La instalación del módulo consta de varios pasos:
- Preparar el archivo de metadatos con los metadatos de DHIS2
- Importar el archivo de metadatos en DHIS2
- Configurar los metadatos importados
- Adaptar el programa después de la importación
Se recomienda leer primero cada sección de la guía de instalación antes de comenzar el proceso de instalación y configuración en DHIS2. Identifique las secciones aplicables según el tipo de su importación:
- importar a una instancia DHIS2 en blanco
- importar a una instancia DHIS2 con metadatos existentes.
Los pasos descritos en este documento deben probarse en una instancia de prueba/preparación de DHIS2 y solo luego aplicarse a un entorno de producción.
Requisitos
Para instalar el módulo, se requiere una cuenta de usuario administrador en DHIS2.
Se debe tener mucho cuidado para garantizar que el servidor en sí y la aplicación DHIS2 estén bien protegidos, asimismo se deben definir los derechos de acceso a los datos recopilados. Los detalles sobre cómo proteger un sistema DHIS2 están fuera del alcance de este documento, por lo que remitimos a la documentación de DHIS2.
Archivos de metadatos
Si bien no siempre es necesario, a menudo puede resultar ventajoso realizar ciertas modificaciones en el archivo de metadatos antes de importarlo a DHIS2.
Preparing the Metadata File
Dimensión de datos predeterminada
En las primeras versiones de DHIS2, los UID de las dimensiones de datos predeterminadas se generaban automáticamente. Por lo tanto, si bien todas las instancias de DHIS2 tienen una opción de categoría predeterminada, una categoría de elemento de datos, una combinación de categoría y una combinación de opciones de categoría, los UID de estos valores predeterminados pueden ser diferentes. Las versiones posteriores de DHIS2 tienen UID codificados para la dimensión predeterminada y estos UID se utilizan en los paquetes de configuración.
Para evitar conflictos al importar los metadatos, es recomendable buscar y reemplazar en todo el archivo .json todas las apariciones de estos objetos predeterminados, reemplazando los UID del archivo .json con los UID de la instancia en la que se importará el archivo. La Tabla 1 muestra los UID que deben reemplazarse, así como los API endpoints para identificar los UID existentes
| Objeto | UID | API endpoint |
|---|---|---|
| Categoría | GLevLNI9wkl | ../api/categories.json?filter=name:eq:default |
| Opción de categoría | xYerKDKCefk | ../api/categoryOptions.json?filter=name:eq:default |
| Combinación de categoría | bjDvmb4bfuf | ../api/categoryCombos.json?filter=name:eq:default |
| Combinación de opciones de categoría | HllvX50cXC0 | ../api/categoryOptionCombos.json?filter=name:eq:default |
Identifique los UID de las dimensiones predeterminadas en su instancia utilizando las solicitudes API enumeradas y reemplace los UID en el archivo json con los UID de la instancia.
NOTA
Tenga en cuenta que esta operación de búsqueda y reemplazo debe realizarse con un editor de texto plano, no con un procesador de textos como Microsoft Word.
Tipos de indicadores
El tipo de indicador es otro tipo de objeto que puede crear conflictos de importación porque ciertos nombres se utilizan en diferentes bases de datos DHIS2 (por ejemplo, "Porcentaje"). Dado que los tipos de indicadores se definen por su factor (incluido 1 para indicadores "solo numerador"), no son ambiguos y se pueden reemplazar mediante una búsqueda y reemplazo de los UID. Este método ayuda a evitar posibles conflictos de importación y evita que el implementador cree tipos de indicadores duplicados. La siguiente tabla contiene los UID que podrían reemplazarse, así como los API endpoints para identificar los UID existentes:
| Objeto | UID | API endpoint |
|---|---|---|
| Sólo numerador (número) | kHy61PbChXr | ../api/indicatorTypes.json?filter=number:eq:true&filter=factor:eq:1 |
Visualizations using root organisation unit UID
Las visualizaciones, informes de eventos, tablas de informes y mapas que están asignados a un nivel de unidad organizativa específico o grupo de unidades organizativas tienen una referencia a la unidad organizativa raíz (nivel 1). Dichos objetos, si están presentes en el archivo de metadatos, contienen un marcador de posición <OU_ROOT_UID>. Utilice la función de búsqueda en el editor de archivos .json para identificar este marcador de posición y reemplazarlo con el UID de la unidad organizativa de nivel 1 en la instancia de destino.
Option codes
According to the DHIS2 naming conventions, the metadata codes use capital letters, underscores and no spaces. Some exceptions that may occur are specified in the corresponding package documentation. All codes included in the metadata objects in the current package match the naming conventions. It may occur that the codes of existing metadata objects used in the target database use lower case characters. In this case, it is important to update those values directly in the database.
Important
During the import, the existing option codes will be overwritten with the updated upper case codes. In order to update the data values for existing data in the database, it is necessary to update the values stored in the database using database commands. Make sure to map existing old option codes and new option codes before replacing the values. Use staging instance first, before making adjustments on the production server.
For data element values, use:
UPDATE programstageinstance
SET eventdatavalues = jsonb_set(eventdatavalues, '{"<affected data element uid>","value"}', '"<new value>"')
WHERE eventdatavalues @> '{"<affected data element uid>":{"value": "<old value>"}}'::jsonb
AND programstageid=<database_programsatgeid>;
Sort order for options
Check whether the sort order sortOrder of options in your system matches the sort order of options included in the metadata package. This only applies when the json file and the target instance contain options and option sets with the same UID.
After import, make sure that the sort order for options within an option set starts at 1. There should be no gaps (eg. 1,2,3,5,6) in the sort order values.
Sort order can be adjusted in the Maintenance app.
- Go to the applicable Option Set
- Open the "Options" section
- Use "SORT BY NAME", "SORT BY CODE/VALUE" or "SORT MANUALLY" alternatives.
The IDS package contains one option set and two options:
{
    "optionSets": [
        {
            "name": "YES/NO (numeric)",
            "id": "TdDqpX1kdd2",
            "code": "YES_NO_NUM",
            "valueType": "INTEGER_ZERO_OR_POSITIVE",
            "options": [
                {
                    "id": "VavIEUmBv8j"
                },
                {
                    "id": "Xu8ieCbS7jH"
                }
            ]
        }
    ],
    "options": [
        {
            "name": "Yes",
            "id": "VavIEUmBv8j",
            "code": "1",
            "sortOrder": 1,
            "optionSet": {
                "id": "TdDqpX1kdd2"
            }
        },
        {
            "name": "No",
            "id": "Xu8ieCbS7jH",
            "code": "0",
            "sortOrder": 2,
            "optionSet": {
                "id": "TdDqpX1kdd2"
            }
        }
    ]
}
This Yes/No option set is based on "INTEGER_ZERO_OR_POSITIVE" option values that are assigned to two data elements and evaluated in a predictor listed below:
| Tipo | Nombre | UID | Details |
|---|---|---|---|
| Elemento de datos | IDS One death from severe AWD in a person > 5 years old | v2FeCwrKNt5 | Used in data sets: m9yPuQEqxmS, ZyZmZTUwctj |
| Elemento de datos | IDS Two or more AWD aged 2 years and older (linked by time and place) with severe dehydration or dying | ZOVJGcrCdCH | Used in data sets: m9yPuQEqxmS, ZyZmZTUwctj |
| Predictor | IDS - Cholera/AWD Alert | nrJQj0Kxp03 | Generator: if( #{ZOVJGcrCdCH}>= 1 || #{my2vljFIgT3}>= 1 || #{v2FeCwrKNt5}>= 1,1,0) |
Population data
The IDS package includes data elements, indicators and other metadata objects that are related to population data.
| Elemento de datos | UID |
|---|---|
| GEN - Population | DkmMEcubiPv |
| GEN - Population weekly | iLEkjJcYTJd |
| GEN - Population < 15years | cPLAnOTldta |
If the target instance already has metadata infrastructure, which is used for collecting Population data, please refer to the steps listed below:
- Choose the strategy to align population metadata in the target instance and in the .json file.
- Alternative 1: Replace the UIDs of the data elements and all their occurences in the json file with the UIDs from the target system
-
Alternative 2: Consider replacing the UIDs of these data elements in the target system with the UIDs from the json file. GEN data elements are part of DHIS2 core metadata library and are used in other metadata packages.
-
Indicators that use the population data will be aggregating data at the level/levels where the data is entered.
-
Additional mapping and configuration may be required after the package is imported. Refer to the data set configuration section
NOTE
When updating the UID of a metadata element in the existing DHIS2 instamce, you will need to run an SQL command in the database and additionally replace all occurances and references of its UID in other metadata objects: predictors, indicators, validation rule expressions, etc.
Predictors
The package includes the following predictors:
| Nombre | UID | Period type | Missing value strategy | Output data element - name | Output data element - UID | Organisation unit levels |
|---|---|---|---|---|---|---|
| IDS - Acute Flacid Paralysis outbreak | vclhob0deoe | Weekly | Skip if all values are missing | IDS - Acute Flacid Paralysis outbreak | yCjneRUc565 | District level |
| IDS - Cholera/AWD Alert | nrJQj0Kxp03 | Weekly | Skip if all values are missing | IDS - Cholera/AWD Alert | k2hYvS8LTFl | District level |
| IDS - Cholera outbreak | b64lroD7kZI | Weekly | Skip if all values are missing | IDS - Cholera outbreak | fVYqPV4Yfuv | District level |
| IDS - Dengue Fever Alert | r64RbaAOIri | Weekly | Skip if all values are missing | IDS - Dengue Fever Alert | j3t0jhGOHhP | District level |
| IDS - Diarrhoea with blood Alert | Frp6BqdLOsQ | Weekly | Skip if all values are missing | IDS - Diarrhoea with blood Alert | ZYvr5OITjBa | District level |
| IDS - Diphtheria Alert | eZad6JpXT0E | Weekly | Skip if all values are missing | IDS - Diphtheria Alert | qFGp7kAZ5Me | District level |
| IDS - Measles Confirmed Outbreak | sieOmlObW8L | Weekly | Skip if all values are missing | IDS - Measles Confirmed Outbreak | Z1lCDUuuuHg | District level |
| IDS - Measles Suspected Outbreak | C1ocEPMZUWn | Weekly | Skip if all values are missing | IDS - Measles Suspected Outbreak | mZ08SCurQVX | District level |
| IDS - Meningites Alert | qN9hTkwE4Ye | Weekly | Skip if all values are missing | IDS - Meningites Alert | KNruIU8QeKP | District level |
| IDS - Meningitis outbreak | HXBvKxWaujs | Weekly | Skip if all values are missing | IDS - Meningitis outbreak | I3570OWVcKN | District level |
| IDS - Neonatal Tetanus Alert | iuNfzUx351B | Weekly | Skip if all values are missing | IDS - Neonatal Tetanus Alert | RGXZgVrOQyo | District level |
| IDS - Non Neonatal tetanus Alert | SQ5BUEZpsgd | Weekly | Skip if all values are missing | IDS - Non Neonatal tetanus Alert | f45l3xKDAPs | District level |
| IDS - Pertussis Alert | BlwExnIXNEA | Weekly | Skip if all values are missing | IDS - Pertussis Alert | I5V4NUxtTre | District level |
| IDS - Rabies Alert | mdYA6Hfl2J4 | Weekly | Skip if all values are missing | IDS - Rabies Alert | f3MTBlkGjZw | District level |
| IDS - Viral Haemorragic Fever Alert | XhrFVuATU9L | Weekly | Skip if all values are missing | IDS - Viral Haemorragic Fever Alert | BSyp9DU4HWn | District level |
| IDS - Yellow Fever Alert | hub5RjpxB7b | Weekly | Skip if all values are missing | IDS - Yellow Fever Alert | jUaZniVe1Uq | District level |
Predictor metadata includes organisation unit levels used for aggregation of data values. The package metadata file contains placeholders that need to be replaced with the UIDs of the corresponding organisation unit levels in the target database.
The steps to prepare the predictors for import are described below:
- Identify the organisationUnitLevel UID of the District level at which the data for the predictors will be aggregated. Use the following API endpoint to identify the required UID:
../api/organisationUnitLevels.json?fields=id,name - Find the following organisationUnitLevel placeholders in the json file:
<OU_LEVEL_DISTRICT_UID> - Replace the placeholders with the UID of the identified facility level in the target instance.
Validation rules
All validation rules included in the package are listed in the metadata reference file.
The organisation unit groups for all validation rules are set to the district level. The district level value is located in the "organisationUnitLevels" property of each validation rule. It is set to 3 by default. Adjust these levels in the metadata file to match the district level in the target instance before importing the package.
Validation rule notifications
All validation notifications included in the package are listed in the metadata reference file.
Note that all validation rule notifications for this package are all set to be sent as a "single notification." This means that one notification is sent out for each organisation unit/period combination when a notification is triggered. This can also be configured as a "collective summary." The strategy for sending these notifications is located in the "sendStrategy" property of each validation notification. It is set to SINGLE_NOTICIATION by default. Adjust these values to COLLECTIVE_SUMMARY within the metadata file if you would like to change this strategy before importing the package.
NB: Note that you can also change this in maintenance for each validation rule notification at any time after they are imported as you may want to demonstrate or test both strategies to select one that is appropriate for your own setting.
Importar metadatos
Use the Import/Export DHIS2 app to import metadata packages. It is advisable to use the "dry run" feature to identify issues before attempting to do an actual import of the metadata. If "dry run" reports any issues or conflicts, see the import conflicts section below. If the "dry run"/"validate" import works without error, attempt to import the metadata. If the import succeeds without any errors, you can proceed to configuring the module. In some cases, import conflicts or issues are not shown during the "dry run", but appear when the actual import is attempted. In this case, the import summary will list any errors that need to be resolved.
Gestión de conflictos de importación
NOTA
Si está importando el paquete a una nueva instancia de DHIS2, no experimentará conflictos de importación, ya que no hay metadatos en la base de datos de destino. Después de importar los metadatos, vaya a la sección “Configuración”.
Pueden ocurrir varios conflictos diferentes, aunque el más común es que haya objetos de metadatos en el paquete de configuración con un nombre, nombre corto y/o código que ya existe en la base de datos de destino. Hay un par de soluciones alternativas a estos problemas, con diferentes ventajas y desventajas. Cuál sea la más adecuada dependerá, por ejemplo, del tipo de objeto para el que se produce un conflicto.
Alternativa 1
Cambiar el nombre del objeto existente en su base de datos DHIS2 para el cual existe un conflicto. La ventaja de este enfoque es que no es necesario modificar el archivo .json, ya que los cambios se realizan a través de la interfaz de usuario de DHIS2. Es probable que esto sea menos propenso a errores. También significa que el paquete de configuración se deja como está, lo que puede ser una ventaja, por ejemplo, cuando se publican actualizaciones del paquete. Con frecuencia también se hace referencia a los objetos del paquete original en la documentación y los materiales de formación.
Alternativa 2
Cambiar el nombre del objeto para el que existe un conflicto en el archivo .json. La ventaja de este enfoque es que los metadatos DHIS2 existentes se dejan como están. Este puede ser un factor cuando existe material de formación o documentación como SOPs de diccionarios de datos vinculados al objeto en cuestión, y no implica ningún riesgo de confundir a los usuarios al modificar los metadatos con los que están familiarizados.
Tenga en cuenta que, tanto para la alternativa 1 como para la 2, la modificación puede ser tan simple como agregar un pequeño pre/post-fijo al nombre, para minimizar el riesgo de confusión.
Alternativa 3
Un tercer enfoque, más complicado, es modificar el archivo .json para reutilizar los metadatos existentes. Por ejemplo, en los casos en los que ya existe un set de opciones para un determinado concepto (por ejemplo, "sexo"), ese set de opciones podría eliminarse del archivo .json y todas las referencias a su UID podrían reemplazarse con el set de opciones correspondiente que ya se esté en la base de datos. La gran ventaja de esto (que no se limita a los casos en los que existe un conflicto de importación directo) es evitar la creación de metadatos duplicados en la base de datos. Hay algunas consideraciones clave que se deben tener en cuenta al realizar este tipo de modificación:
- requiere conocimiento especializado de la estructura detallada de metadatos de DHIS2
- el enfoque no funciona para todos los tipos de objetos. En particular, ciertos tipos de objetos tienen dependencias que son complicadas de resolver de esta manera, por ejemplo relacionadas con desagregaciones.
- las futuras actualizaciones del paquete de configuración serán complicadas.
Configuración
Una vez que todos los metadatos se hayan importado correctamente, hay algunos pasos que deben seguirse antes de que el módulo sea funcional.
Compartir
Primero, tendrá que usar la funcionalidad Compartir de DHIS2 para configurar qué usuarios (grupos de usuarios) deben ver los metadatos y los datos asociados con el programa, así como quién puede registrar/introducir datos en el programa. De forma predeterminada, el uso compartido se ha configurado para lo siguiente:
- Tableros
- Visualizaciones, mapas, informes de eventos y tablas de informes
- Sets de datos
- Opciones de categoría
Consulte la documentación DHIS2 para obtener más información sobre compartir.
Three core user groups are included in the package:
- IDS access (view metadata/view data)
- IDS admin (view and edit metadata/no access to data)
- IDS alerts (view metadata/capture and view data)
The users are assigned to the appropriate user group based on their role within the system. Sharing for other objects in the package may be adjusted depending on the set up. Refer to the DHIS2 Documentation on sharing for more information.
Roles de usuario
Los usuarios necesitarán roles de usuario para poder interactuar con las diversas aplicaciones dentro de DHIS2. Se recomiendan los siguientes roles mínimos:
- Aggregate data analysis : Can access dashboards, data visualizer, pivot tables, reports and maps.
- Aggregate data capture : Can acccess the data entry app and add/modify data values,
Consulte la Documentación de DHIS2 para obtener más información sobre la configuración de roles de usuario.
Asignación de unidades organizativas{ #organisation-unit-assignment }
The data sets must be assigned to organisation units within existing hierarchy in order to be accessible for data entry and data analysis personnel.
Creating jobs in the scheduler
You will have to use the scheduler app in order to take advantage of the predictor and validation notification components of the package. You will need at least 3 jobs in the following order:
- Predictor
- Analytics Table
- Monitoreo
You will want each job to complete before you run the next one (ie. the predictors should all be created before analytics starts; the monitoring job should only start after analytics is complete). Each DHIS2 implementation will need to review their configuration to determine the time it takes to run each of these jobs and schedule them accordingly. It is recommended that you have these run late at night when there is not much activity within your DHIS2 instance, as these are generally resource heavy operations.
A couple tips for each job type:
Predictor
Predictor jobs consist of a relative start and end date. This means you can run your predictors for the most recent period to generate the latest data that you need. This should be useful if your previous data is not being changed, as the other predicted values will already be generated and stored (and thus this process will not necessarily need to occur once more for those already generated values that are still valid). This is a particularly resource heavy operation, and if your previous data is not routinely changing, generating data for the most recent period that you need data for is the recommended approach.
You are also able to select specific predictors or predictor groups to run during the job. The predictor group for this package is simply called IDS. If you select multiple groups it will run the predictors in the order the groups are selected. You can read more about this within the DHIS2 documentation.
This needs to be the first job that starts in your sequence, and should finish before the next job (analytics) starts.
Analytics table
The analytics table job takes all of the raw data that has been entered and applies the necessary aggregation to it based on your configuration. If you are using an integrated system with multiple programs inside your instance, then you may already have an analytics table job scheduled to run at routine intervals. If this is the case, you may need to modify the period in which it runs so it can run after the predictor job has been completed.
This needs to be second job in your sequence, and should finish before the next job (monitoring) starts.
Monitoring
Similar to the predictor, the monitoring job also consists of a relative start and end date. If your data is not changing during previous periods, you can run the monitoring job only for the period you need to review.
You can specify validation rule groups for the monitoring job. Create one monitoring job that runs weekly, using the validation rule group IDS - Weekly
If you want to send out the validation notifications, ensure that the "Send notifications" item is selected.
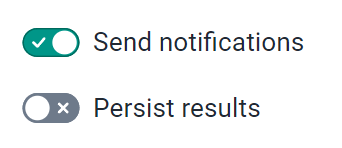
Sending out notifications
By default, notifications will be sent out to via the DHIS2 messaging app.
In order to send out notifications via SMS or e-mail, you will need an SMS gateway and/or an e-mail configuration set up within your DHIS2 instance. The settings necessary for these will vary between implementations and it is best to consult the documentation links provided here for more information.
Metadatos duplicados
NOTE
This section only applies if you are importing into a DHIS2 database in which there is already meta-data present. If you are working with a new DHIS2 instance, please skip this section and go to Adapting the program. If you are using any third party applications that rely on the current metadata, please take into account that this update could break them”
Incluso cuando los metadatos se han importado exitosamente sin ningún conflicto de importación, puede haber duplicados en los metadatos: elementos de datos, atributos de entidad tracker o set de opciones que ya existen. Como se señaló en la sección anterior sobre resolución de conflictos, una cuestión importante a tener en cuenta es que las decisiones sobre la realización de cambios en los metadatos en DHIS2 también deben tener en cuenta otros documentos y recursos que están asociados de diferentes maneras tanto con los metadatos existentes, como con los metadatos que se han importado a través del paquete de configuración. Por lo tanto, resolver duplicados no es sólo una cuestión de "limpiar la base de datos", sino también de asegurarse de que esto se haga sin, por ejemplo, romper la posible integración con otros sistemas, la posibilidad de utilizar material de capacitación, romper los SOP, etc. Esto dependerá en gran medida del contexto.
Una cosa importante a tener en cuenta es que DHIS2 tiene herramientas que pueden ocultar algunas de las complejidades de posibles duplicaciones en los metadatos. Por ejemplo, cuando existen set de opciones duplicados, se pueden ocultar para grupos de usuarios mediante compartir.
Adaptar el programa
Una vez que se haya importado el programa, es posible que desee realizar ciertas modificaciones en él. Algunos ejemplos de adaptaciones locales que podrían realizarse son:
- Añadir variables adicionales al formulario.
- Adapting data element names according to national conventions.
- Añadir traducciones a las variables y/o al formulario de entrada de datos.
- Modificación de indicadores basados en definiciones de casos locales
- Adding dashboards/dashboard items
However, it is strongly recommended to take great caution if you decide to change or remove any of the included form/metadata. There is a danger that modifications could break functionality, for example predictors or notifications.
Eliminar metadatos
In order to keep your instance clean and avoid errors, it is recommended that you remove the unnecessary metadata from your instance. Removing unnecessary metadata requires advanced knowledge of DHIS2 and various dependencies.