Using the Data Entry app
About the Data Entry app
The Data Entry app is where you manually enter aggregated data in DHIS2. You register data for an organisation unit, a period, and a set of data elements (data set) at a time. A data set often corresponds to a paper-based data collection tool. You configure the data sets in the Maintenance app.
Note
If a data set has both a section form and a custom form, the system displays the custom form during data entry. Users who enter data can't select which form they want to use. In web-based data entry the order of display preference is:
Custom form (if it exists)
Section form (if it exists)
Default form
Mobile devices do not support custom forms. In mobile-based data entry the order of display preference is:
Section form (if it exists)
Default form
When you close an organisation unit, you can't register or edit data to this organisation unit in the Data Entry app.
Enter data in a data entry form

-
Open the Data Entry app.
-
In the organisation unit tree to the left, select an organisation unit.
-
Select a Data set.
-
Select a Period.
The available periods are controlled by the period type of the data set (reporting frequency). You can jump a year back or forward by clicking Prev year or Next year.
Note
Depending on how you've configured the data entry form, you might have to enter additional information before you can open the date entry form. This can for example be a project derived from a category combination.
-
Enter data in the data entry form.
-
A green field means that the system has saved the value.
-
A grey field means that the field is disabled and you can't enter a value. The cursor will automatically jump to the next open field.
-
To move to the next field, press the Tab key or the Down Arrow key.
-
To move back to the previous field, press Shift+Tab or the Up Arrow key.
-
If you type in an invalid value, for example a character in a field that only accepts numeric values, you'll get a pop-up that explains the problem and the field will be coloured yellow (not saved) until you have corrected the value.
-
If you have defined a minimum maximum value range for the field and you enter a value that is outside this range, you'll get a pop-up message that says the value is out of range. The value remains unsaved until you've changed the value or updated the value range and then re-entered the value.
-
-
When you've filled in the form, click Run validation in the top right corner or below the data entry form.
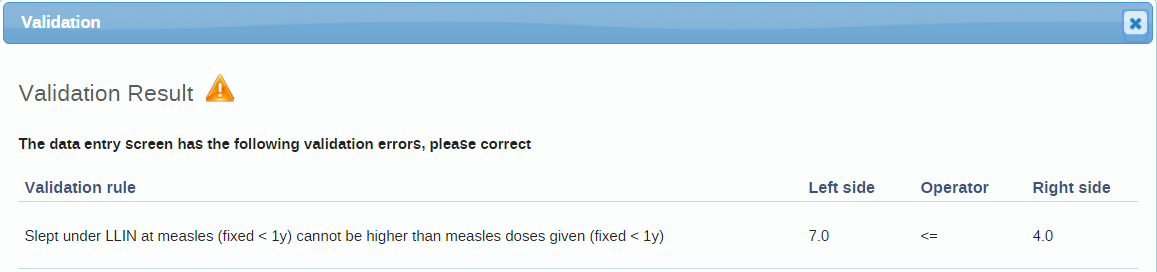
All validation rules which involves data elements in the current data entry form (data set) are then run against the new data. If there are no violations of the validation rules, you'll see a message saying The data entry screen successfully passed validation. If there are validation violations, they will be presented in a list.
-
(Optional) Correct validation violations.
Note
Zero (0) will delete the value if the data element has been configured to not store zeros.
-
When you've corrected errors and you're done with data entry, click Complete.
The system uses this information when generating completeness reports for district, county, province or the national level.
Mark a data value for follow-up
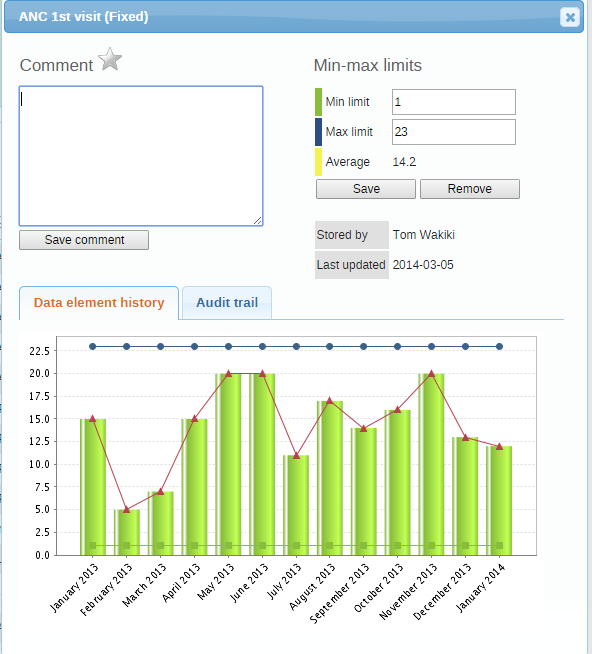
If you for example have a suspicious value that you need to investigate further, you can keep it the system, but mark it for follow-up. In the Data Quality app you can then run a follow-up analysis to view and correct all marked values.
-
Open the Data Entry app.
-
Open an existing data entry form.
-
Double-click the field with the value you want to mark for follow-up.
-
Click the star icon.
Edit data values in a completed data entry form
-
Open the Data Entry app.
-
Open an existing data entry form.
-
Click Incomplete.
-
Change the relevant data values.
Note
Zero (0) will delete the value if the data element has been configured to not store zeros,
-
Click Complete.
Display a data value's history
You can display the last 12 values registered for a field.
-
Open the Data Entry app.
-
Open an existing data entry form.
-
Double-click the field with the value you want to view the history for.
-
Click Data element history.
Display a data value's audit trail
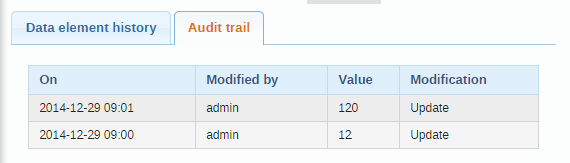
The audit trail allows you to view other data values which have been entered prior to the current value. The audit trail also shows when the data value was altered and which user who made the changes.
-
Open the Data Entry app.
-
Open an existing data entry form.
-
Double-click the field with the value you want to view the audit trail for.
-
Click Audit trail.
Create minimum maximum value range manually
-
In the Data Entry app, open a data entry form.
-
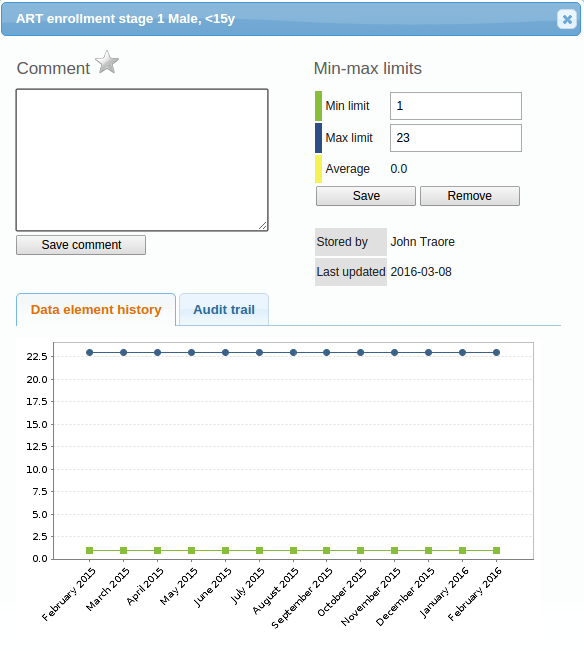
Double-click the field for which you want to set the minimum maximum value range.
-
Enter Min limit and Max limit.
-
Click Save.
If values don't fall within the new value range the next time you enter data, the data entry cell will appear with an orange background.
-
(Optional) Type a comment to explain the reason for the discrepancy, for example an event at a facility which may have generated a large number of clients.
-
(Optional) Click Save comment.
Tip
Click the star icon to mark the value for further follow-up.
Enter data offline
The Data Entry app works even if you don't have a stable Internet connection during data entry. When you don't have an internet connection, the data you enter is saved to your local computer. When the Internet connection is back, the app will push the data to the server. The total bandwidth usage is reduced since data entry forms no longer are retrieved from the server for each rendering.
Note
To use this functionality, you must login to the server while you've an Internet connection.
-
When you're connected to the Internet, the app displays this message at the top of the data entry form:

-
If your Internet connection breaks during data entry, the app detects it and displays this message:

Now your data will be stored locally. You can continue to enter data as normal.
-
Once you have entered all necessary data and the app detects that the Internet connection is back, you'll see this message:

Click Upload to synchronize data with the server.
-
When the data has successfully synchronized with the server, you'll see this confirmation message:

Enable multi-organisation unit data entry

It can be useful to enter data for multiple organisation units in the same data entry form, for instance if there are few data elements in the form and a huge number of organisation units in the hierarchy. In that case, you can enable multi-organisation unit data entry.
Note
Multi-organisation unit data entry only works for section forms.
-
Open the System Settings app.
-
Select Enable multi-organisation unit forms.
-
In the Data Entry app, select the organisation unit immediately above the organisation unit you want to enter data for in the organisation unit hierarchy.
Data elements will appear as columns and organisation units as rows in the form.
Note
The data entry forms should still be assigned to the facilities that you actually enter data for, that is the organisation units now appearing in the form.