COVAC - Android User Guide
DHIS2 Android App
DHIS2 Immunization Toolkit
COVID-19 Vaccination Registry
Introduction
The DHIS2 Android app is optimized to use the COVID-19 immunization that is aligned with the WHO’s technical guidance on COVID-19 immunization case definitions and implementation guidance to enable rapid deployment in countries. This end-user manual will help the users in understanding the data entry for using the DHIS2 Android app for entering COVID-19 vaccination data.
Please also refer to the official DHIS2 android app documentation for further assistance:
Note
The DHIS2 Android app allows offline data capture across all DHIS2 data models. Data and metadata are automatically synchronized whenever there is internet access, always keeping the most relevant data for the logged user in the device.
Logging in
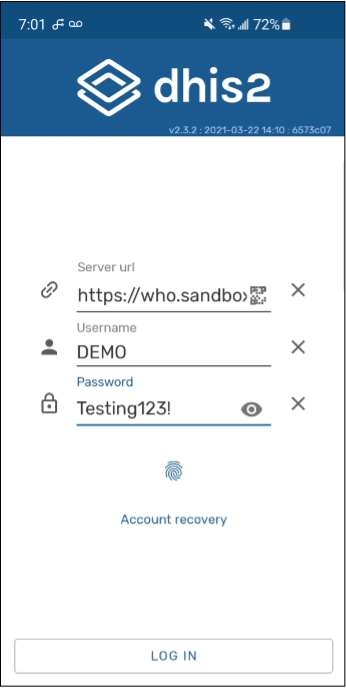
- Enter the given URL in the browser (as provided) or use a QR code
- Enter the username and password (as provided)
- Select "Log in" after entering these details
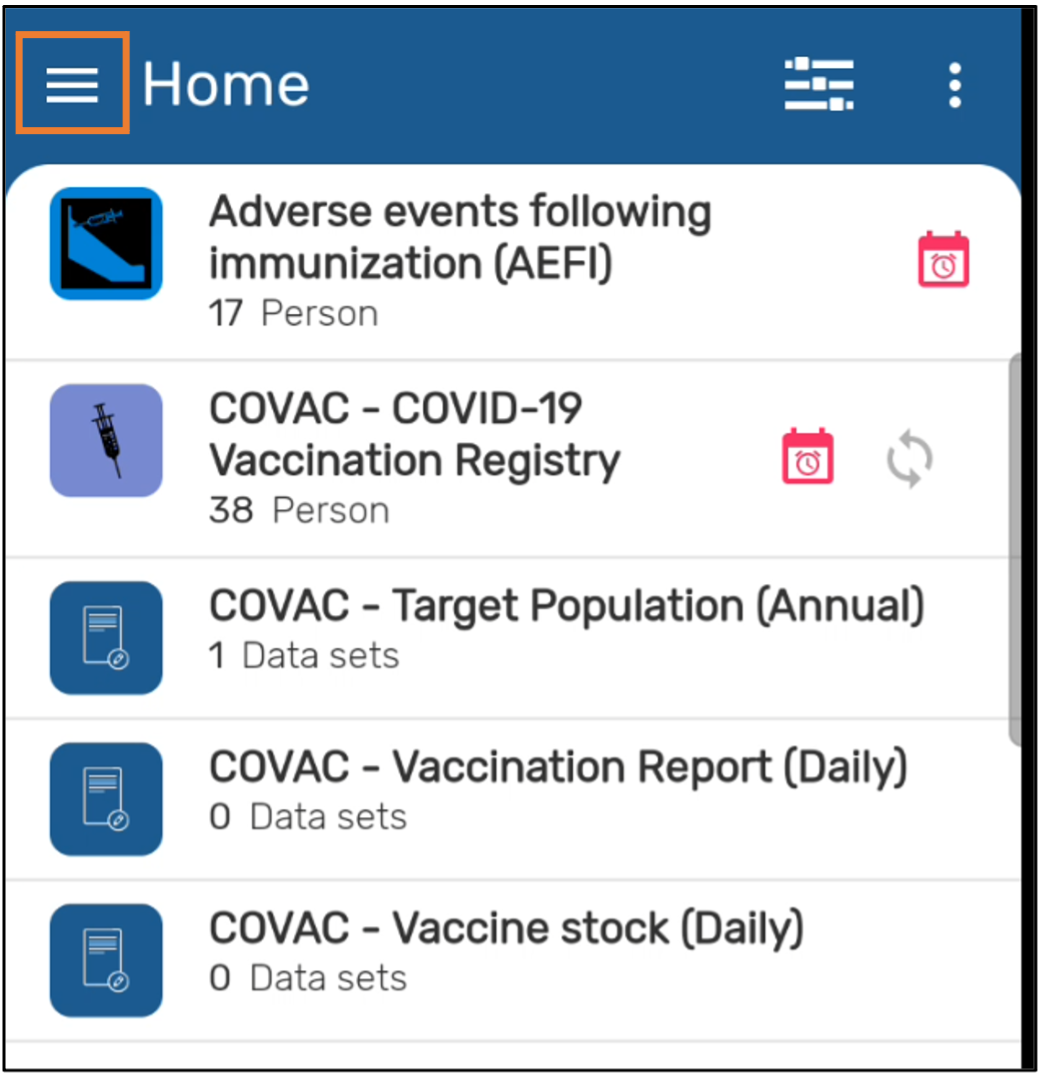
The home screen will show a list of programs depending on your level of access within your system. In this example, both tracker programs and aggregate data sets are available to the user. [Note to trainer: modify this text to explain to your users what they will have access to]
Note
The android capture app allows a user to enter data from aggregate, event and tracker data models all within the same app
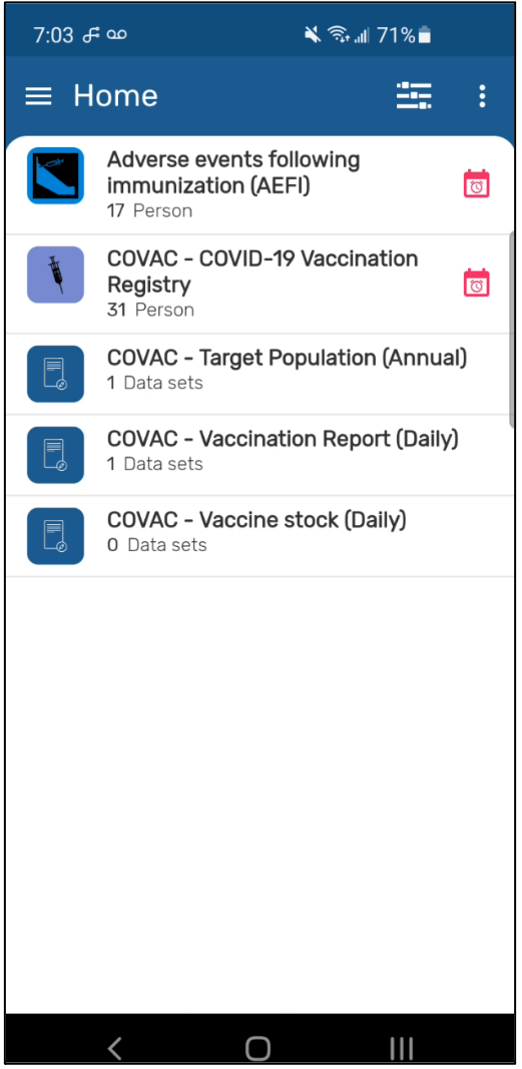
Accessing the Program
- Select the COVID-19 Vaccination Registry program
- This will take you the home page of data entry
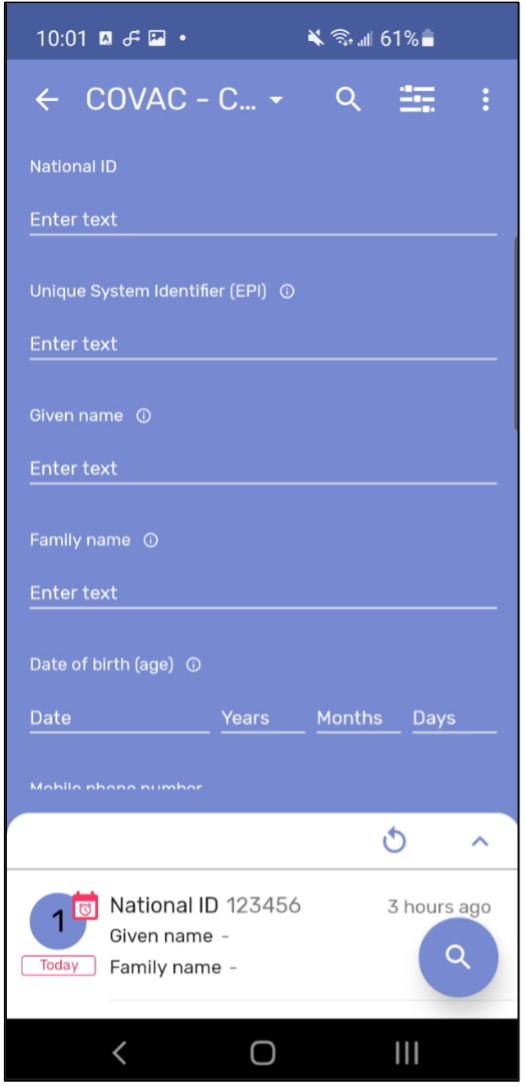
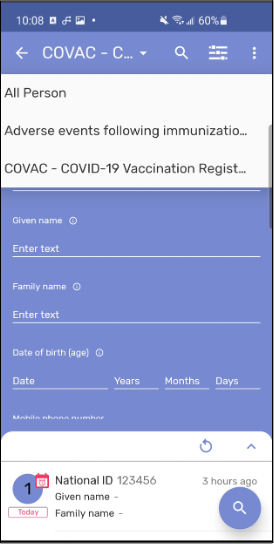
On this screen you will be able to search all the cases already registered in the system to make sure you do not enter duplicates. You need to enter at least one of the attributes to perform a search. [Note to trainer: this will vary based on how you set up your configuration; modify the minimum number of attributes needed to search accordingly]. Click on the magnifying glass icon to perform the actual search.
Adding a New Person
Note
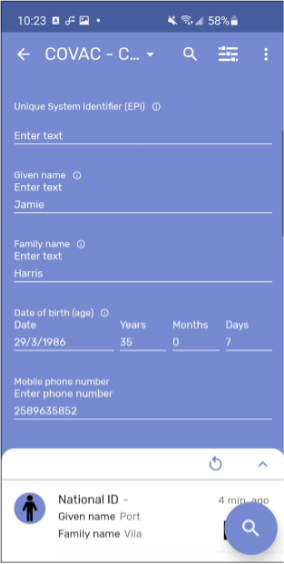
To add a new person, you will need to attempt a search first. When the search cannot find a result that meets your criteria, you will be able to add the person. Details that you fill in during your search will carry over and you will not need to re-enter them.
- Enter your details
- Attempt a search by selecting the magnifying glass icon
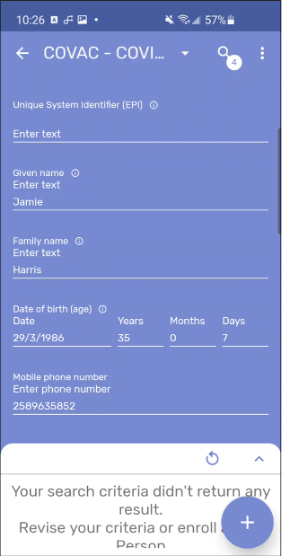
- If no person is found, you will receive a message.
- From here you can add a new person by selecting the “+” icon
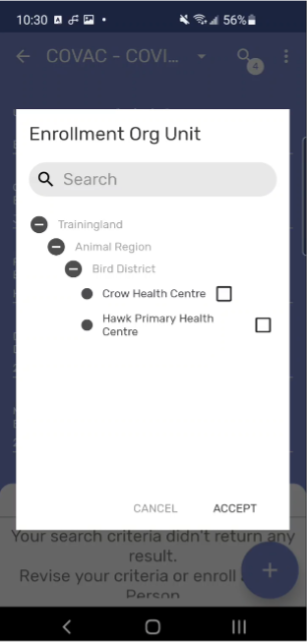
- Select the location in which to register the new person
- Select Accept to continue
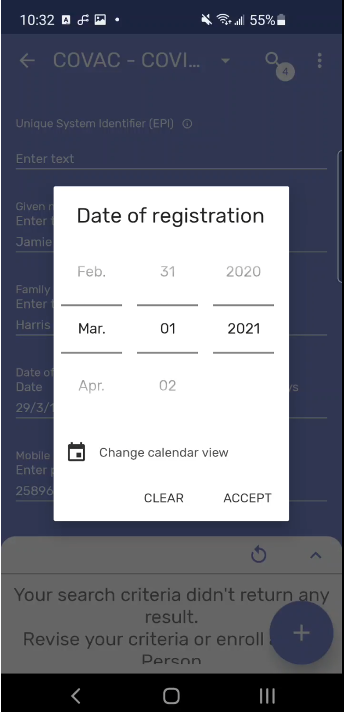
- Select the registration date
- Select “Accept” to continue.
Note
You can change the calender view by selecting the “Change Clander View” option available on the Date window.
This will take you to the “Registration screen” where you can finalize the registration of the person.
- Enter any remaining details for the person in the “Attributes – Person” section
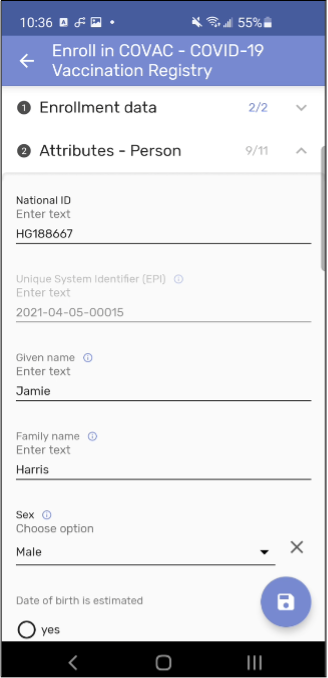
- Select the save button when all the information is entered
Tip
- Use the arrow keys to expand each section
- Any information you have already entered during your search will carry over. You can add additional details as required. If you are generating an ID, it will generate at this stage of the data entry.
This will register the new case and take you to the data entry dashboard of the case. This is where you will be entering the relevant information to be captured in the vaccination program.
Note
A user can search across all programs using one tracked entity type (TET). In the Search screen there is a drop-down menu which shows all the programs available for the active TET (active TET is defined by the selection of the program in the home screen). That drop down should also have an option with the TET name. (for example: person)
When the user selects that option, the search fields available will only be the TET attributes (no program specific attributes). Search restrictions do not apply, because they belong to the programs
If you search across all programs and find the person you intend to register is already registered in another program, you should not register them again.
Exploring the Tracker Dashboard
Within the person’s tracker dashboard, there are 4 separate sections that you can navigate to:
- Overview : this is the default section and is most relevant to the vaccination use-case
- Indicators : any individual, calculated indicators about the person will be shown here. It is like the “indicators” widget within the web-based version of tracker capture
- Relationships : here you can add relationships to other tracked entities in the system (such as other people)
- Notes : notes can be added about the individual person
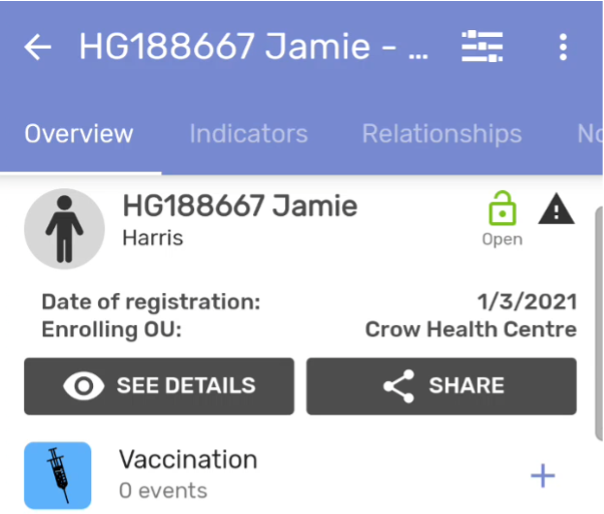
The filter button allows you to filter the events within a single person’s dashboard

The menu button has several useful options. Note that you can only delete enrollments or TEIs if you have been granted permission to do so.
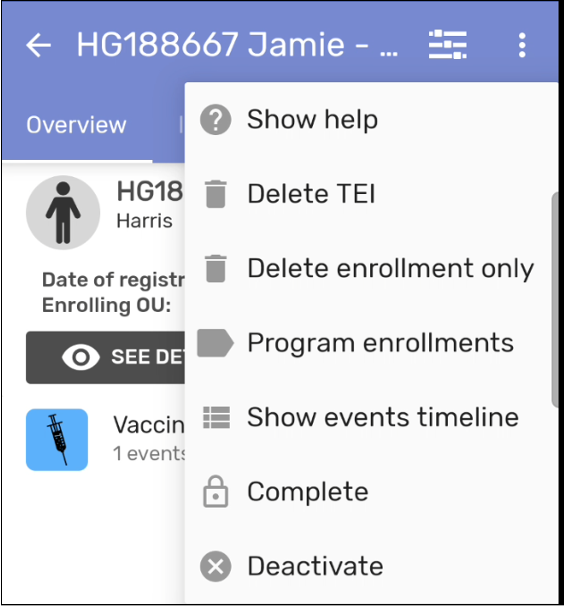
- Show help: Shows a help dialog that explains the dashboard screen
- Delete TEI: Deletes the TEI. Your user role must have permission to perform this task
- Delete enrollment only: Deletes the enrollment. Your user role must have permission to perform this task
- Program enrollemnts: Shows the programs the person either is or can be enrolled into
- Show events timeline: swappable mode to either group events together or show them seperately in a timeline. Useful when multiple events are present within a stage
- Complete: Completes the enrollment
- Deactivate: Deactivites the enrollment
Vaccination – 1st Dose
To start the data entry process, add a new event [Note to trainer: Your config will dictate what a user needs to do. An event may get created on its own based on the registration date, or you may want to schedule a new event if you are performing pre-registration. Modify this section with the appropriate steps that follow your workflow.]
- From the overview tab, select the “+” beside the vaccination stage
- Select “Add new”

- Select the date in which the vaccine dose was given
- Select “Accept” to save the date
- Select “Next” to proceed.
- You will receive a message saying “event created” and be taken to the data entry screen for the 1st dose

You can now enter your related data
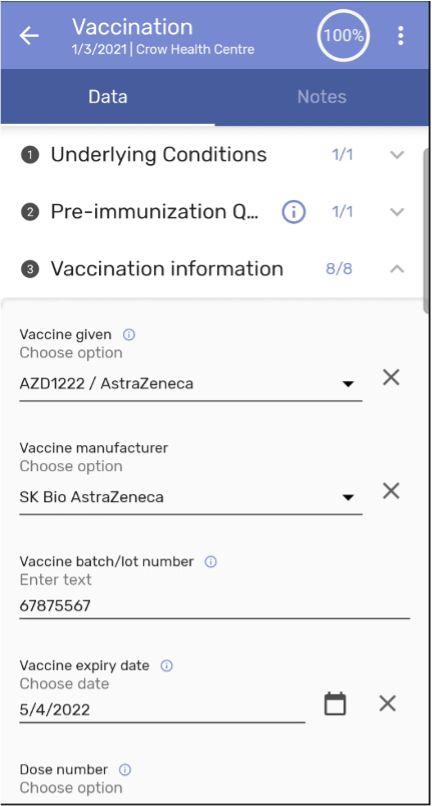
Note
As you start entering the data you can see that the “percentage of data completed in each event” is shown in the top right corner of an event when it is opened after first registration
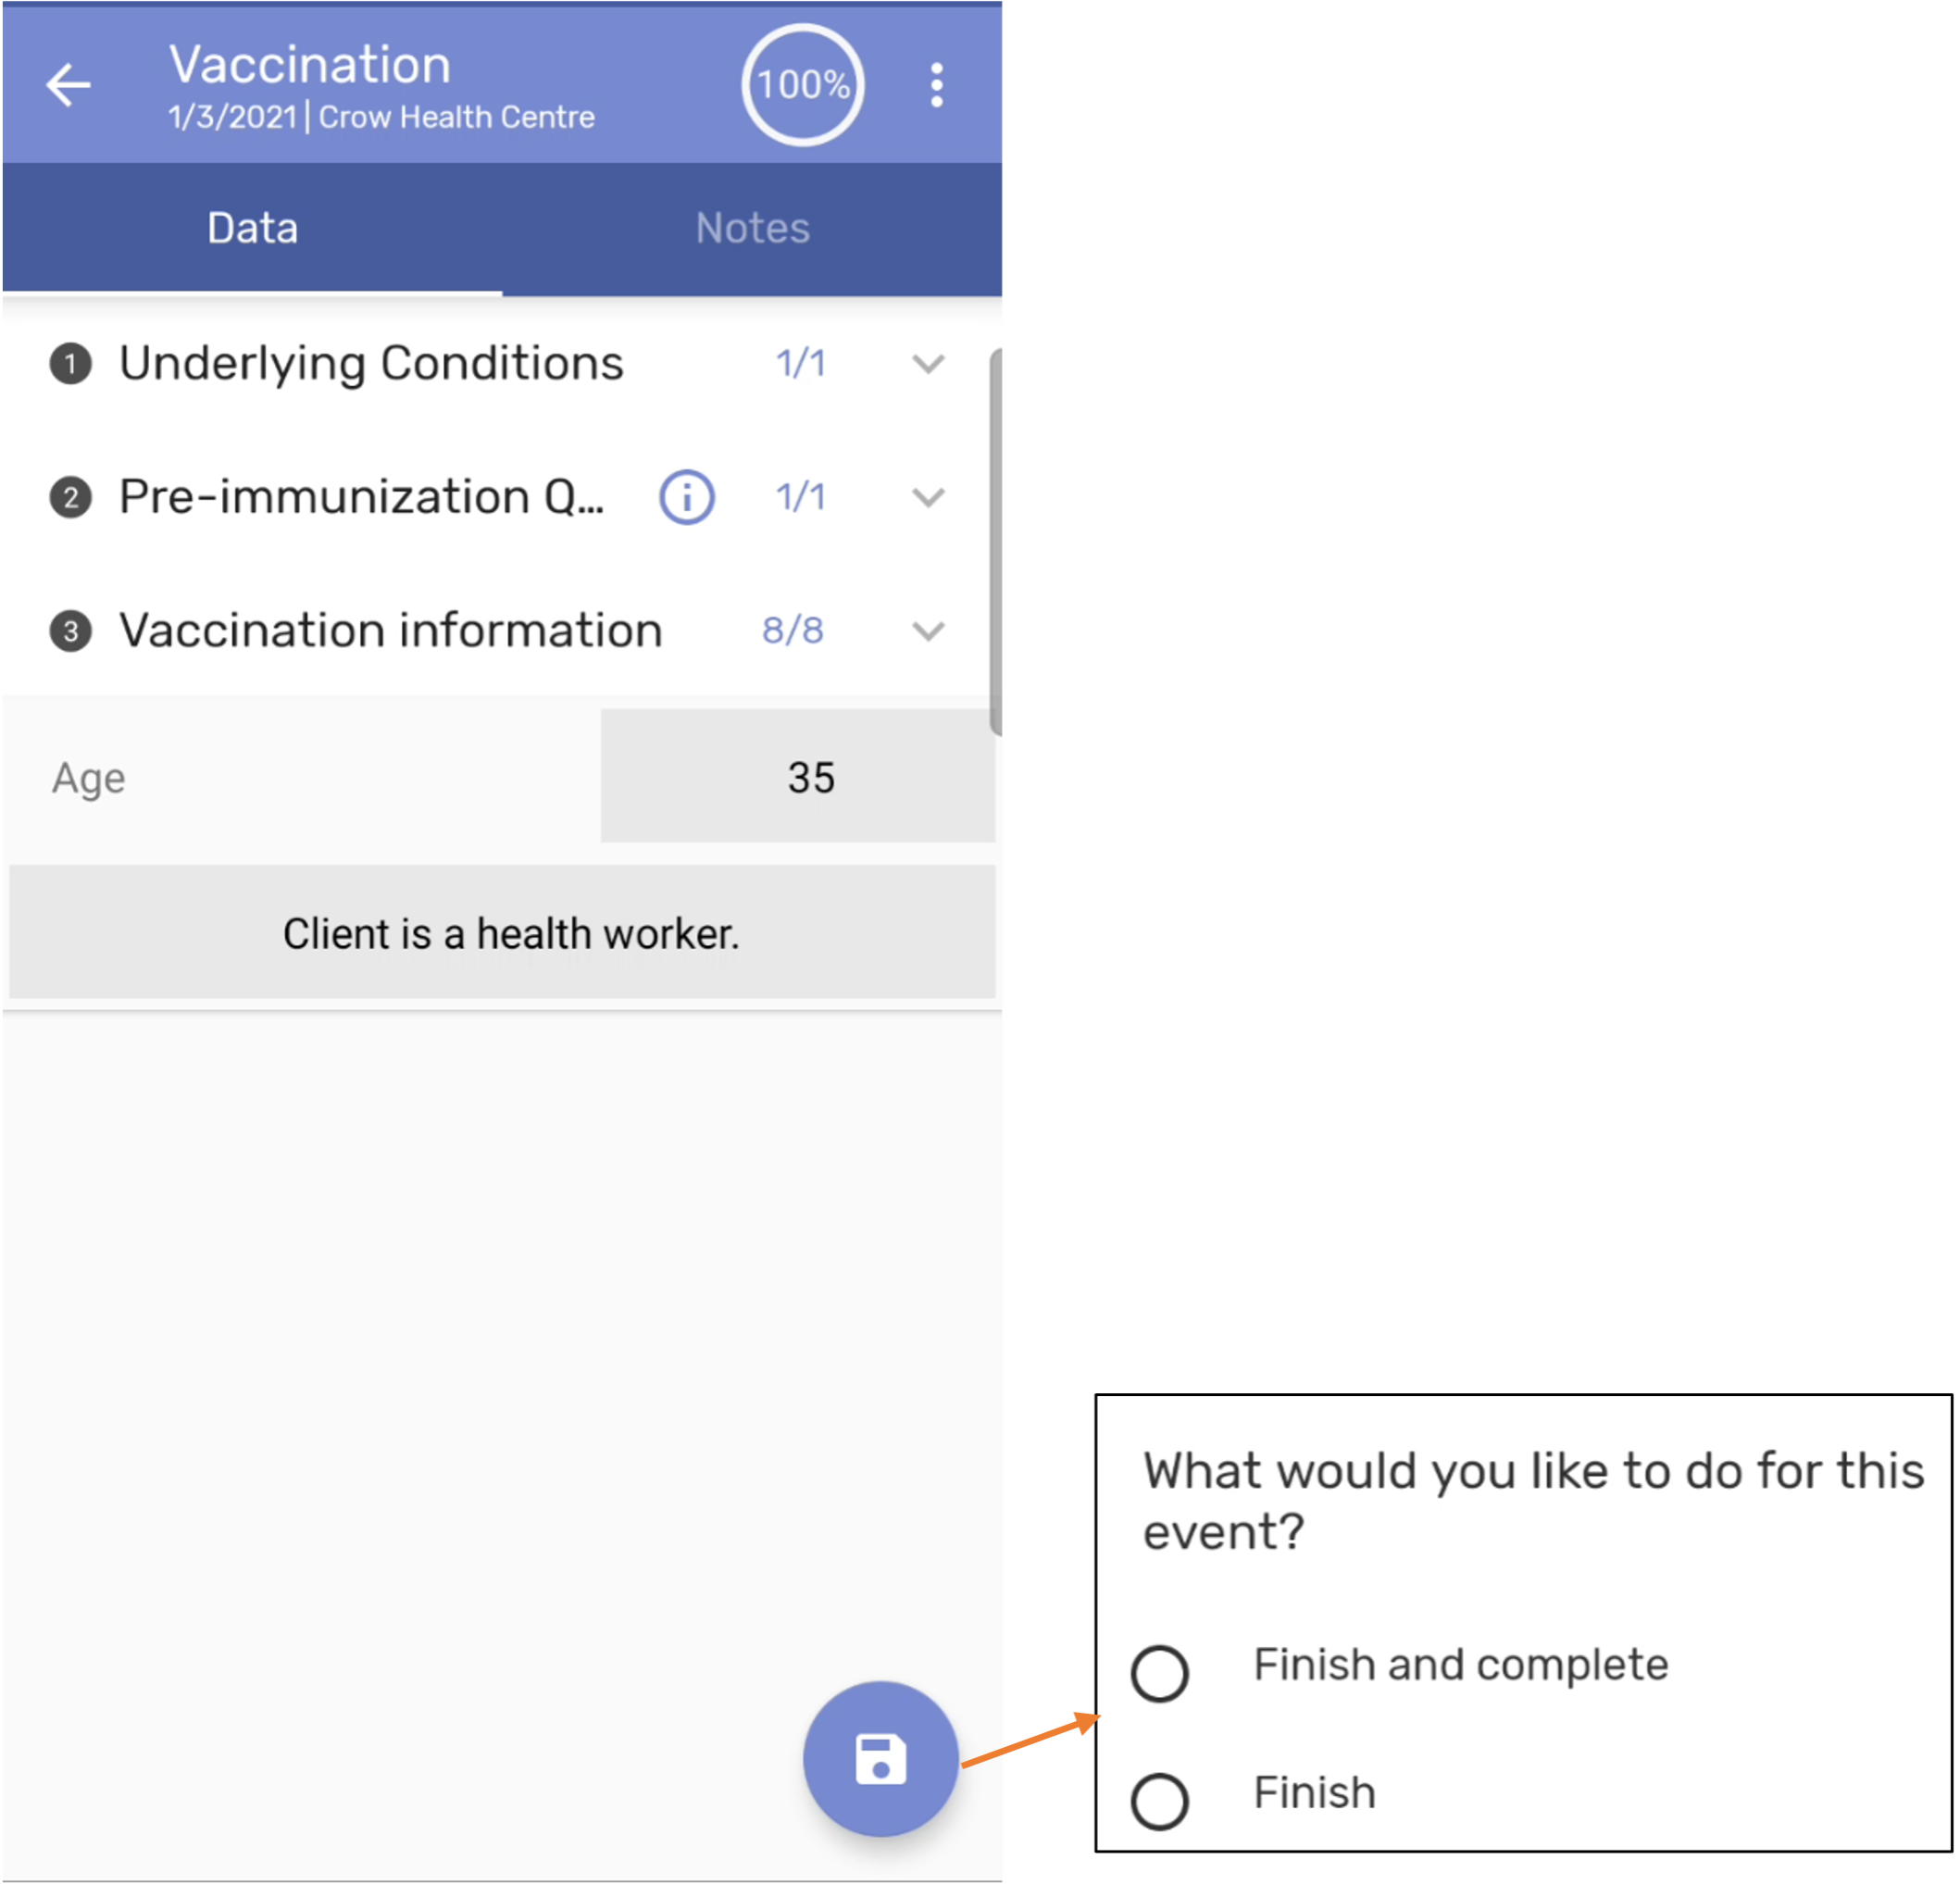
Once you finish entering the data click on the save icon
Two options will be presented:
- Finish: will take you back to the patient dashboard without having completed the data entry for the 1st dose fully
- Finish and complete : will complete the data entry for the 1st dose and prompt you to schedule the 2nd dose
In this case, select “Finish and complete” to schedule the 2nd dose
Scheduling the 2nd dose
You will receive a prompt to “Generate new event.” Select OK

Select “Vaccination” as the event you are scheduling

- Select the date in which you are scheduling the vaccination
- Select “Accept” to save the date
- Select “Next” to proceed
- You will get a message saying “Event created”

Verifying the status of the events within a program
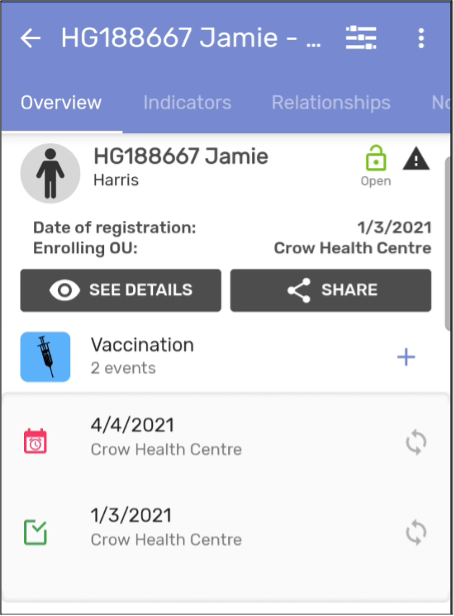
Select the “Vaccination” stage to see a list of the events that are within the person’s vaccination program along with their status.
Note
- The calendar icon indicates an event has been scheduled
- The green checkbox indicates an event has been completed
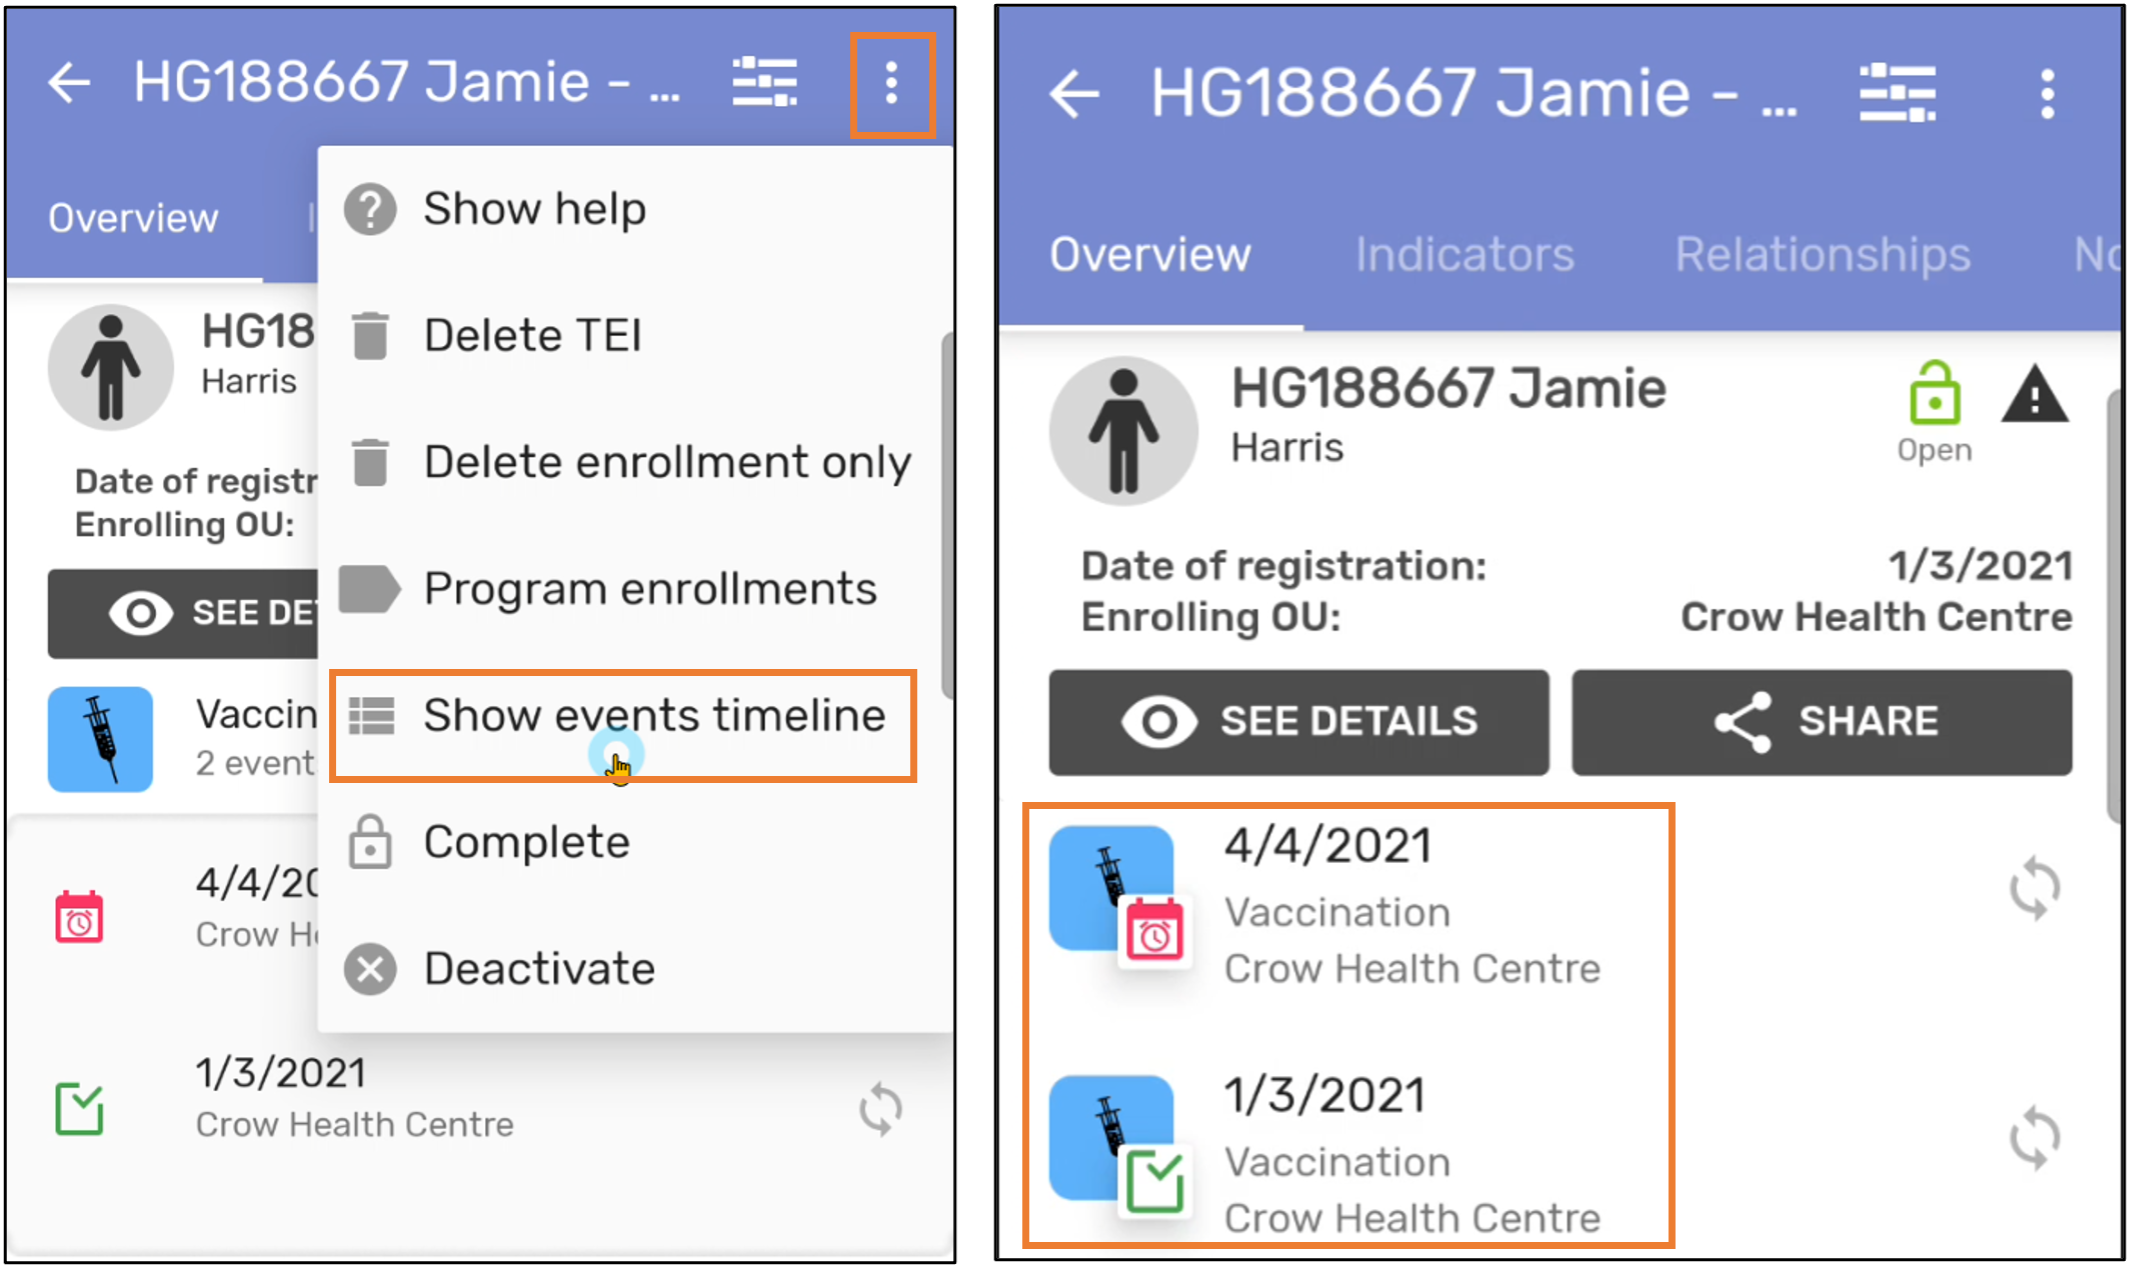
An alternative method to check on these events is to
- Open the menu
- Select the “show events timeline” option
- The view will change showing the listing of the events by their date
Searching for a person
- Select the COVID-19 Vaccination Registry program
- This will take you the home page of data entry
Note
On this screen you will be able to search all the cases already registered in the system to make sure you do not enter duplicates. You need to enter at least one of the attributes to perform a search. [Note to trainer: this will vary based on how you set up your configuration; modify the minimum number of attributes needed to search accordingly]. Click on the magnifying glass icon to perform the actual search.
From the data entry home page
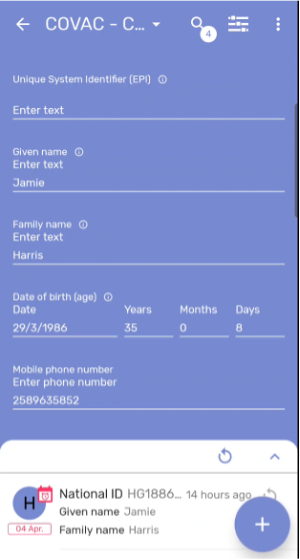
- Enter your details of the person you are searching for
- Attempt a search by selecting the magnifying glass icon
- If no person is found, you will receive a message.
- From here you can add a new person by selecting the “+” icon
Note
Your search results will be displayed at the bottom. You can expand the list to view the complete results, or select your case if it is displayed.
Vaccination – 2nd Dose
To start the data entry process, select the scheduled new event
- From the overview tab, select the vaccination stage
- Select the event that was previously scheduled

- Select the date in which the vaccine dose was given
- Select “Accept” to save the date

You can now enter your related data

Note
- Use the arrows to expand/collapse your sections
- Enter your data in the available fields
- If it is the last dose, you will receive a notification to complete the enrollment.
- As you start entering the data you can see the “percentage of data completed in each event” is shown in the top right corner of an event when it is opened after first registration
Once you finish entering the data click on the save icon
Two options will be presented:
- Finish: will take you back to the patient dashboard without having completed the data entry for the 2nd dose fully
- Finish and complete : will complete the data entry for the 2nd dose and take you back to the patient dashboard
You can verify the status of both events. Please refer to the section “Verifying the status of the events within a program"
Completing the Enrollment
Once all the data for a person related to their vaccinations has been completed, you should proceed to complete the enrolment. To do this:
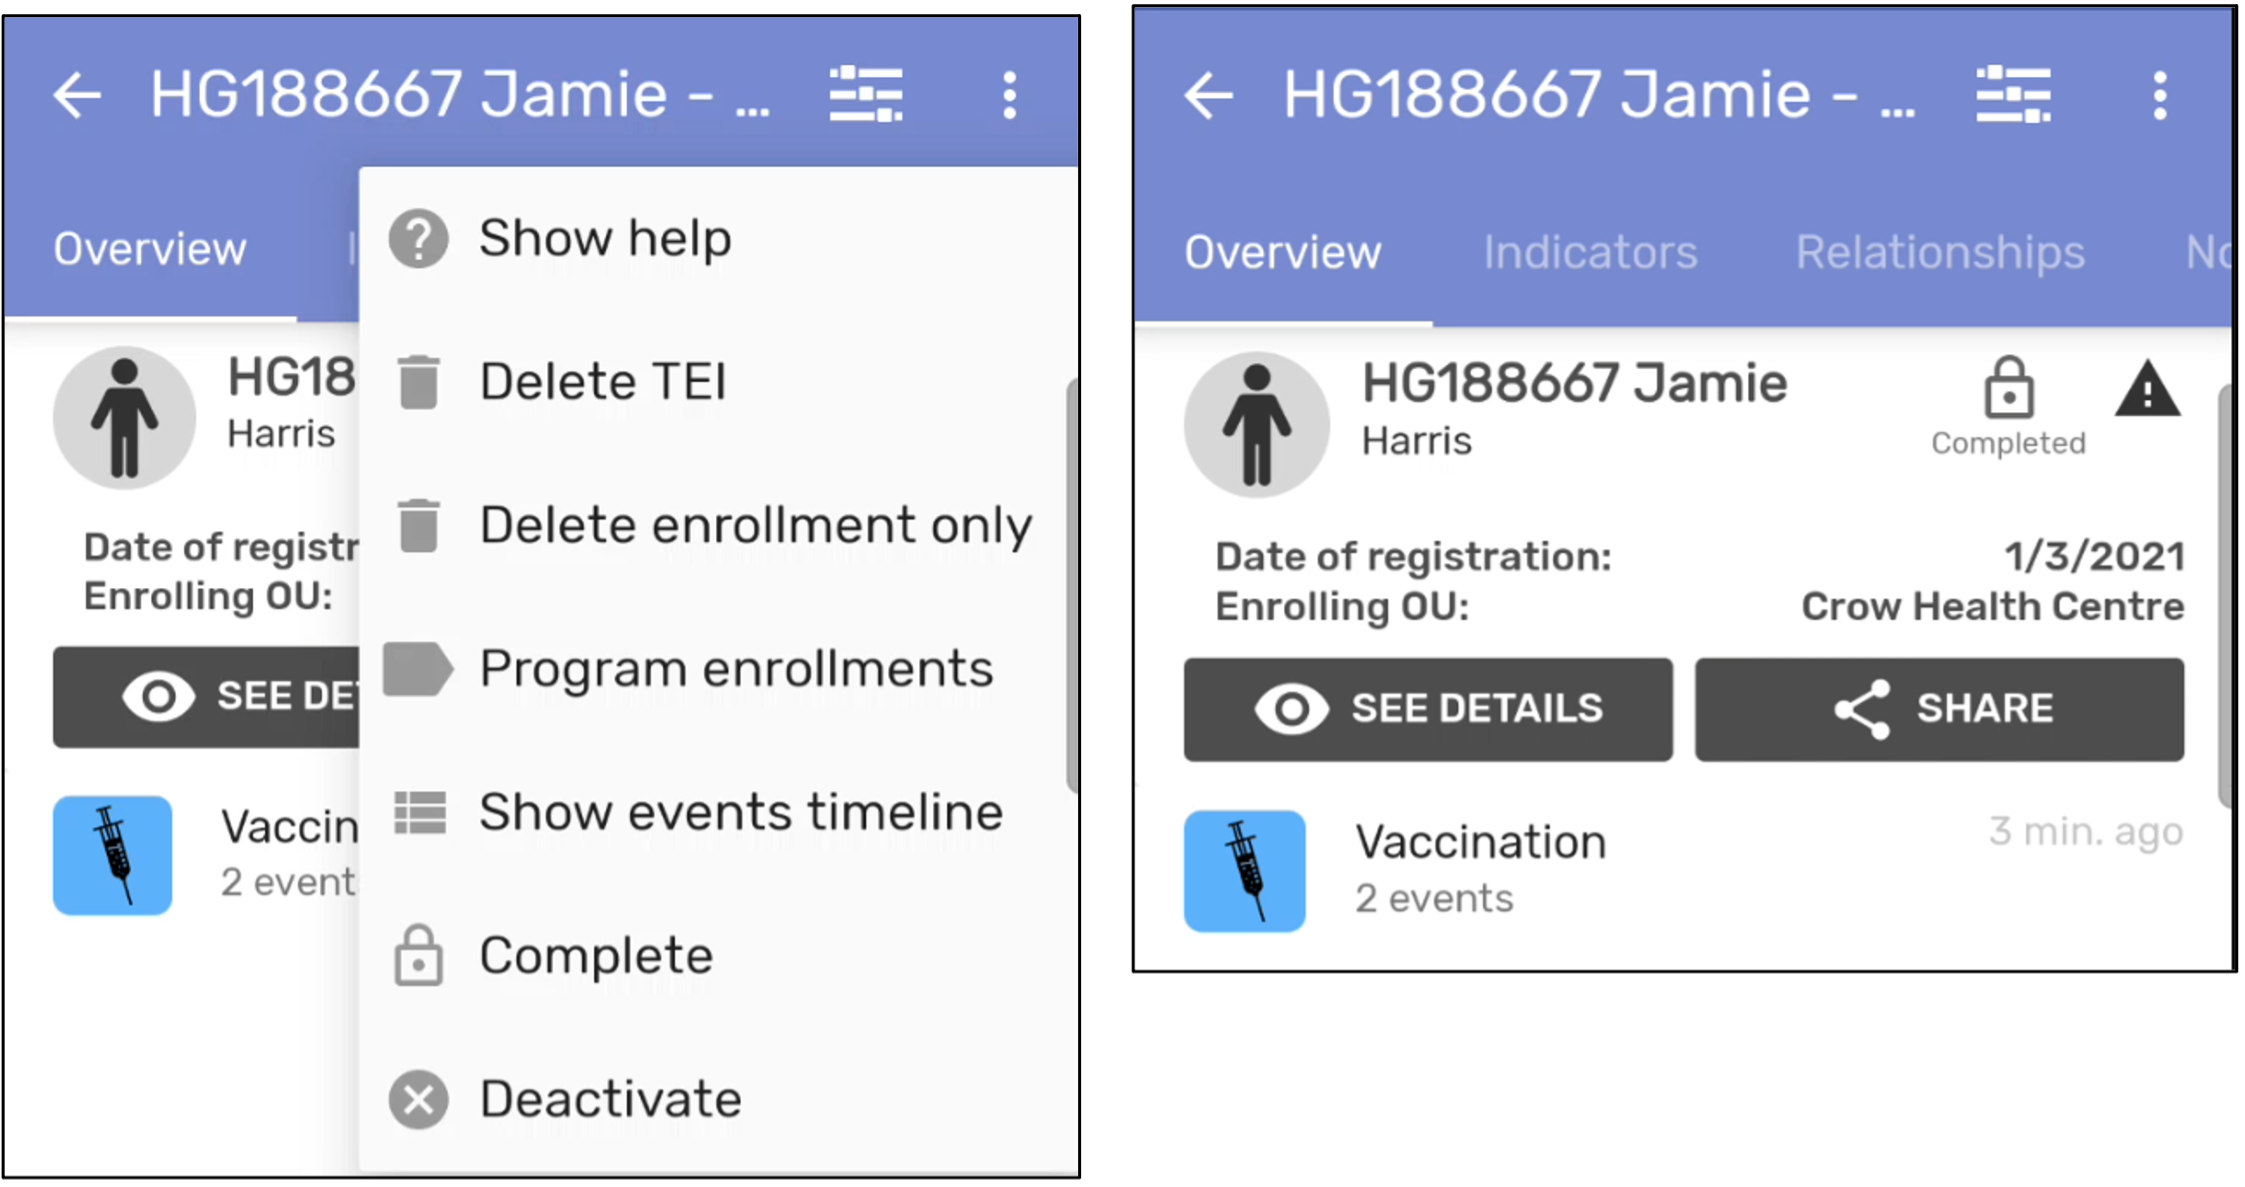
- Select the menu button from the patient’s dashboard
- Select the “Complete” option
- The status of the person on the dashboard will be changed to “Completed”
Additional Information or Features
Using Filters
Follow the instructions outlined within the “Accessing the program” section to open the program data entry page. From this page:
- Select the filter icon to open up the available filters
- Select the filter type that you want to use; “Event status” and “Enrollment Status” are particularly useful for following up on individual people
- Within the filter type, select the filter(s) you want to apply
Note You can select and apply multiple filters, for example from “Event Status” you can select Overdue and from “Enrollment Status” you can select Active. The number of filters applied will appear within this screen denoted by a number icon over the filter types and filter button

- After selecting your filters, your list at the bottom of the data entry page will be updated and the filters will be applied.
- You can expand this list by using the arrow key at the top of this list

Manually Synchronizing Data
Your device will automatically synchronize data based on the schedule that has defined by your system administrator(s). You may want to manually sync your data however. There are several locations that will inform you of the sync status of your data.
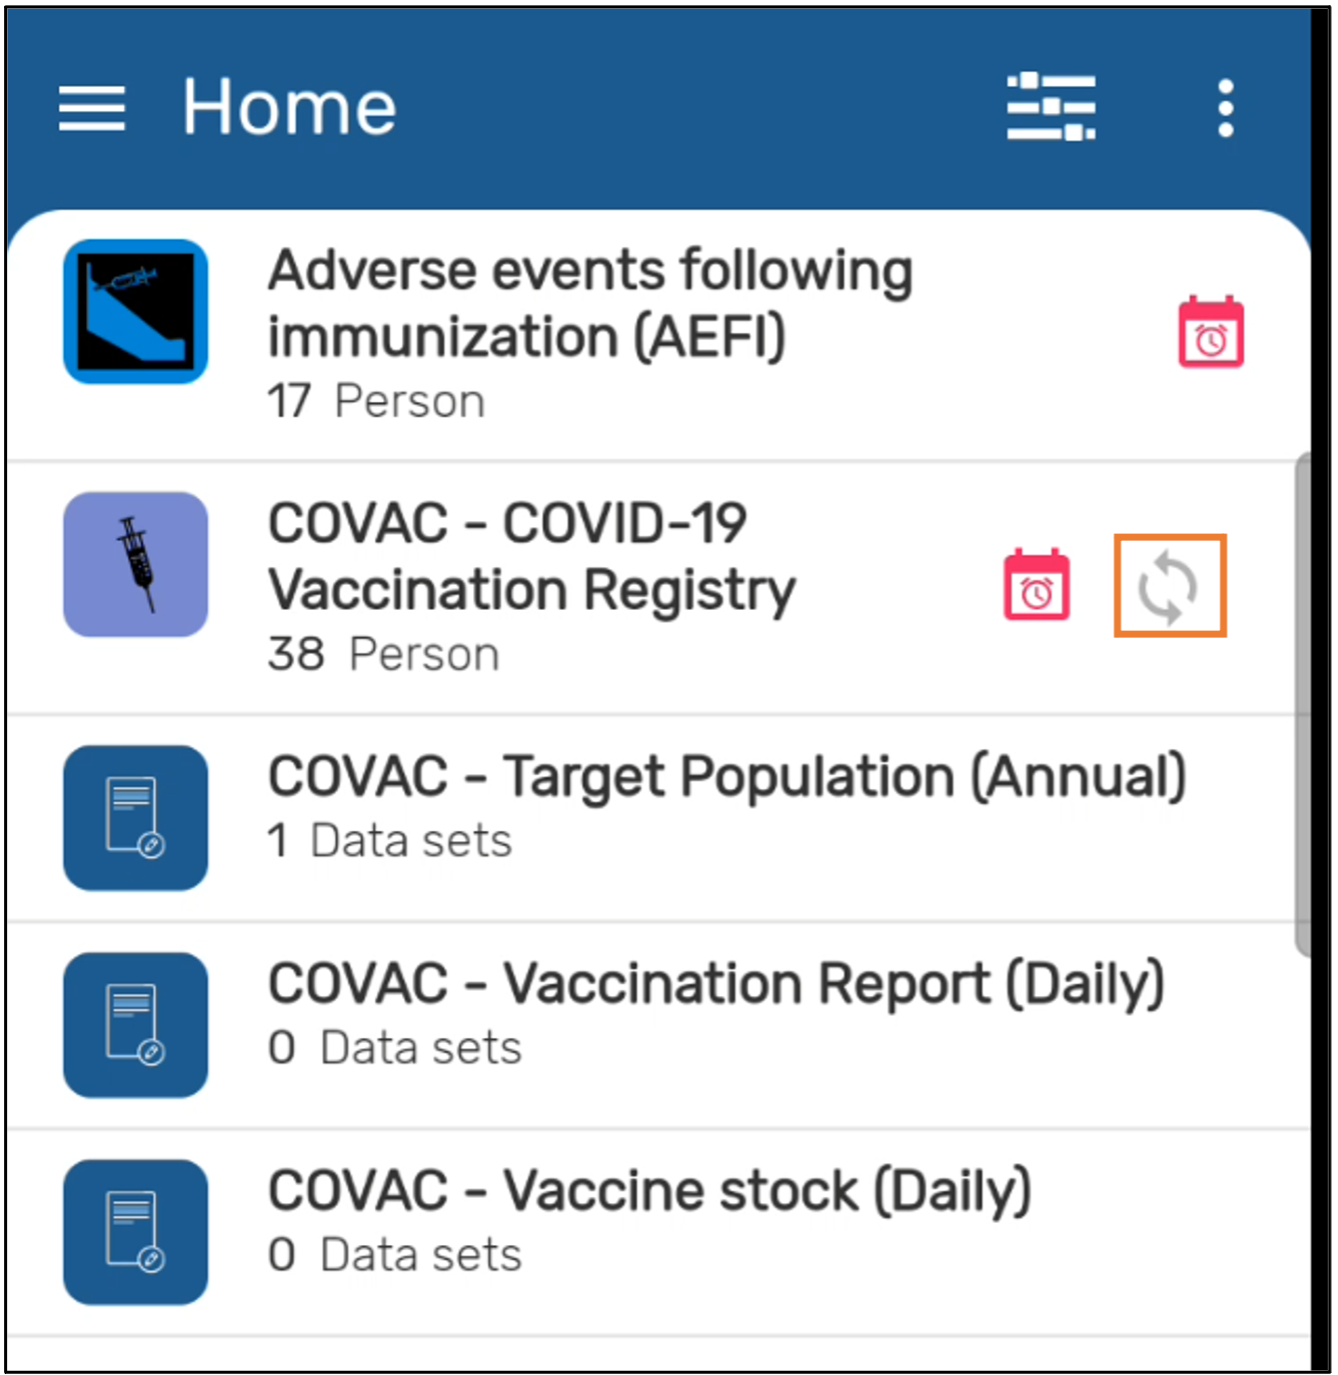
On the android home page, you will see this gray arrow icon when there is data that has not yet been synced within a program
Note
Programs/datasets with no indicator next to their name indicate that all data has been synced.
Within the main data entry page when you review your list of people, you will see a gray arrow icon when there is data that has not yet been synced for an individual.

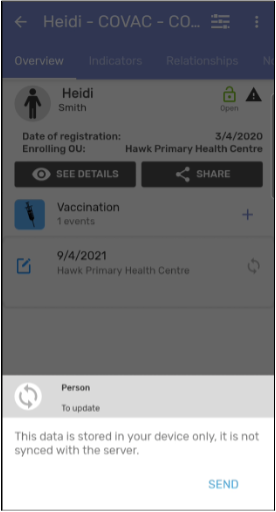
Within a person’s dashboard when you are reviewing events, you will see a gray arrow icon when there is data that has not yet been synced for an event.

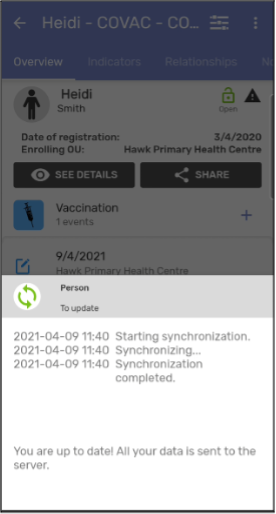
You can sync data by selecting this gray icon when you have an internet connection. You will be asked to confirm that you want to send this data. Once this is complete, you will receive a message indicating the data has been sent successfully.
Note
The amount of data that is sent will be dependent on where you trigger the synchronization from. If you trigger this for only one record, only one record will be synchronized. To send all the data for one program, you can trigger the synchronization from the android home page.
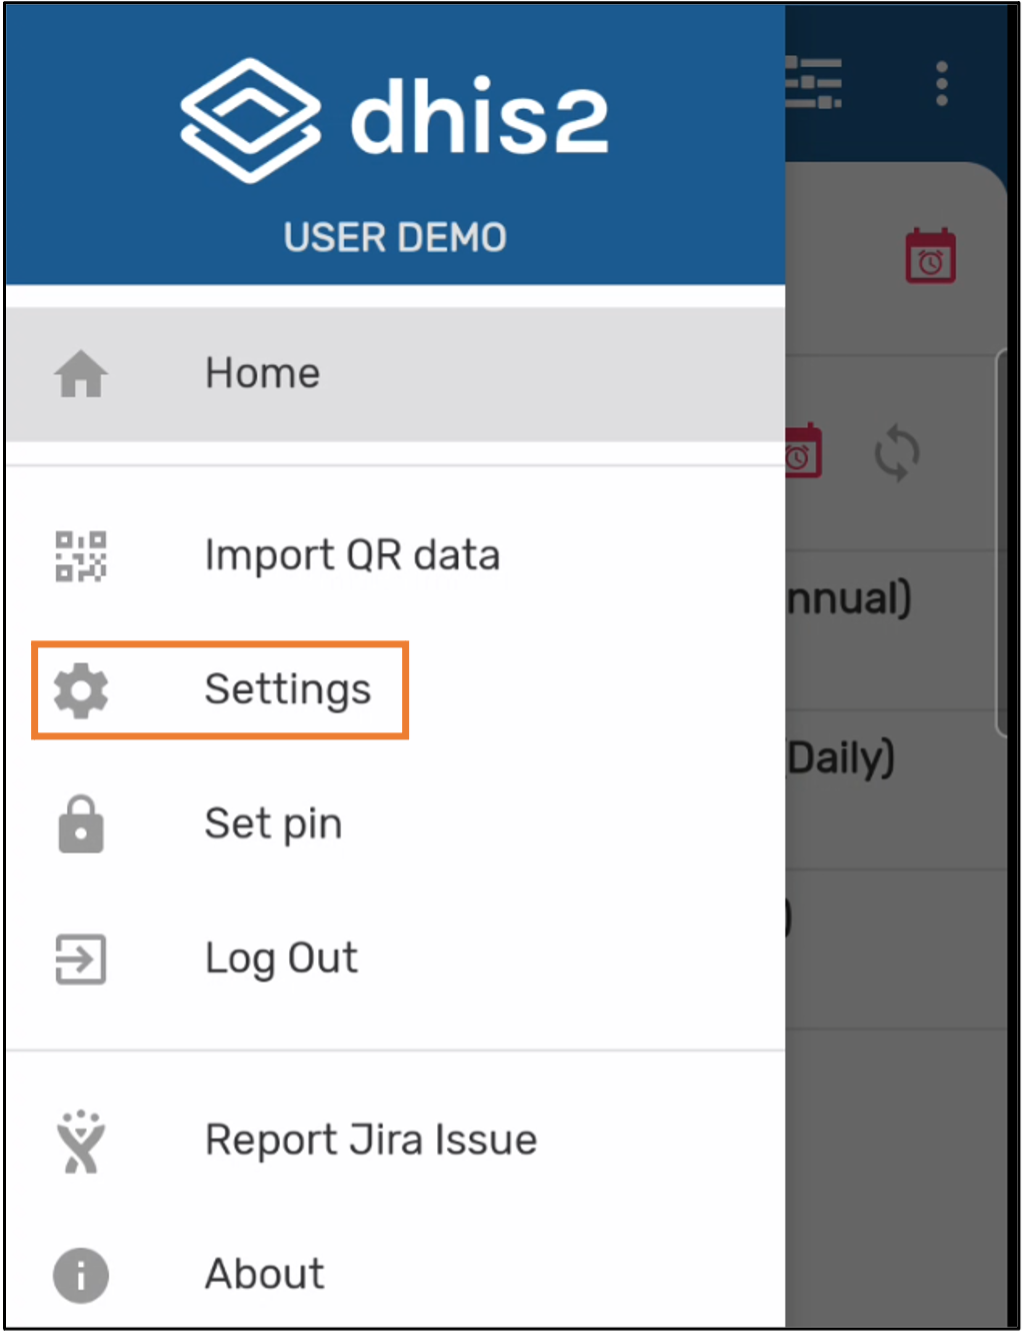
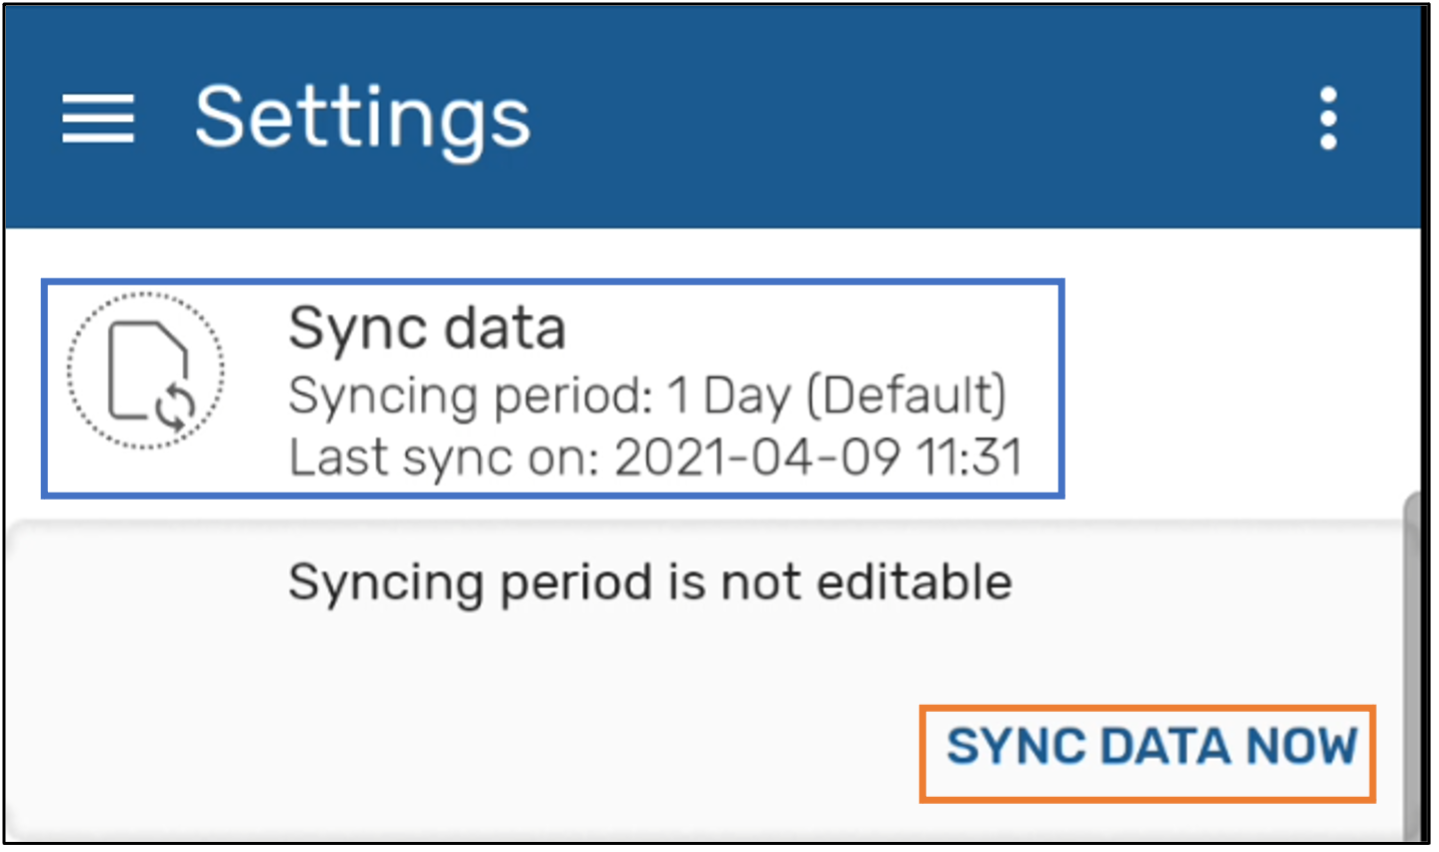
If you want to synchronize data for multiple programs and/or datasets at the same time, you can do this by accessing the settings from the android home page
- Select the Menu button on the android home page
- Select “Settings”
- Select the “Sync data” menu option
- Select “Sync data now”