
DHIS2 Documentation Team
Copyright © 2008-2023 DHIS2 Team
source.revision.date: 2025-08-22
Warranty: THIS DOCUMENT IS PROVIDED BY THE AUTHORS ‘’AS IS’’ AND ANY EXPRESS OR IMPLIED WARRANTIES, INCLUDING, BUT NOT LIMITED TO, THE IMPLIED WARRANTIES OF MERCHANTABILITY AND FITNESS FOR A PARTICULAR PURPOSE ARE DISCLAIMED. IN NO EVENT SHALL THE AUTHORS OR CONTRIBUTORS BE LIABLE FOR ANY DIRECT, INDIRECT, INCIDENTAL, SPECIAL, EXEMPLARY, OR CONSEQUENTIAL DAMAGES (INCLUDING, BUT NOT LIMITED TO, PROCUREMENT OF SUBSTITUTE GOODS OR SERVICES; LOSS OF USE, DATA, OR PROFITS; OR BUSINESS INTERRUPTION) HOWEVER CAUSED AND ON ANY THEORY OF LIABILITY, WHETHER IN CONTRACT, STRICT LIABILITY, OR TORT (INCLUDING NEGLIGENCE OR OTHERWISE) ARISING IN ANY WAY OUT OF THE USE OF THIS MANUAL AND PRODUCTS MENTIONED HEREIN, EVEN IF ADVISED OF THE POSSIBILITY OF SUCH DAMAGE.
License: Permission is granted to copy, distribute and/or modify this document under the terms of the GNU Free Documentation License, Version 1.3 or any later version published by the Free Software Foundation; with no Invariant Sections, no Front-Cover Texts, and no Back-Cover Texts. A copy of the license is included in the source of this documentation, and is available here online: http://www.gnu.org/licenses/fdl.html
This guide provides a complete overview of the DHIS2 Android Capture App, including how to install, configure, deploy, and use it in real-world implementations. It is designed to support a wide range of DHIS2 stakeholders involved in Android-based data collection efforts:
While the guide strives to be complete, there may be certain functionalities which have been omitted or which have yet to be documented. This section explains some of the conventions which are used throughout the document.
DHIS 2 is a browser-based application. In many cases, screenshots have been included for enhanced clarity. Shortcuts to various functionalities are displayed such as Data element > Data element group. The ">" symbol indicates that you should click Data element and then click Data element group in the user interface.
Different styles of text have been used to highlight important parts of the text or particular types of text, such as source code. Each of the conventions used in the document are explained below.
Note
A note contains additional information which should be considered or a reference to more information which may be helpful.
Tip
A tip can be a useful piece of advice, such as how to perform a particular task more efficiently.
Important
Important information should not be ignored, and usually indicates something which is required by the application.
Caution
Information contained in these sections should be carefully considered, and if not heeded, could result in unexpected results in analysis, performance, or functionality.
Warning
Information contained in these sections, if not heeded, could result in permanent data loss or affect the overall usability of the system.
Complete
Information contained in these sections, will indicate that these are issues that have been fully implemented.
Incomplete
Information contained in these sections, will indicate that these are issues that are not implemented and will be ignored.
Not_applicable
Information contained in these sections, will indicate that these are issues not applicable.
Work_in_progress
Information contained in these sections, will indicate that these are issues or freatures not completely implemented or with unexpected behaviour already reported.
Program listings usually contain some type of computer code.
They will be displayed with a shaded background and a different font.
Commands will be displayed in bold text, and represent a command which would need to be executed on the operating system or database.
Links to external web sites or cross references will be displayed in blue text, and underlined like this..
The DHIS2 Android Capture App is the official mobile application for field-based data entry in DHIS2. It was developed in response to the growing use of smartphones in low-resource settings, particularly in Sub-Saharan Africa, and the dominance of Android as the preferred mobile platform. The application was released in September 2018 by the University of Oslo and builds upon the lessons learned from previous DHIS2 mobile apps, including Data Capture, Tracker Capture, Event Capture, and Dashboard.
The Android App is designed to support both Tracker and Aggregate data entry within a single interface, consolidating the functionality of earlier apps into a more streamlined user experience. Its architecture prioritizes offline functionality, making it a reliable option for frontline health workers and data collectors who work in environments where internet connectivity is limited or inconsistent.
This guide is intended to support implementation teams throughout the full lifecycle of a mobile deployment project. The steps of the deployment, which will be described in detail later in the document, include:
It is also included a document map which groups the sections of the document into the phases of a mobile implementation project. All aspects here represented should be considered at the beginning of the project and planned accordingly. This representation illustrates in which phase of the project they will be of critical importance.which summarized its key aspects and facilitates following up this guidelines in your project. It is important to highlight that the cycle represented in the document map considers the requirement gathering process finished. The document map can be found in the first section.
In the last section, it is included a checklist which summarized its key aspects and facilitates following up this guidelines in your project.
This guide is intended for:
While the content is structured for those managing the process, it is recommended that the guide be shared with everyone involved in the rollout to ensure a common understanding of the implementation goals, timelines, and requirements.
The Android App is not a replacement for the DHIS2 web-based platform but a complementary tool designed for mobile-first contexts. It takes into account the realities of fieldwork — such as small screen sizes and unreliable connectivity — and aims to improve the user experience in those environments.
When properly implemented, the app can support a wide range of health system functions, including client follow-up, routine reporting, and service delivery monitoring. Evidence from past implementations and global studies suggests that mobile tools like this one can improve health worker productivity and enable more responsive decision-making at the point of service. However, for these benefits to be realized, adequate investment in training, supervision, and infrastructure is essential.
Understanding the core features of the DHIS2 Android Capture App is essential for planning a successful implementation. This guide focuses on how to prepare, configure, and deploy the app, but knowing what the app can actually do is just as important for making informed decisions around training, rollout, and support.
The Android App includes a set of powerful, field-tested capabilities designed to handle real-world challenges—such as working in areas without connectivity, capturing precise locations, and supporting complex program workflows. Below is a summary of the most relevant features for implementers. For a deeper look at how each feature works in practice, refer to the DHIS2 Android Use Guide.
The app is built to work fully offline. Users can capture data, run validations, apply program rules, and use calculated fields without needing a network connection. Synchronization happens later, when connectivity is available.
Field workers can collect geolocation data and work with maps, even when offline.
Programs can be adapted to local needs through language, branding, and configuration.
Designed to scale and simplify management across teams, regions, and servers.
The Android implementation process can be broken into distinct phases to guide planning and decision-making from early setup through long-term support. This document map outlines those phases and connects each to the relevant sections of this guide. While many projects will follow this structure, it can be adapted based on your local timeline, team capacity, and implementation scope.

This document focuses on mobile implementation which use the new DHIS 2 Capture Android App. To get additional information about the different DHIS 2 Android apps please visit the App Store and the Documentation on the website.
The DHIS2 Android Capture App is the official mobile application developed by the DHIS2 core team for collecting and managing data in field-based environments. It supports both Tracker and Aggregate programs and is fully aligned with the DHIS2 data model and Web API.
As of 2020, this app has fully replaced earlier DHIS2 Android applications such as Tracker Capture, Event Capture, Data Capture, and Dashboard, all of which have been officially deprecated. The Android Capture App consolidates their functionality into a single, unified experience, while also continuing to evolve with new capabilities.
The app plays a central role in DHIS2’s mobile strategy, supporting use cases where access to desktop computers or consistent internet connectivity is limited or unavailable. It has been used globally in a wide range of programs, including immunization, community outreach, HIV case management, routine facility reporting, and nutrition programs and now increasingly in education, stock management and logistics tracking.
The Android Capture App is designed with the following key principles:
The DHIS2 Android Capture App includes a range of features designed to ensure usability, performance, and security in real-world mobile data collection settings. Below is an overview of its main capabilities.
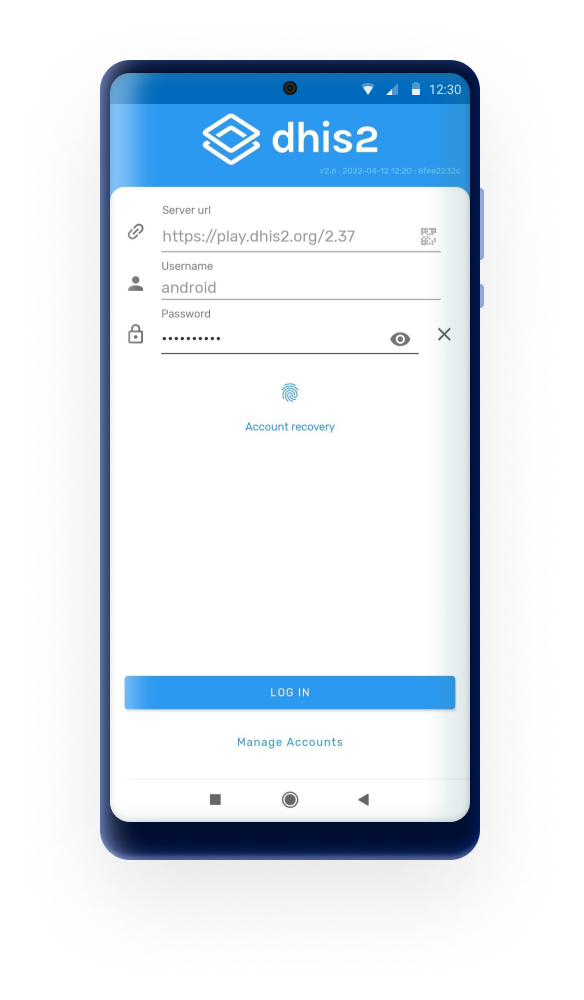
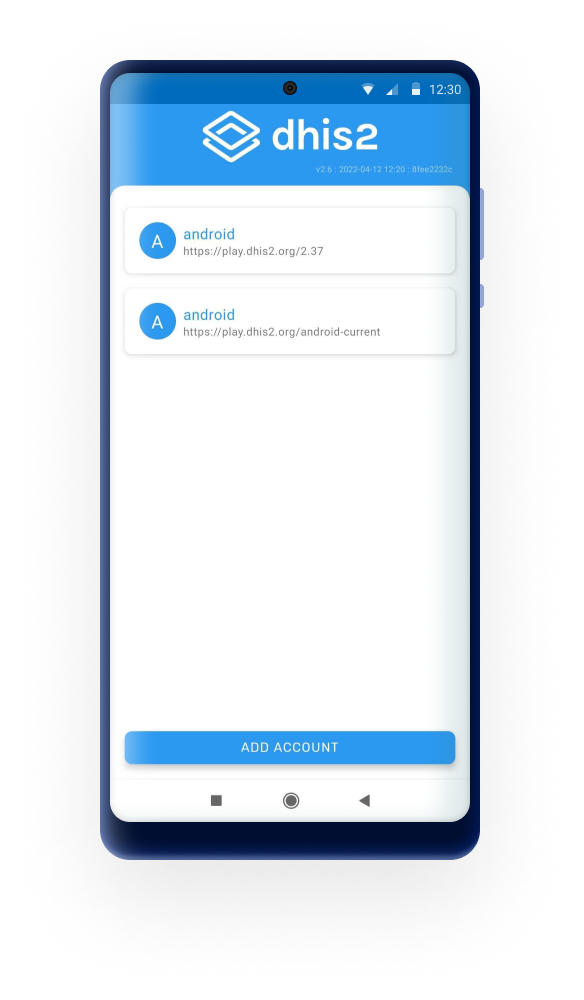
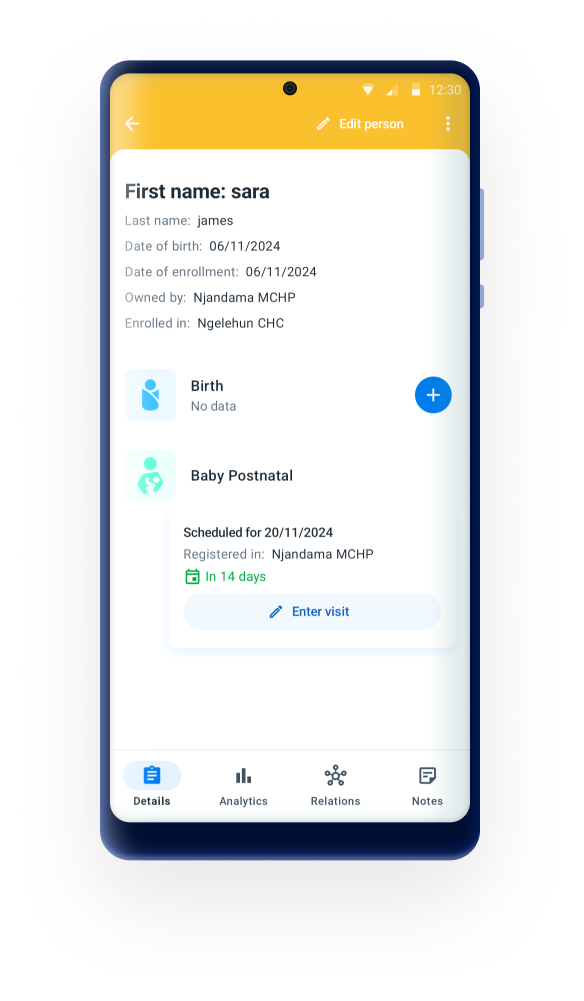
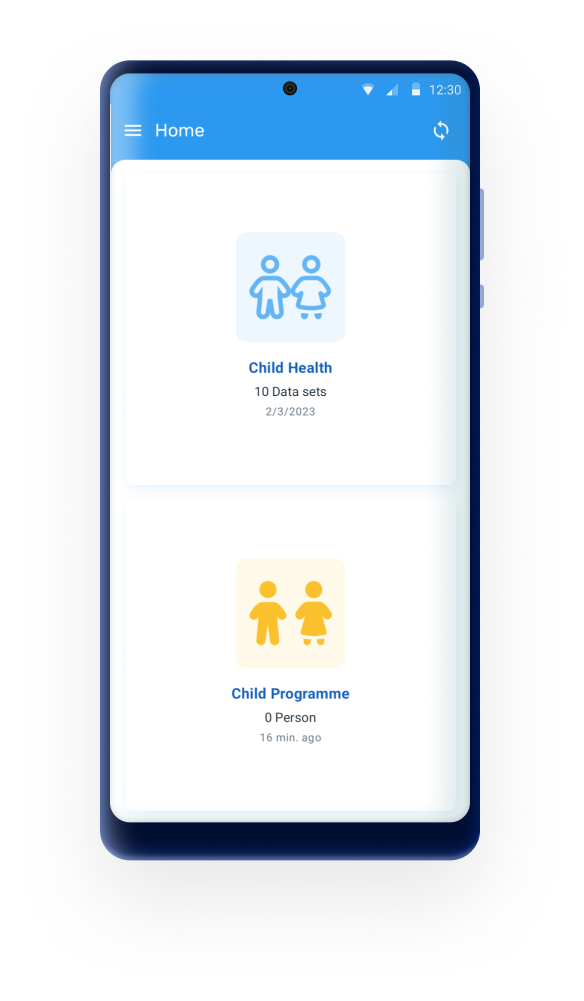
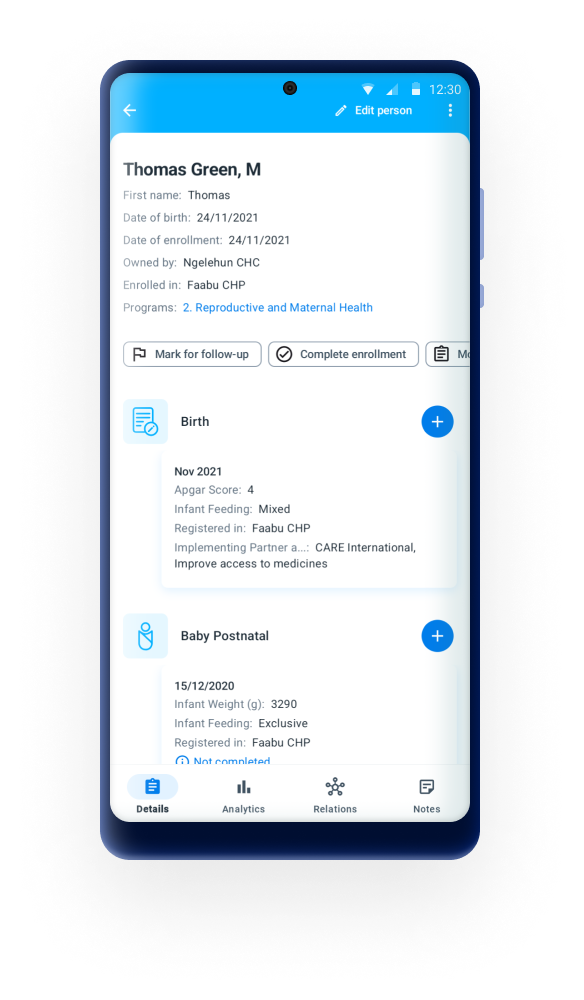
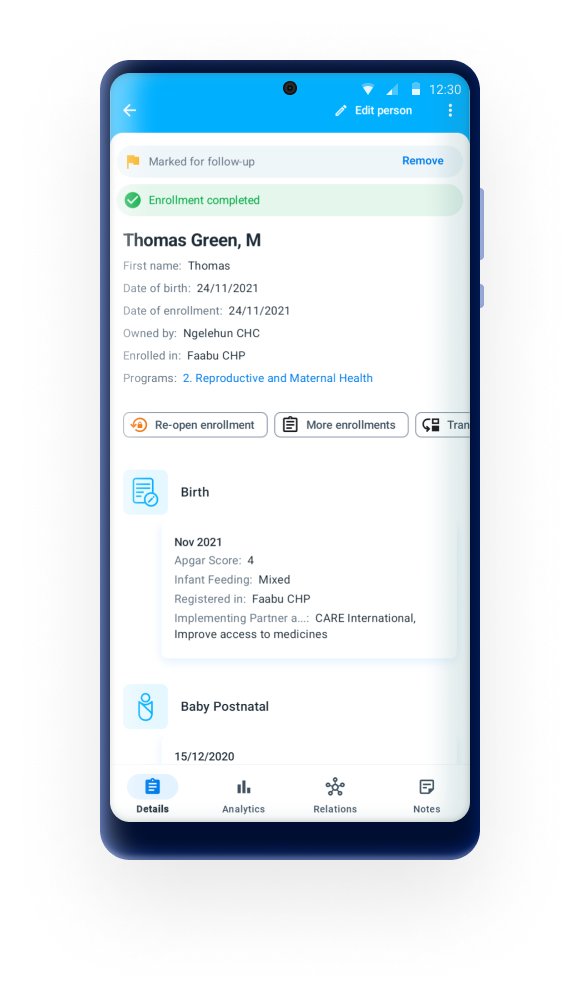
During data entry, the app provides real-time indicators for section or stage completeness — especially useful in complex program forms with multiple stages or sections.
The DHIS 2 Capture Android App requires a DHIS 2 2.30 or greater instance running in a web server. The DHIS 2 instance can reside on-premise server, a virtual machine or it can be purchased as software-as-a-service (managed hosting). For more information about the different DHIS 2 hosting options please visit https://www.DHIS2.org/hosting.
This section provides basic guidelines on how to configure the DHIS 2 server, which you will need to do in the first two scenarios (on-premis and virtual machine). In the third scenario of managed hosting, you should let your provider know that you will be deploying the Android App and have an open discussion on best ways to configure the server. You should start by sharing these guidelines with your managed hosting provider.
The DHIS 2 Server must be designed and configured keeping in mind: data collection flow, expected data analysis and expected visual UI. At a minimum three servers will be needed for a DHIS 2 deployment: Testing, Production and Training.
The Testing Server will be the server where you can change the server configurations and test the results of such configurations. Once you are happy with the configuration, training of users should occur in an environment different to Production. A dedicated Training server is the ideal environment in which you will train your users. You will create DHIS 2 users for all the trainees and make sure everyone understands and feels comfortable with the changes. The last step once you have tested the configurations and trained the users will be to deploy the configuration to the Production environment. You should never make configuration changes or train your users directly into the Production environment.
DHIS 2 is licensed under BSD, an open source license and is free for everyone to install and use. However, managing a DHIS 2 instance involves more than setting up a powerful web server. Deploying a reliable and scalable system includes at least these aspects:
The DHIS 2 Capture Android App runs in mobile devices, including smartphones, tablets and Chromebooks. It is important to keep an eye on the number of programs, number of data elements and number of program rules that are made available to a user on those mobile devices. You should also budget sufficient time for creating the necessary translations for your metadata configuration. For the app dialogues, menus and other prompts, if the app is not translated to the language that you need, please send us a message in the DHIS 2 community and we will let you know how to contribute to the app translations.
Caution
In addition to the DHIS2 Server requirements listed here note that the DHIS2 Android App might require connections to additional services and by blocking those the application might not fully function. This can apply in implementations where you might use strict firewall rules like in a zero-rate URL environment by an agreement with an ISP provider. In those cases you might want to include in the list of allowed URLs the following:
- Your DHIS2 URL server
- The public and/or private Matomo server for statistics as explained in the guide
- OpenStreetMap urls
openstreetmap.orgwww.openstreetmap.orga.tile.openstreetmap.orgb.tile.openstreetmap.orgc.tile.openstreetmap.orgd.tile.openstreetmap.orgcarto.comcartodb-basemaps-a.global.ssl.fastly.netcartodb-basemaps-b.global.ssl.fastly.netcartodb-basemaps-c.global.ssl.fastly.netcartodb-basemaps-d.global.ssl.fastly.net
With the new DHIS 2 Android Capture App, users will be collecting individual data at the point of service provision, which is the lowest level of direct data capture as it involves the direct beneficiary. Capturing Data this way enables upstream analytics without compromising on detail, makes downstream analytics possible, reduces error and enables post hoc analysis to answer questions identified after data collection and system design. However, individual data brings additional challenges for information systems, including considerations of security and privacy, considerations of readiness and capacity, as lower IT literacy data collectors are provided with digital tools and additional complications with regards to analytics, storage and system responsiveness.
There is wide consensus on the need to provide a comprehensive data security practice. This comprehensive security practice should consideot only confidentiality and integrity, but also availability of data. Harvard Humanitarian Initiative has stated that information itself, including its generation, communication and reception, is a basic humanitarian need that should be afforded protection equal to other such traditional needs as food, water, shelter, and medical care. The Roadmap for Health Measurement anccountability (MA4Health), stated that “Public health and clinical care cannot be delivered safely, with high quality, and in a cost-effective manner, without seamless, sustainable and secure data and information exchanges at all levels on the health system”. Still, the capture and storage of personally identifiable data introduces risk and a commensurate obligation for rigorous privacy practices.
The University of Oslo is committed to the following:
There can be a tension between the health system’s need for identifiable data, and the patient’s right to privacy. In the absence of clear legislation governing the collection and storage of personally identifiable data, there are important concepts that should be understood and promoted by system owners and implementers. They include:
The right of access will be defined by the data protection regulations of each country. In general terms, it includes information about the processing purposes, the categories of personal data processed, the recipients or categories of recipients, duration of storage, information about the rights of the data subject such as rectification, erasure or restriction of processing, the right to object, information about the existence of an automated decision-taking process, including profiling, etc. Please be aware of the regulations specific to your area and make sure you are ready to comply before you start collecting data.
The right of erasure is also defined by the data protection regulations of each country. In general terms, personal data must be erased immediately where the data are no longer needed for their original processing purpose, or if the data subject has withdrawn his/her consent and there is no other legal ground for processing. Again please make sure you understand the regulations of your specific area and make sure you are ready to comply.
The basic idea of data minimization is that data processing should only use as much data as is required to accomplish a given task. It also implies that data collected for one purpose cannot be used for another purpose other than original processing one without further consent.
It is a data management procedure that makes personal data less identifiable while keeping it suitable for analysis and processing. It can be accomplished by replacing the value of some of the data fields by one or more artificial identifiers, or pseudonyms. Pseudonymized data can be restored to make individuals identifiable again, while anonymized data can never be restored to its original state. Depending on the regulations applicable to your area, you can define a Pseudonymization strategy that meets the regulations and meets your needs.
In order to use data effectively we need to ensure its integrity. In order to ensure its integrity, it is important to monitor these data when they are collected, processed and moved. You need to understand: “what”, “when”, “why” and “who”. Organizations that take advantage of traceability, are able to find data faster and are better able to support security and privacy requirements.
Based on the regulations of your territory and the complexity of your project, including the level of potential risk, you must implement appropriate technical and organisational measures, such as pseudonymisation, data minimisation, audit logs, search restrictions, granular sharing, etc, and integrate the necessary safeguards into the data processing in order to meet the requirements of the regulations that apply to your region.
An adequate security / privacy approach for any DHIS2 implementation capturing personally identifiable data would include the creation of a clear policy naming an individual(s) with full access to the system, with the responsibility to ensure the following. For any technical support on databases containing sensitive data, a signed NDA with a clear end-date should be required for any third parties.
| Possible practical implementation | |
|---|---|
| Right of access & Right of erasure | Giving access to the patient to his / her record electronically for its review or deletion is not available in DHIS 2 (2.32). You should ensure that you put in place other methods by which a patient can request a copy of his/ her record so he/ she can review it and request amendments or its deletion. If its deletion is not possible, you should anonymize the record by removing / replacing all identifiable data points. |
| Data minimization | Ensure that there is a valid reason for collecting personal identifiable data. Don’t collect unnecessary details which don’t serve a practical purpose in terms of data analysis or the need of finability of a patient record. For example, if the need for patient follow-up gets determined by a test result being positive, don’t collect patient name if the result is negative. |
| Pseudonymization | Consider using alternative values for recording information about certain procedures or conditions of a patient. Por example you can have a list of medical procedures / personal behavior / actions listed as a color list. This allows to do analytics, without revealing what could be a stigmatized procedure/ action/ behavior in a given territory. |
| Traceability | DHIS 2 provides detailed audit log for each data point. This includes the tracing of data captured via its web tools (from 2.22), as well as imported or via Android (from version 2.27). Currently (2.32) DHIS 2 does not provide a full deletion / anonymization export option, as deletion of a value preserves previous data in the audit log. For this reason, any sharing of exported data to outside parties should include manual removal of sensitive / identifiable data. |
In this section we will share some tips on how to use DHIS 2 sharing and share restrictions to ensure that only the right users have access to records with identifiable information.
Here is a practical example of granular sharing and search restrictions in the context of a Health Care Center for Maternal and Newborn Care:
Midwife User Role:
Lab tech User Role
MOH Supervisor User Role
It is very important to have standard operating procedures (SOPs) as part of your Data Protection Strategy.
A SOP is a set of step-by-step instructions compiled by your organization to help you carry out complex routine operations such as those related to data security.
SOPs helps your organization achieving efficiency, quality and consistency, while complying with Data Protection regulations.
When defining your Data Protection SOPs you should address questions such as:
We include here some SOP Best Practices taken from the DHIS 2 Community Health Information System Guidelines document published by the University of Oslo:
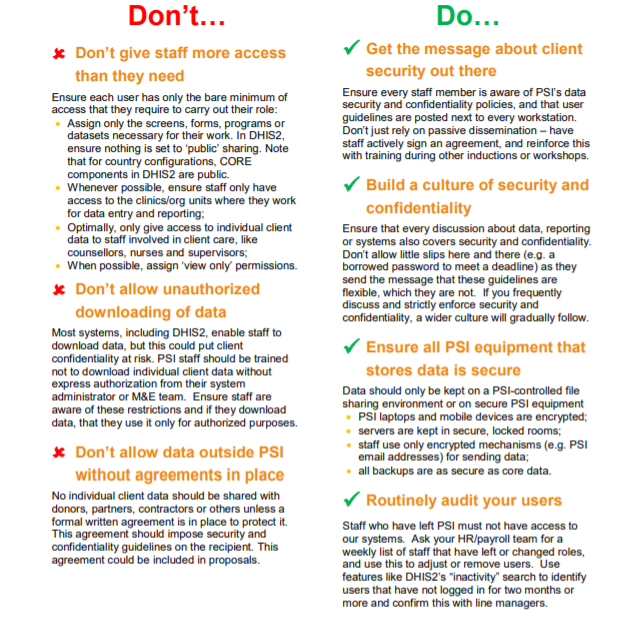
Ensuring that the personal data stored on mobile devices is only accessible by the authorized health staff starts by educating users on how to use this data and ensure that it is kept secured at all times. The guidelines below are an extract taken from the PSI’s “Monitoring and Evaluation Standard Operating Procedures for Keeping Client Data Secure & Confidential” manual.

System administrators play an important role when configuring user’s access-level, by ensuring that their data access is appropriate and never unnecessarily excessive. The guidelines below are also part of PSI’s “Keeping Client Data Secure & Confidential Administrators Guide” manual
.
If your project plans to do a large acquisition of devices, it is good practice to delay the bulk of the acquisition as much as possible. The idea is to get the best device that you can afford. Technology, and particularly mobile devices, evolves very rapidly. A given model is normally refreshed on an annual cycle, giving consumers access to significant technical improvements year-on-year, but with similar price point. More recommendations on acquisitions can be found in the Scale Up section.
Specifications for mobile devices to use the DHIS 2 Android App deployment are included in the following table. Please, note that these recommendations are very generic as performance of the device will be highly impacted by your configuration. For example, having a tracker program with hundreds of program rules will require a more powerful device than an implementation where you are only collecting a small set of aggregate data.
In general terms when having to choose different versions of Android aim for the higher. Also, acquiring devices from well known brands might be an indicator of having better after sales services like repairing and/or updates.
| Mobile phones | Tablets | Chromebooks | |
|---|---|---|---|
| Construction | Probably the most important feature: this device is going to be doing a lot of field work, and it needs to last 2+ years | ||
| Brand | If you are going to be responsible for managing a lot of devices, it is easier to stick to one brand | ||
| OS | Minimum Supported: Android 5.0 Minimum Recommended for new devices: Android 7.X Recommended for new devices: Android 8.X or superior | Chrome OS devices are updatable to the latest version of Chrome OS for at least 5 years after release. Check here | |
| Processor | Recommended: 4 cores, 1.2GHz | various | |
| RAM | Minimum: 1Gb Recommended: 2Gb or more | Minimum: 1.5Gb Recommended: 3Gb or more | Minimum: 4Gb Recommended: 4-8Gb |
| Storage | Minimum: 8Gb Recommended: 32Gb DHIS 2 app do not uses much space. However, storage of personal images & videos uses a lot of space | Minimum: 16Gb Recommended: 32-128Gb | |
| Screen Size | Minimum: 4" Recommended: from 5.5" | Minimum: 7" | 11" - 14" |
| Camera | Minimum: 5Mpx, with flash Recommended: at least 8Mpx, flash | optional | |
| Accessories Case, Keyboard, External power | Consider an appropriate external cover and a screen protector. For tablets, consider an external keyboard for desk operation Consider supplying an external power bank (10,000 mAh - 20,000 mAh) | USB 3G/4G modem Mouse WebCam | |
| Connectivity | 4G (LTE)/ 3G radio, unlocked. If importing devices, check the compatibility of frequency bands with local mobile operators Bluetooth 4.0 or better. WiFi 2.4 GHz & 5 GHz | Bluetooth 4.0 or better. WiFi 2.4 GHz & 5 GHz External USB 3G/4G dongle or Wifi hotspot | |
This file is no longer maintaned here but included in the System Administration Guide
The DHIS2 Android Capture App is fully metadata-driven. This means that the programs, datasets, forms, user access, and even many user interface elements in the app are determined by how the server is configured. Proper metadata and access configuration on the DHIS2 server will ensure that users see the appropriate functionality based on their assigned roles and organization units.
This section outlines how to prepare your DHIS2 instance for Android use and points to relevant configuration tools and documentation resources. For a complete and successful implementation, please read the detailed and updated documentation to get all the information about configuring the DHIS 2 Server for using with the DHIS 2 Android Capture App.
To ensure the Android Capture App functions properly for field users, it’s important to prepare not only the metadata but also user roles, access scopes, and program configuration. This section walks through the essential steps to configure users and control what they see and do in the app.
Android users need access to the app through valid credentials and assigned roles. An Android-compatible user should have a dedicated user role, assigned organisation units, and access to at least one program or dataset.
DHIS2 does not require a special user type for Android access — standard users can authenticate, as long as they have been granted the correct authorities and metadata is shared with them appropriately.
Note
To simplify setup in large deployments, consider defining user groups for Android users, and assigning roles and sharing access via those groups.
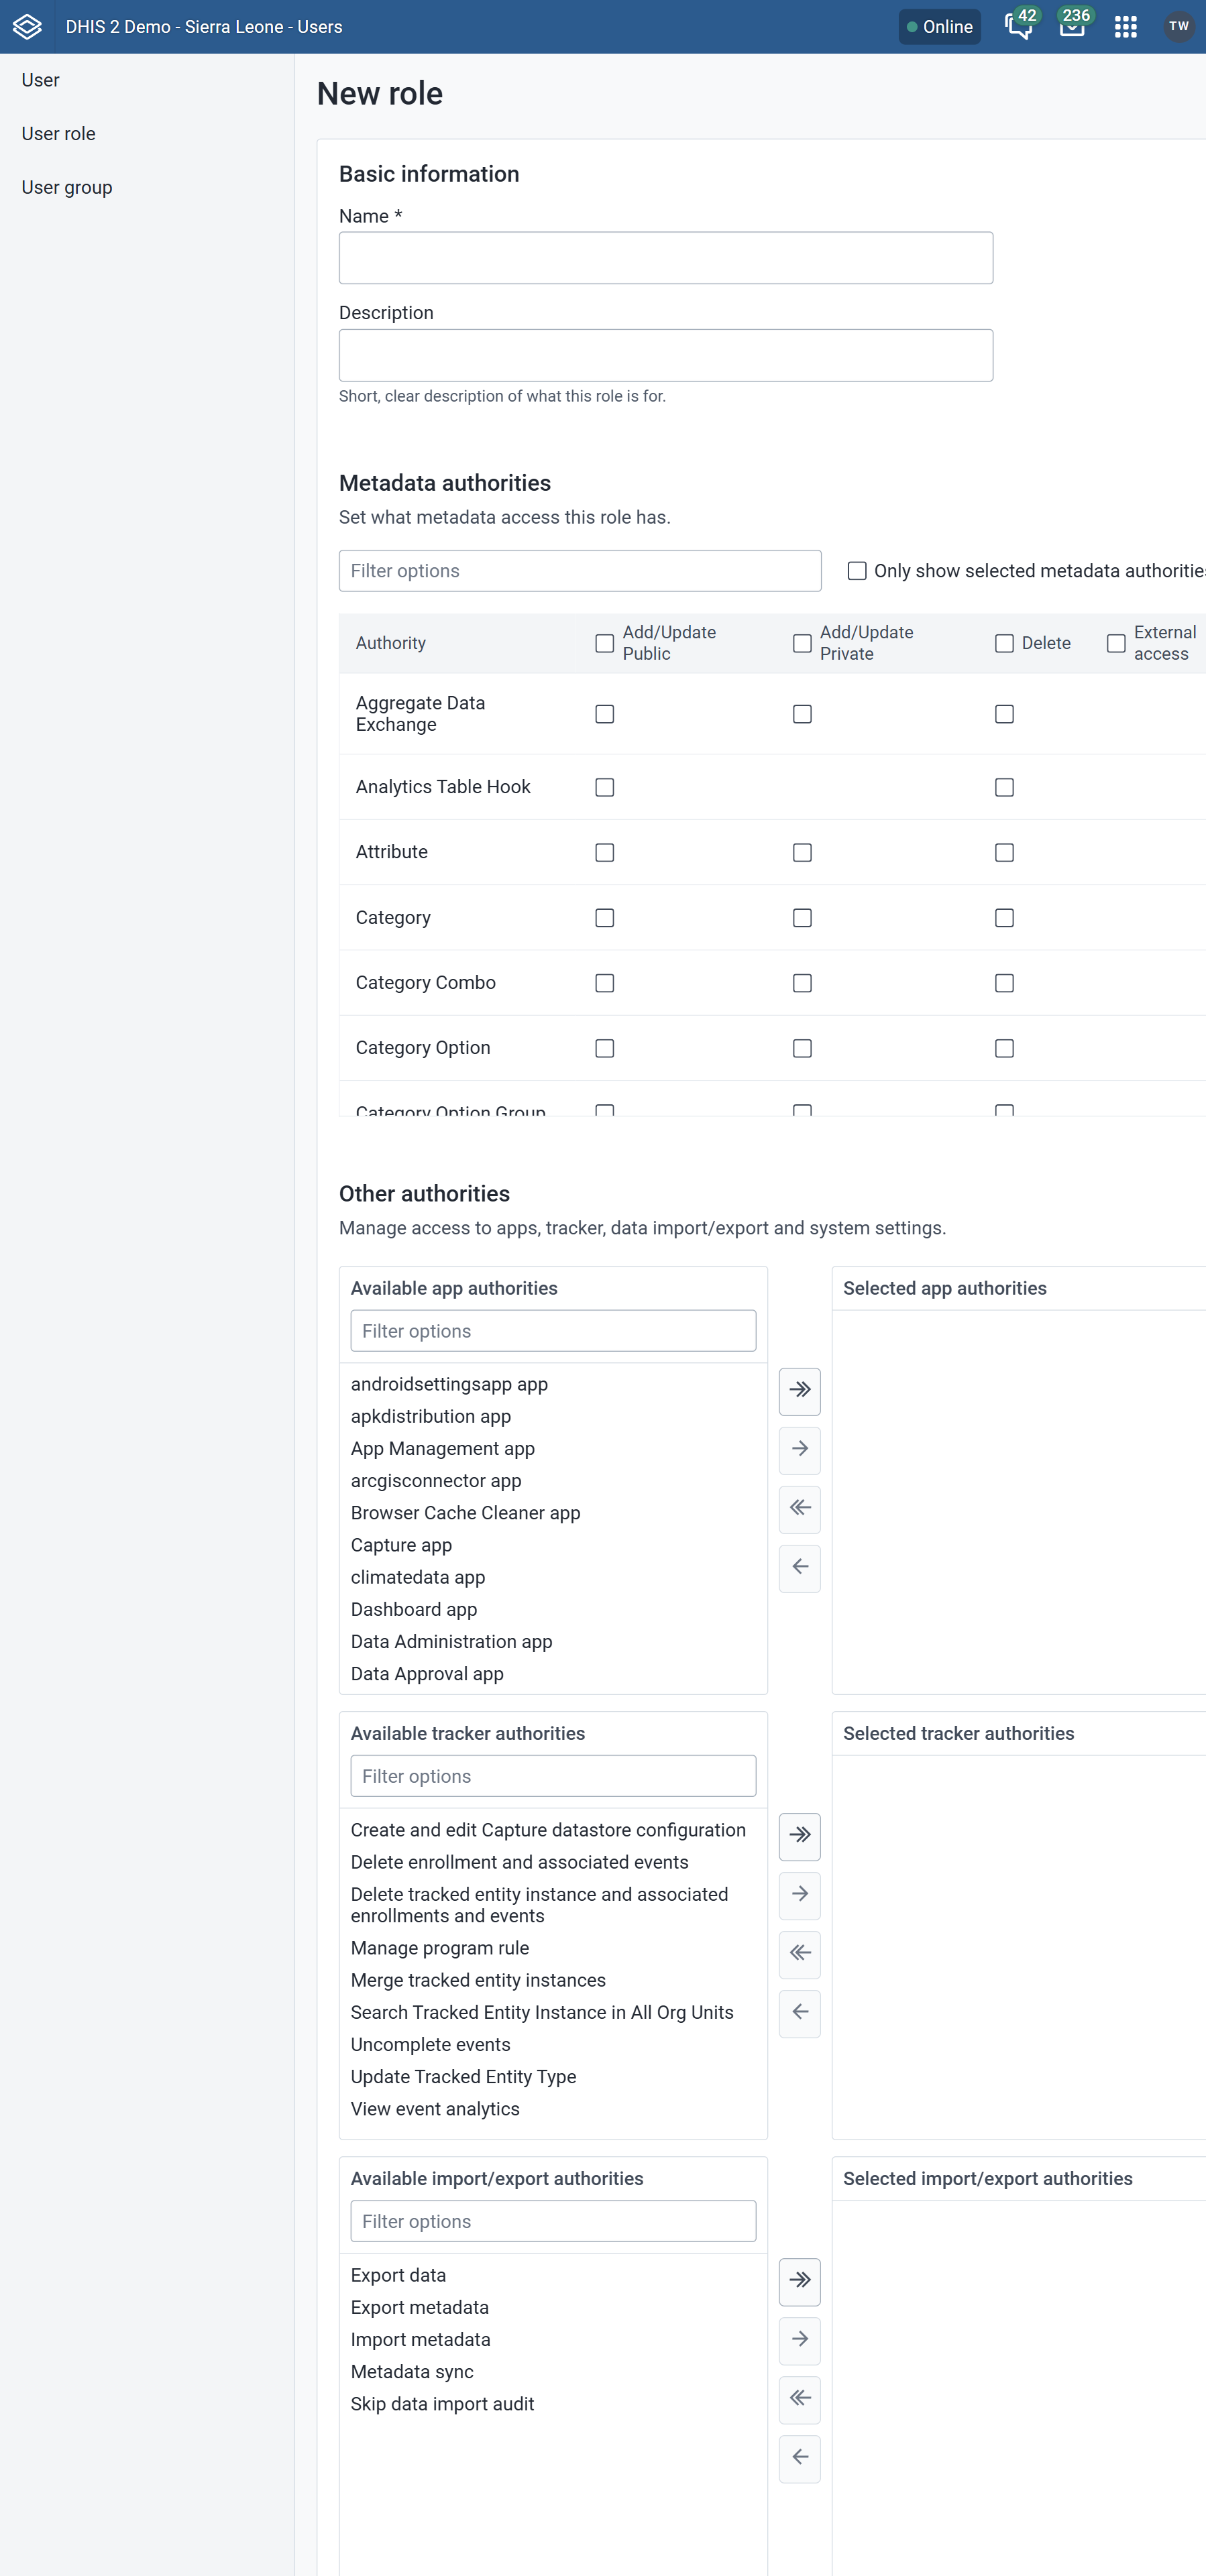
Before you can create a user, first you need to define a DHIS 2 user role. The DHIS 2 Android Capture App doesn’t require any of the authorities that are encapsulated in a user role. The security for a DHIS 2 program or dataset is set as program or dataset data access.
For the purposes of web debugging problems with your users it is recommended that you create and assign a user role with data capture functionality, which should include:
Keep roles simple and task-specific. Avoid assigning global admin rights unless necessary, and test the role on a staging server before rollout.
Note
When users enter a TEI and while it is not synced to the server they will be able to delete the TEI and the enrollment even if they have not been asigned the specific authorities. This is by design and to allow users rolling back in case of having entered wrong data (TEI and/or enrollment) and thus preventing it reaching the server and requiring another user with higher privileges to fix the issue.
Second, you should create a user, for which you will need to add some basic details such as the user name and assign it the role.
The third step is to assign the Org Units to the user you just created.
There are three types of organisation unit assignment:
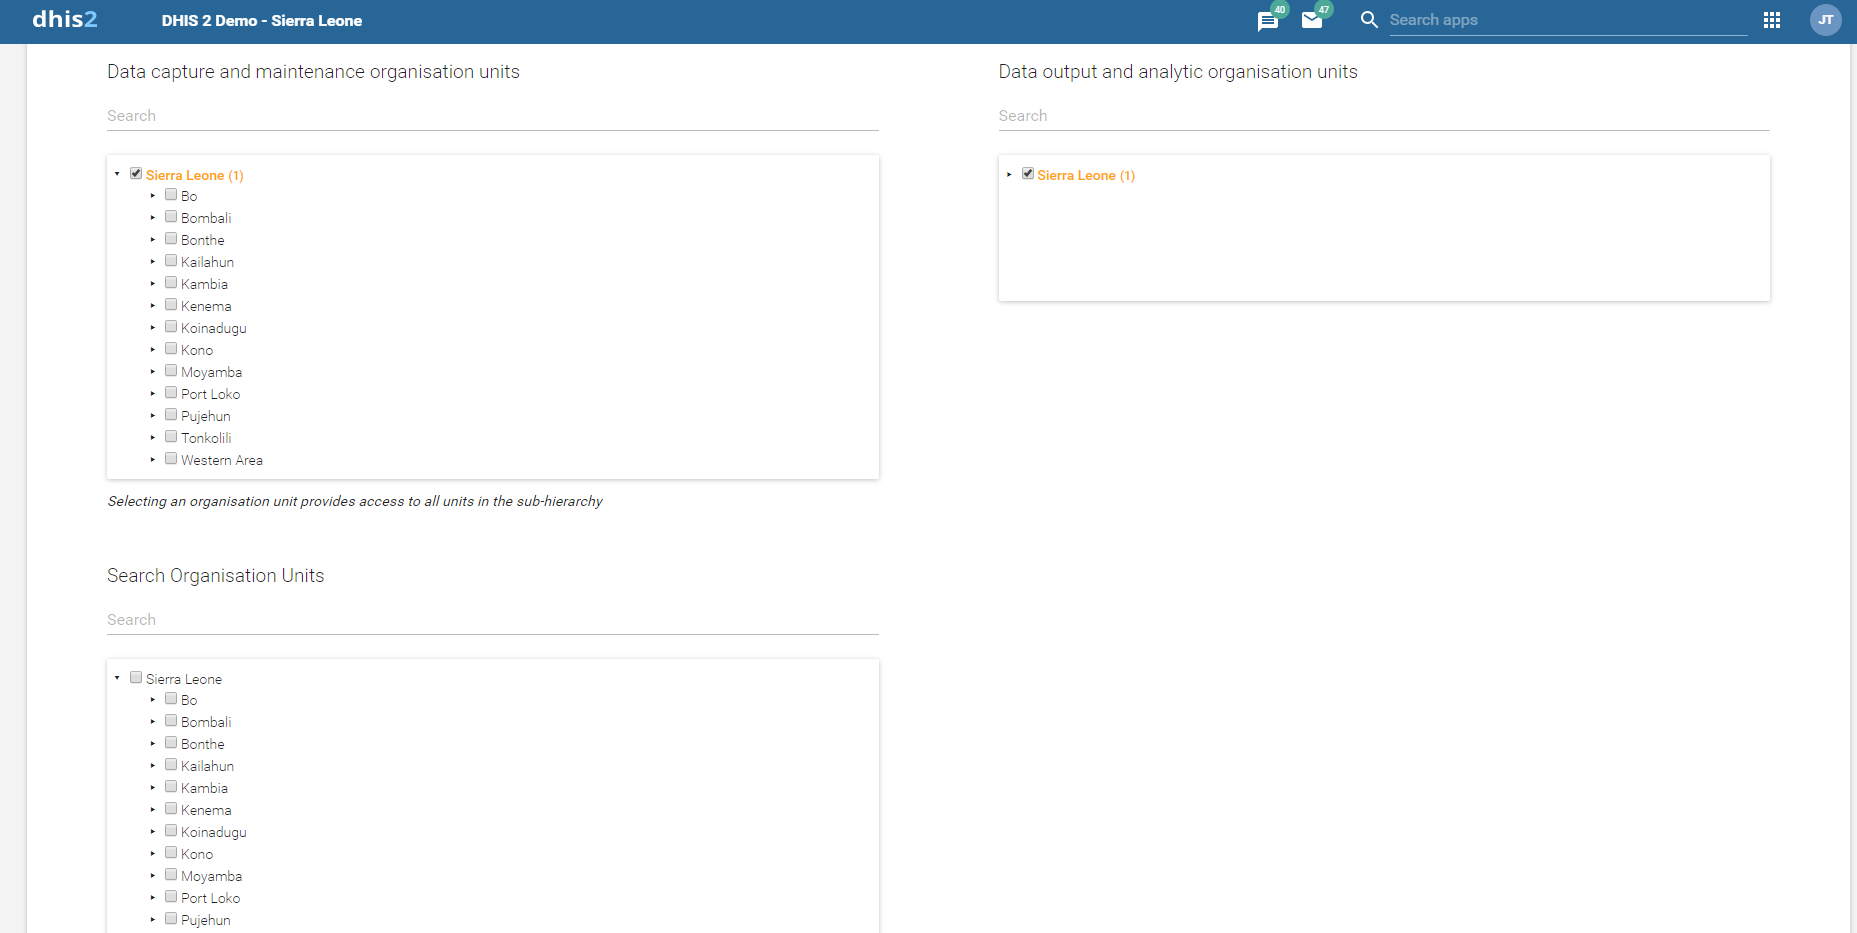
The DHIS2 Android Capture App renders data entry screens based on the structure of the assigned programs and datasets. Each program stage (event) or data set is displayed as a form, and the layout of that form can include sections if they are defined in the metadata. The app does not support custom HTML forms, but it fully supports section-based layouts and program rules (tracker and event programs) for dynamic behavior.
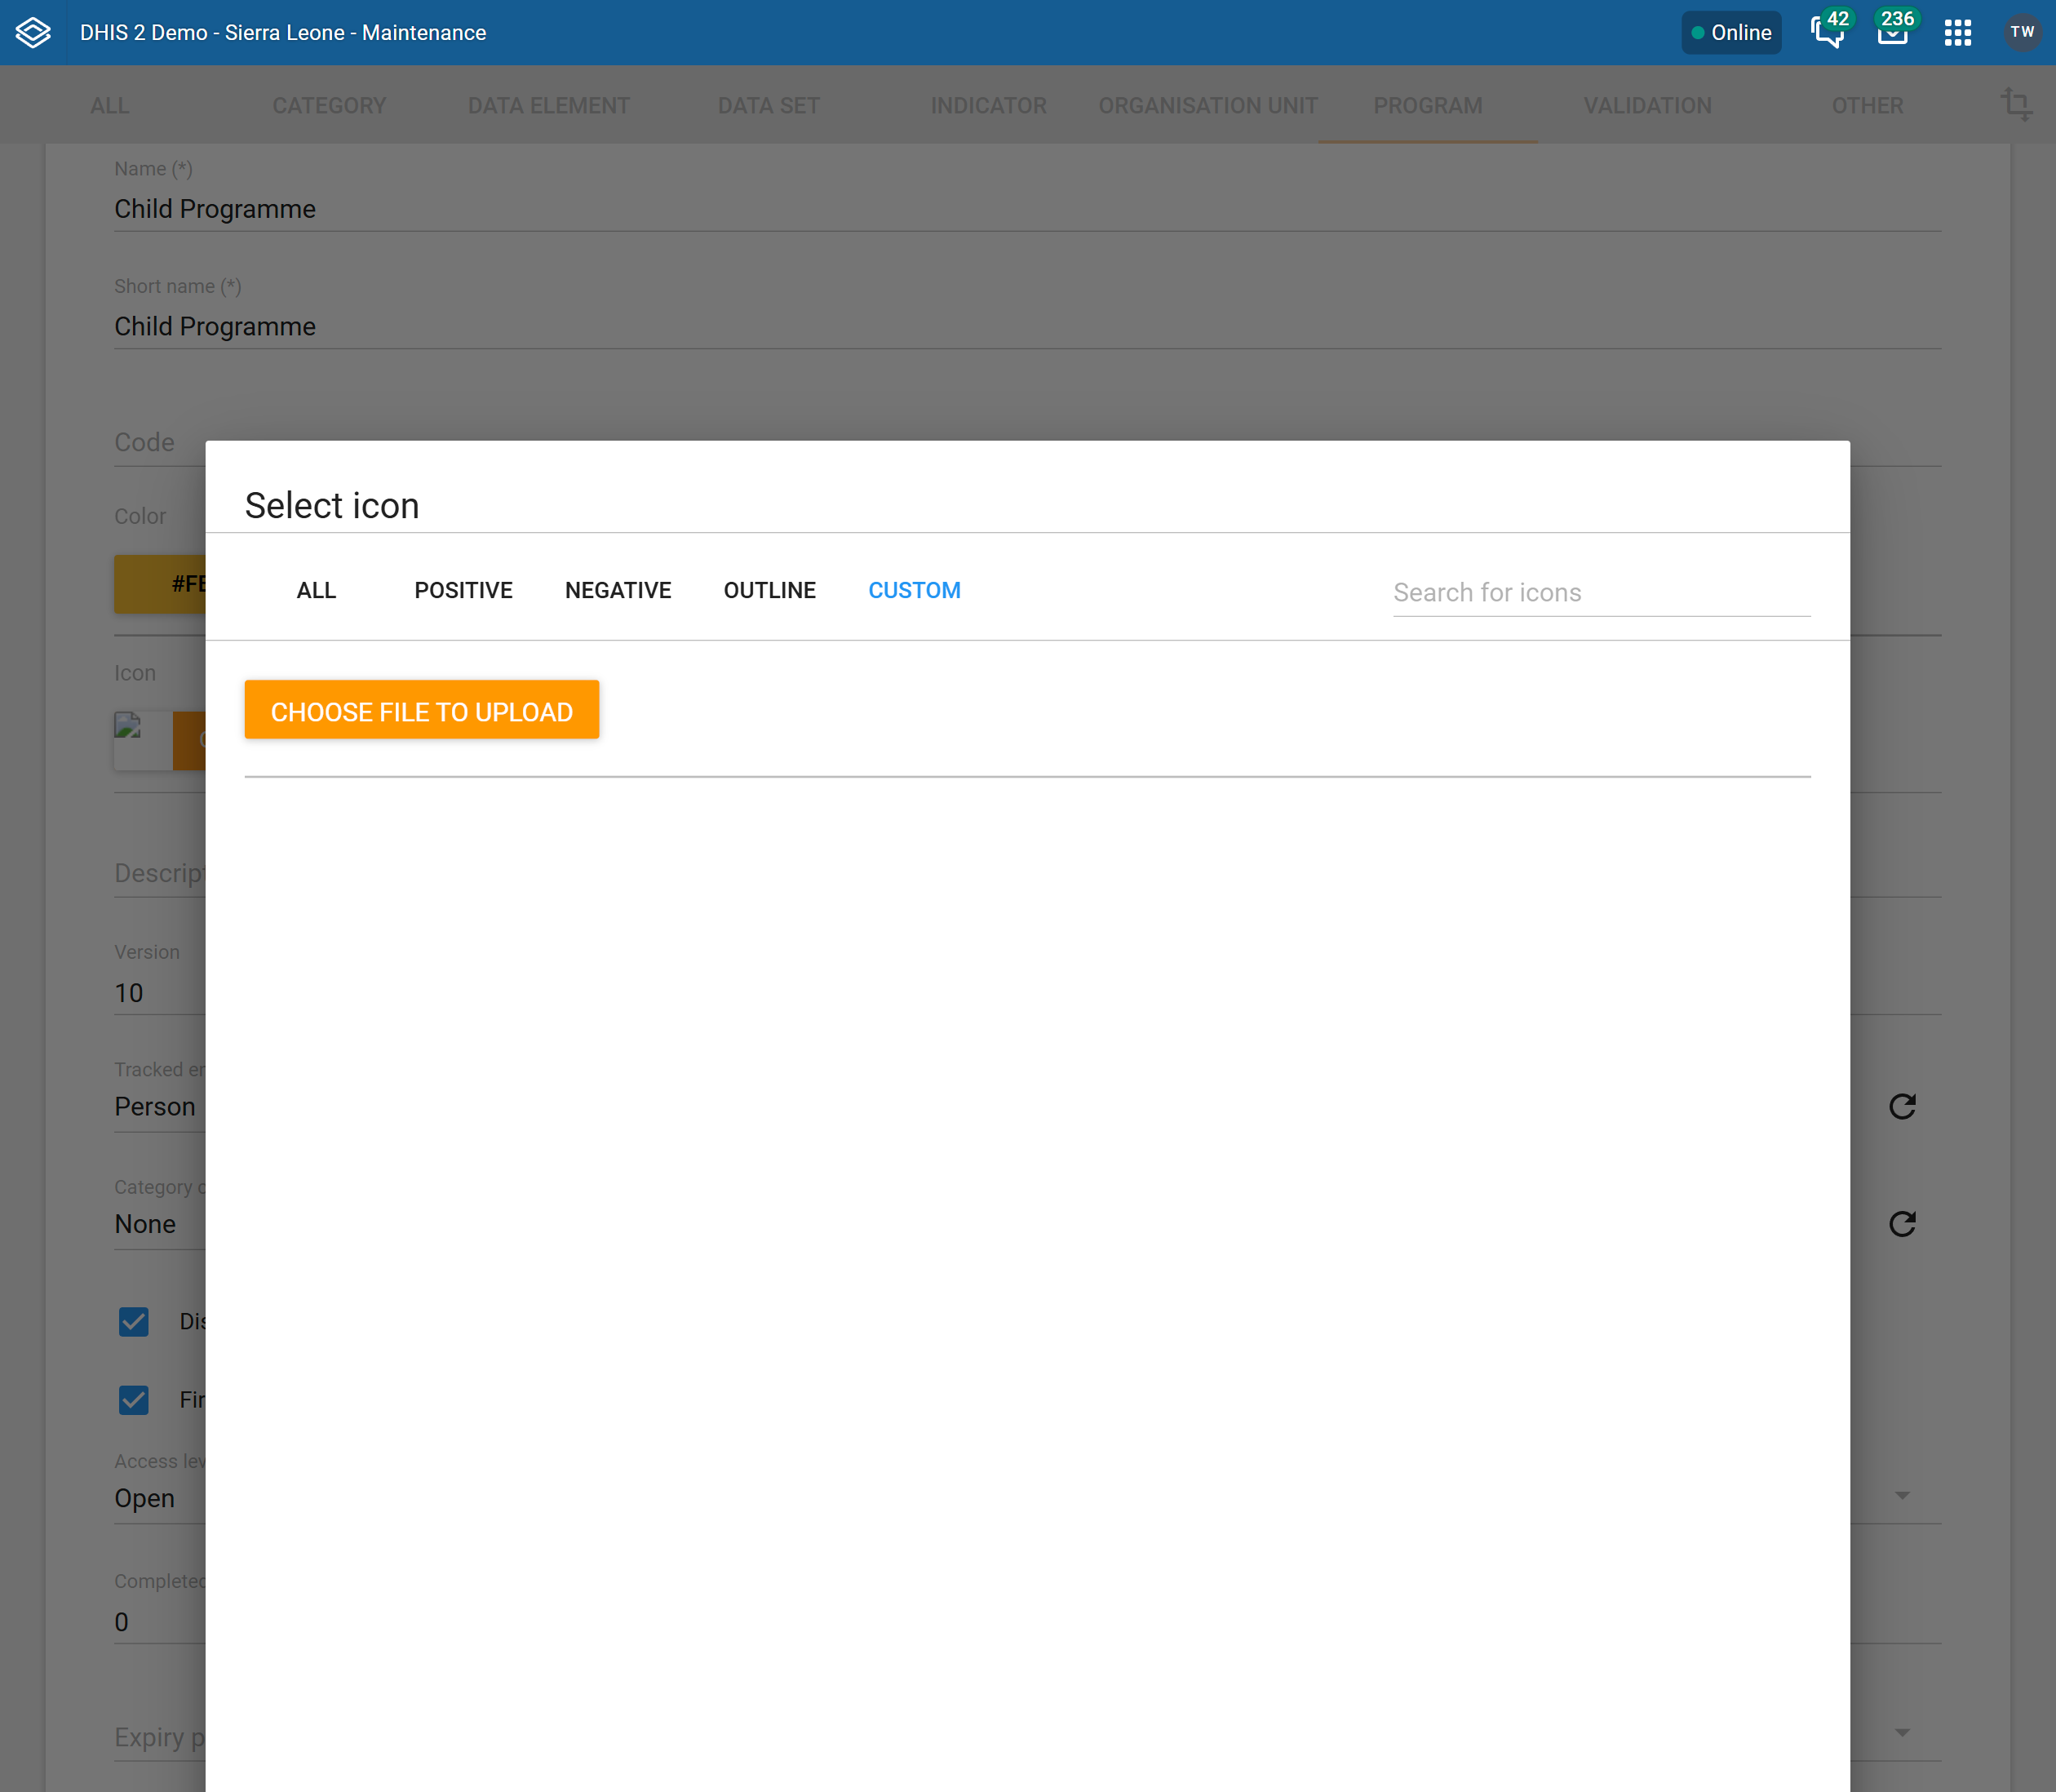
The Android Capture App supports extensive visual customization through the use of icons and colors. These elements improve usability by allowing program and form elements to be visually distinguished and quickly recognized.
Administrators can assign icons and colors to a variety of metadata objects, including programs, program stages, tracked entity types, datasets, data elements, attributes, and option sets. These icons appear throughout the app — in the home screen, data entry forms, dashboards, and filters — to improve navigation and comprehension.
There is an icon library of over four hundred images in DHIS2 instances. As of recent versions, administrators can also upload their own custom icons (e.g., .png or .jpeg) directly via DHIS2. While this increases flexibility, it introduces tradeoffs such as larger metadata payloads and potential sync delays.
For performance reasons, it's recommended to keep custom icons small in size (under 50KB) and only use them where they add clear value (e.g., custom campaign branding or highly specific visual codes).
Metadata Assignments
The following metadata types support color and icon assignment in Android: * Tracked Entity Types * Programs and Program Stages * Data Sets * Data Elements and Attributes * Indicators and Program Indicators * Option Sets and Options

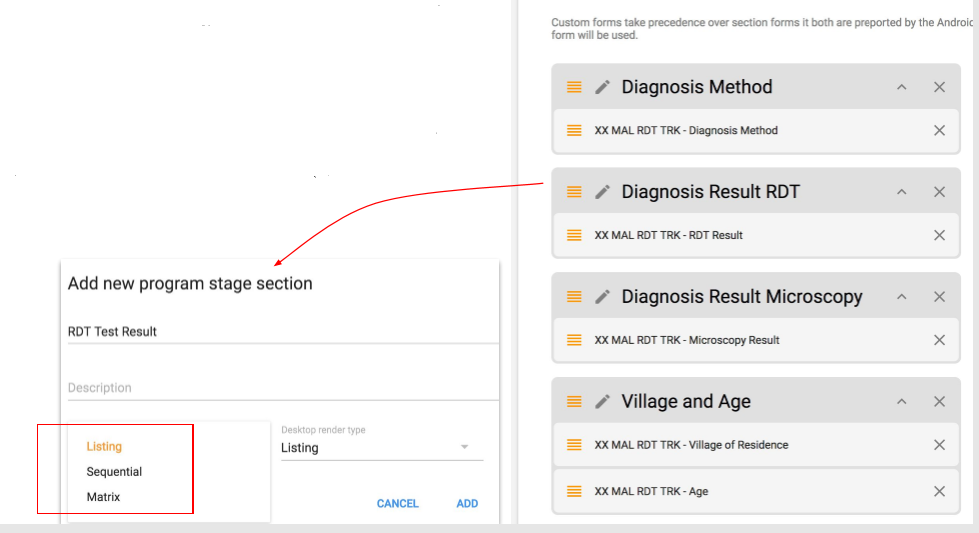
For program stages with sections, Android supports three rendering modes that determine how the fields or options within a section are visually arranged for the user:
Listing: elements are shown as a flat list.
Sequential: typically means that fields or options are displayed one after another in a vertical list, guiding the user through the form step by step.
Matrix: arranges fields or options in a grid or table-like format, allowing for a more compact and comparative view, which can be useful for data that is best visualized in rows and columns.
These can be configured in the program stage settings using the mobile rendering type field. Implementers should choose the rendering mode that best matches the complexity and flow of their form, balancing clarity and data entry speed.

A System Administrator can decide the best way to render the information in each program stage section by setting up the mobile rendering type, as shown on the screenshot.
In addition to form layout and visuals, the Android Settings Web App (ASWA) allows you to control how the app behaves across different contexts and user roles. These settings can be tailored to align with field realities, user capacity, and program complexity. Implementers are encouraged to review these options and apply them based on the specific needs of their workflows.
Some of the most impactful configurable features include:
Sync limits and frequency: Define how much data (TEIs, events, datasets) is synced and how often, ensuring performance in bandwidth-limited environments.
Map accuracy thresholds: Control the GPS precision required before capturing coordinates — critical for use cases like mobile outreach, campaign site mapping, or logistics.
Enable/disable specific actions: Restrict features like referrals, manual geo-location, or dashboard widgets, reducing clutter or enforcing SOPs.
Expand/collapse form sections: Improves navigation, especially in long, sectioned forms. Users can focus on one section at a time, minimizing errors.
Quick actions in dashboards: Enable shortcuts for common activities like event creation or TEI navigation directly from the dashboard.
Filters: Predefine the filters to be displayed across the app.
Local analytics: Allow users to view indicators, charts, or summaries based on the data available on their device, supporting feedback and decision-making in disconnected settings.
For more details, see the Android Settings Configuration Guide.
Program rules allow you to embed real-time logic into the Android app, even while offline. They automatically enforce data validation, default values, conditional display, and other dynamic behaviors, greatly improving data quality and user experience.
Key considerations:
Note
We recommend to test the Android App in parallel with the configuration of your program rules, this is to make sure that your changes in the server are properly reflected and working in the app.
Steps to configure a program rule
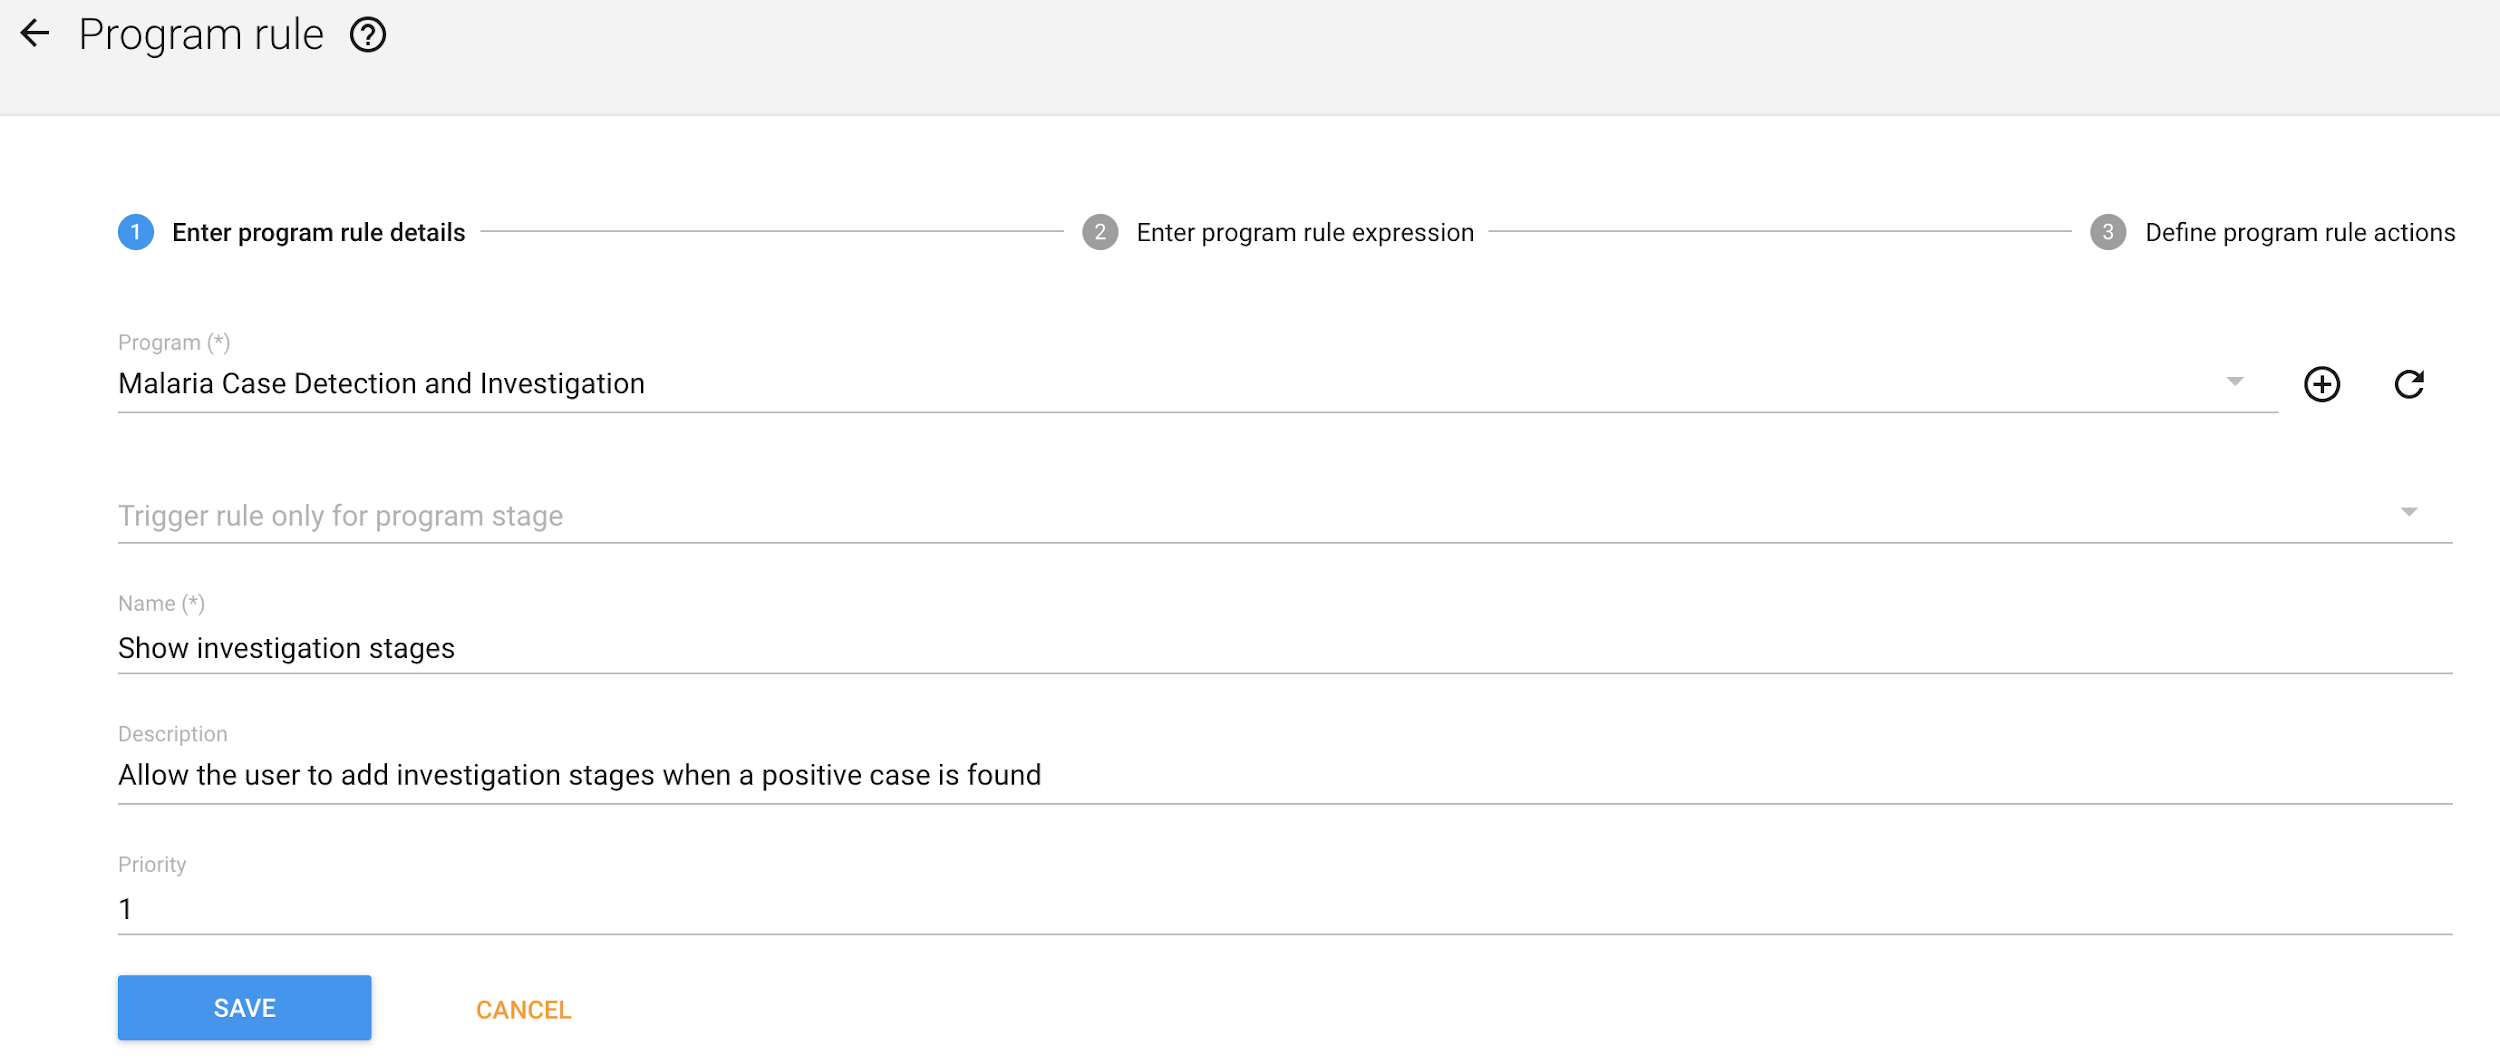
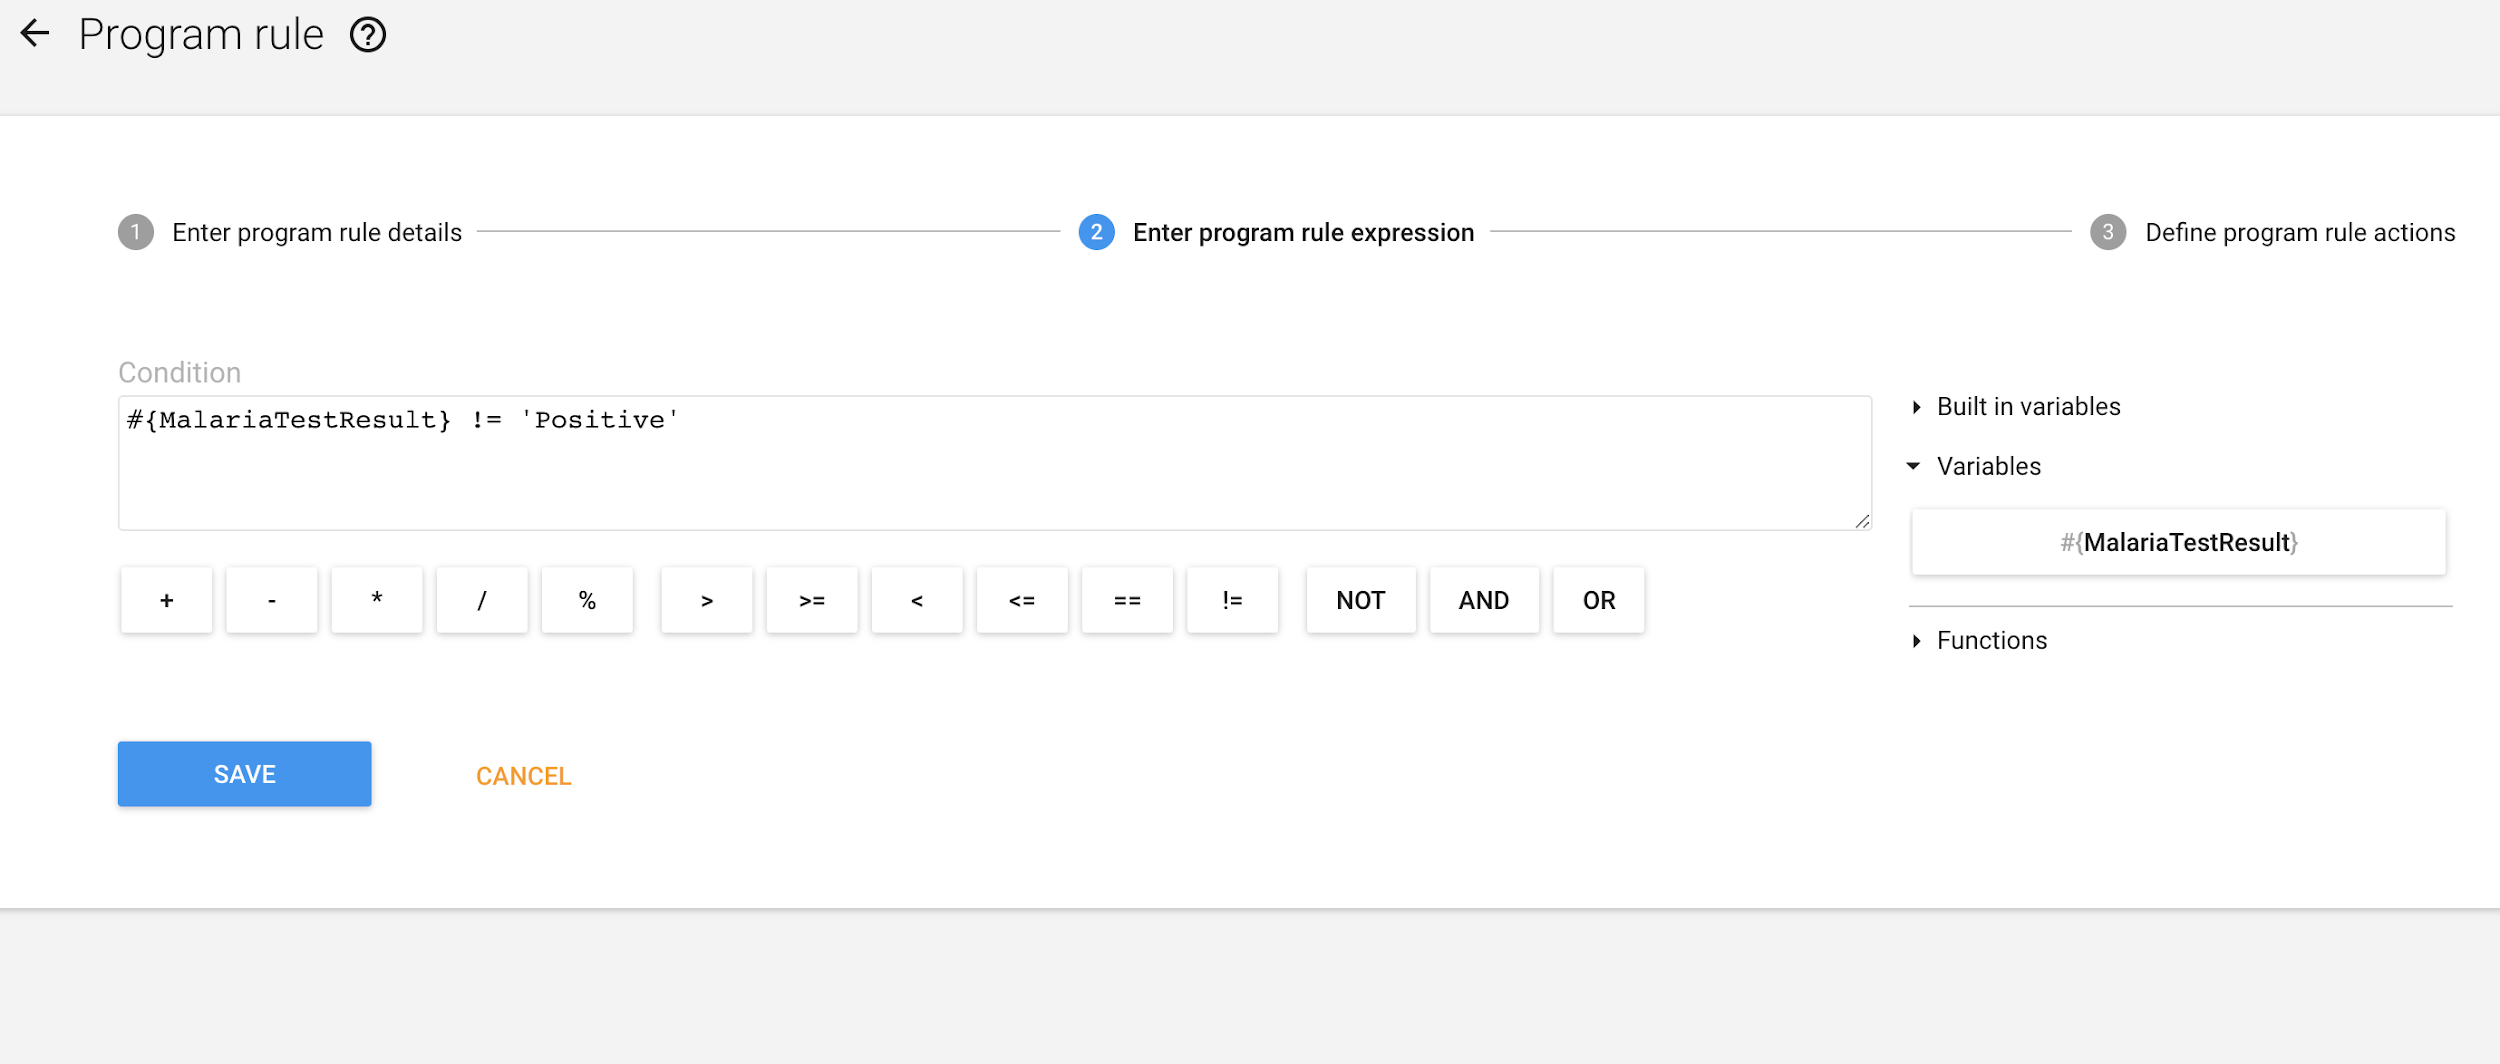
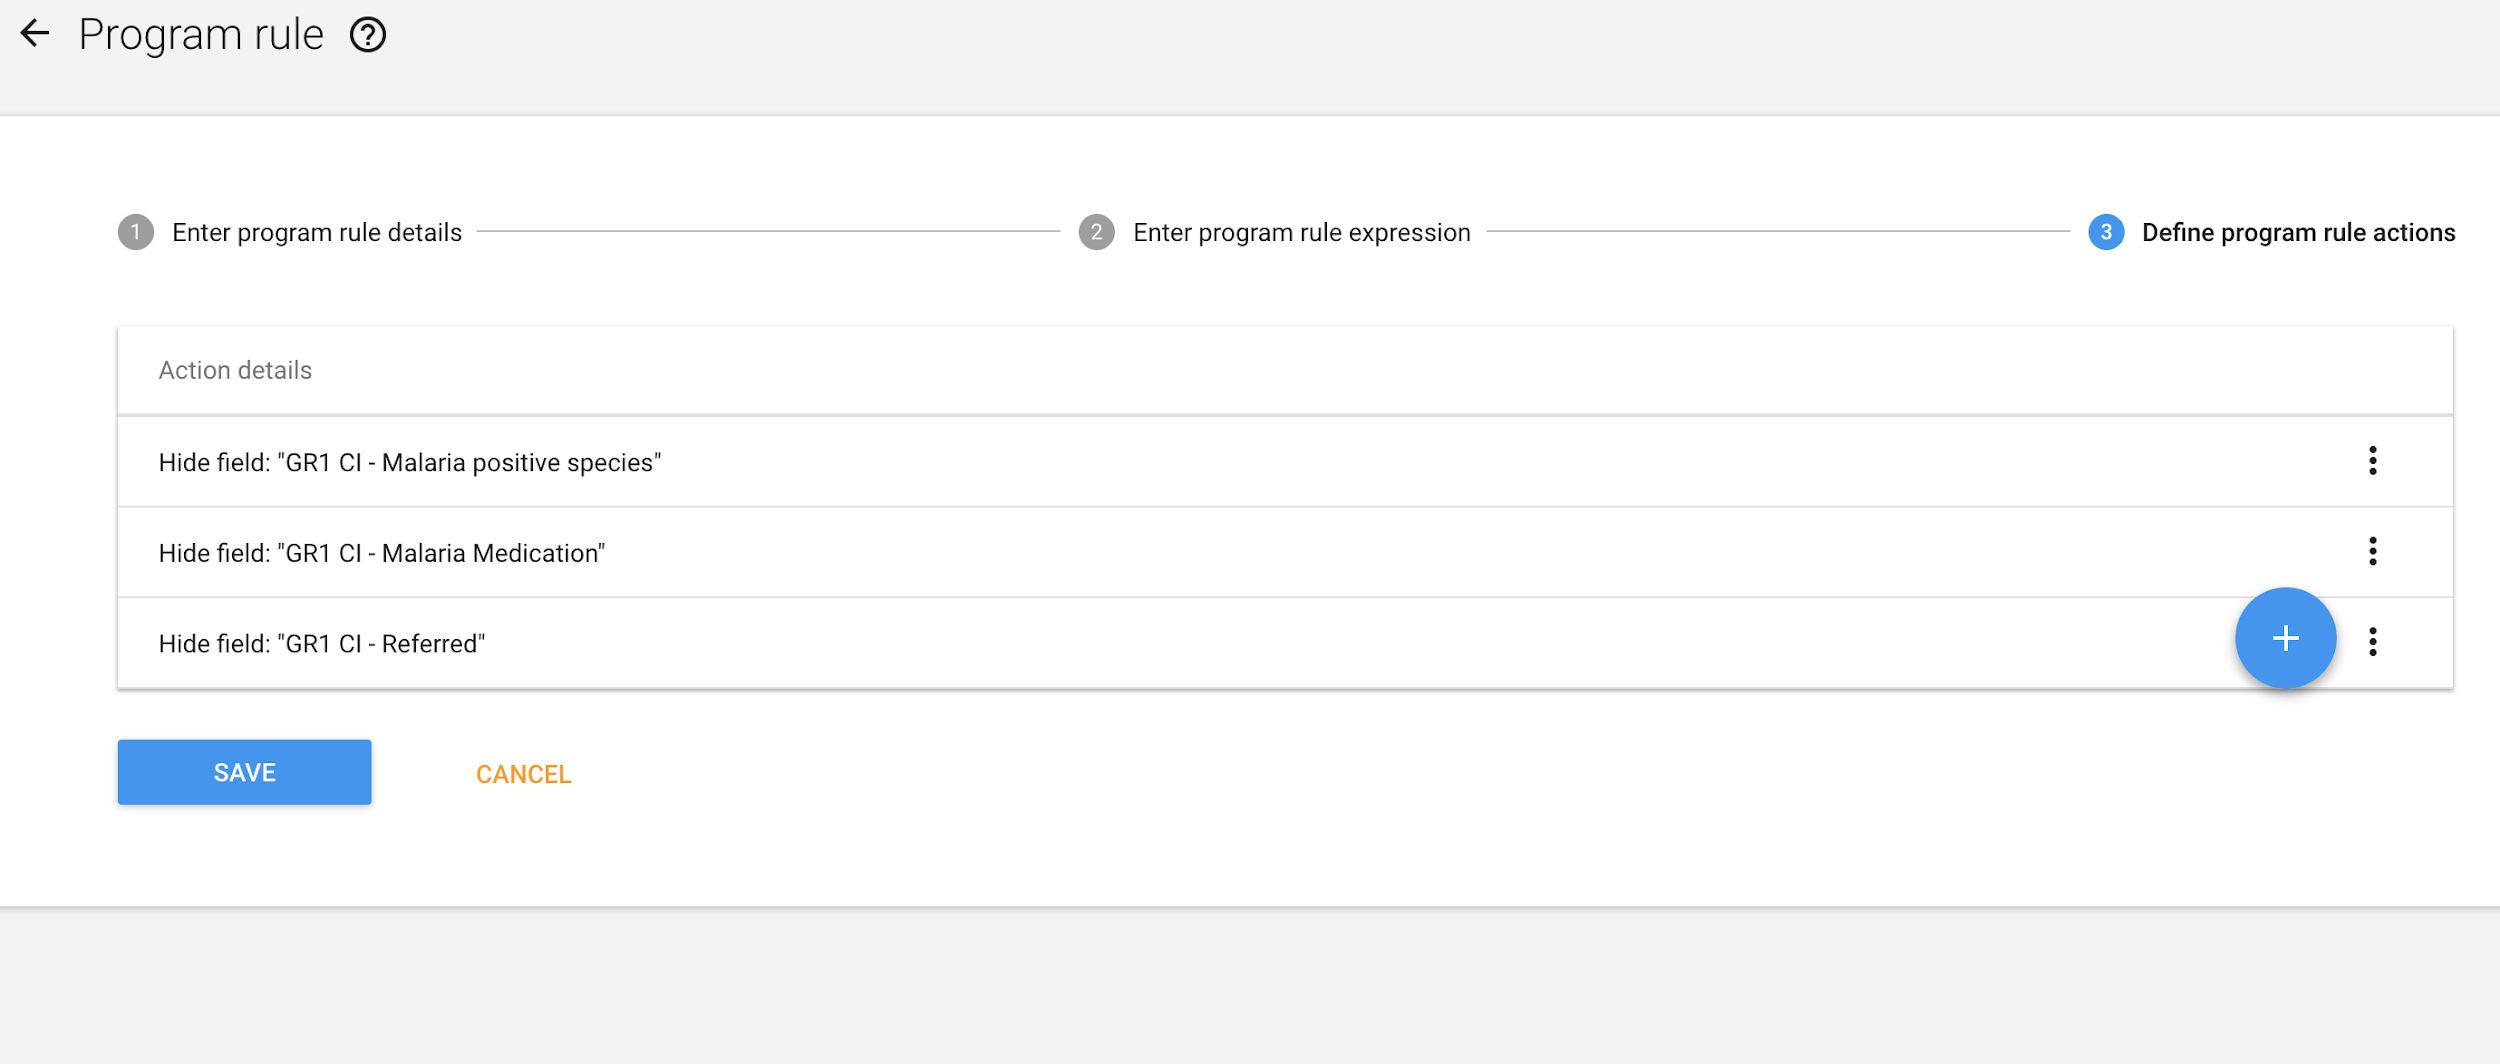
When setting up your program rules you should be aware of what is supported by the DHIS 2 Android app. You can check the updated list in the user guide.
Program indicators are used in the Android Capture App to display real-time calculations based on values in a program event or data set. These indicators help users interpret the data they're collecting by surfacing meaningful summaries.
To display a program indicator (events or tracker) in the Android app, ensure the “Display in form” option is enabled in the indicator configuration.
To display indicators in data sets, ensure you assign them during the data set configuration in the maintenance app.
Legend sets allow you to apply colors to numeric ranges, making it easy to visually flag critical values such as:
Legends are supported in the following areas in Android:
You can create legend sets in Maintenance > Other > Legends in the DHIS2 server and then assign them either to a program indicator or to a data element. In the app, legends appear as background color changes or status indicators inside the form, giving users immediate visual cues.
You can check the updated information of what is supported when using program indicators in the user guide.
In many Tracker programs, a unique identifier — such as a case ID, patient number, or voucher code — must be generated when a new Tracked Entity Instance (TEI) is registered. DHIS2 supports this using Generated Values for Tracked Entity Attributes (TEAs), which follow predefined patterns (e.g. ANC-#####) managed by the server.
Because field users often work offline, the Android app handles this by preloading a pool of reserved IDs, downloaded from the server during sync. These are then assigned locally, even without connectivity.
The number of IDs reserved per tracked entity type is configurable through the Android Settings Web App (ASWA). This setting is crucial for ensuring smooth operation in low-connectivity environments. If ASWA is not configured, the default number of reserved IDs is 100.
Everytime the user uses a value (registers a tracked entity instance), the app will:
Whenever the app is synced it will:
A value is considered as "expired" when one of the following conditions is true:
Caution
When using auto-generated unique values which contain dates as part of the pattern the expiryDate of those values will be linked to that date pattern which might result in unexpected behavior if the pattern is not defined well.
Example: The value UniqueID has been configured with a pattern like CURRENT_DATE(MM)-SEQUENTIAL(###) and today is 31st of January, the application would download 100 values (from 01-001 to 01-101) to allow the application working offline and having enough values, but tomorrow, 1st of February, the applicataion would not have any available values as all would have been marked as expired and so it would display such message.
On the App, the user can also check the available values and refill them in the settings menu.
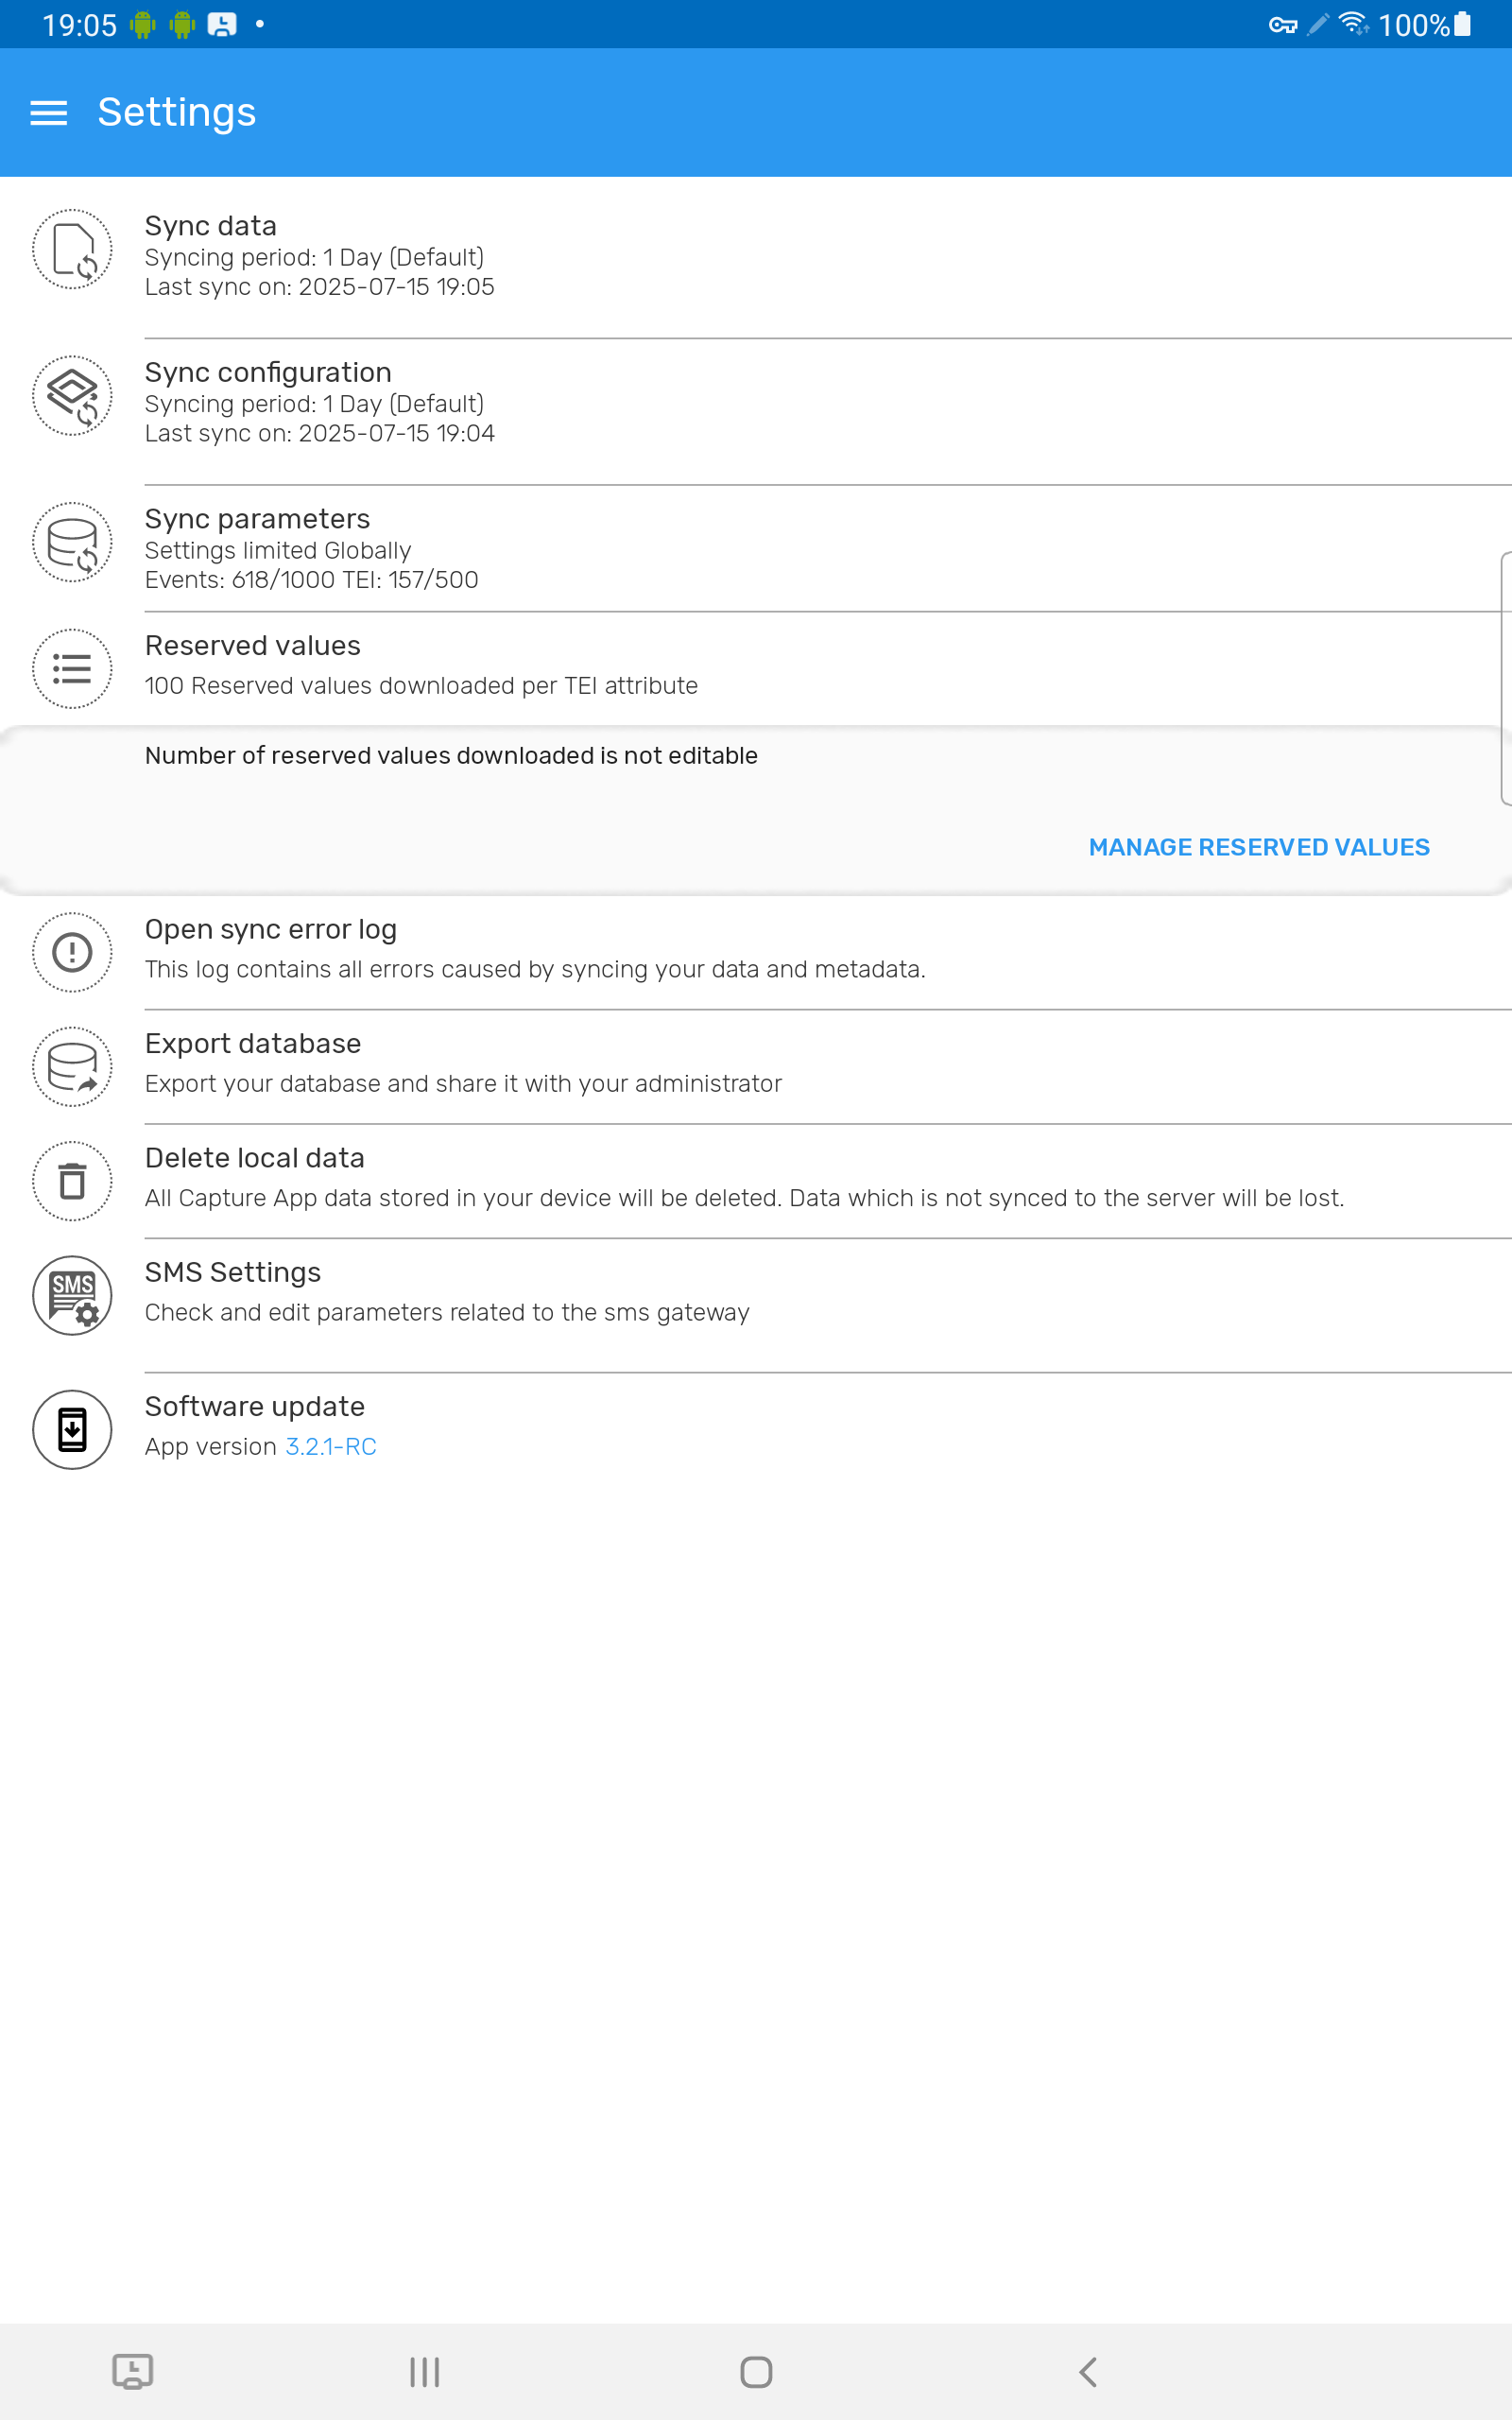
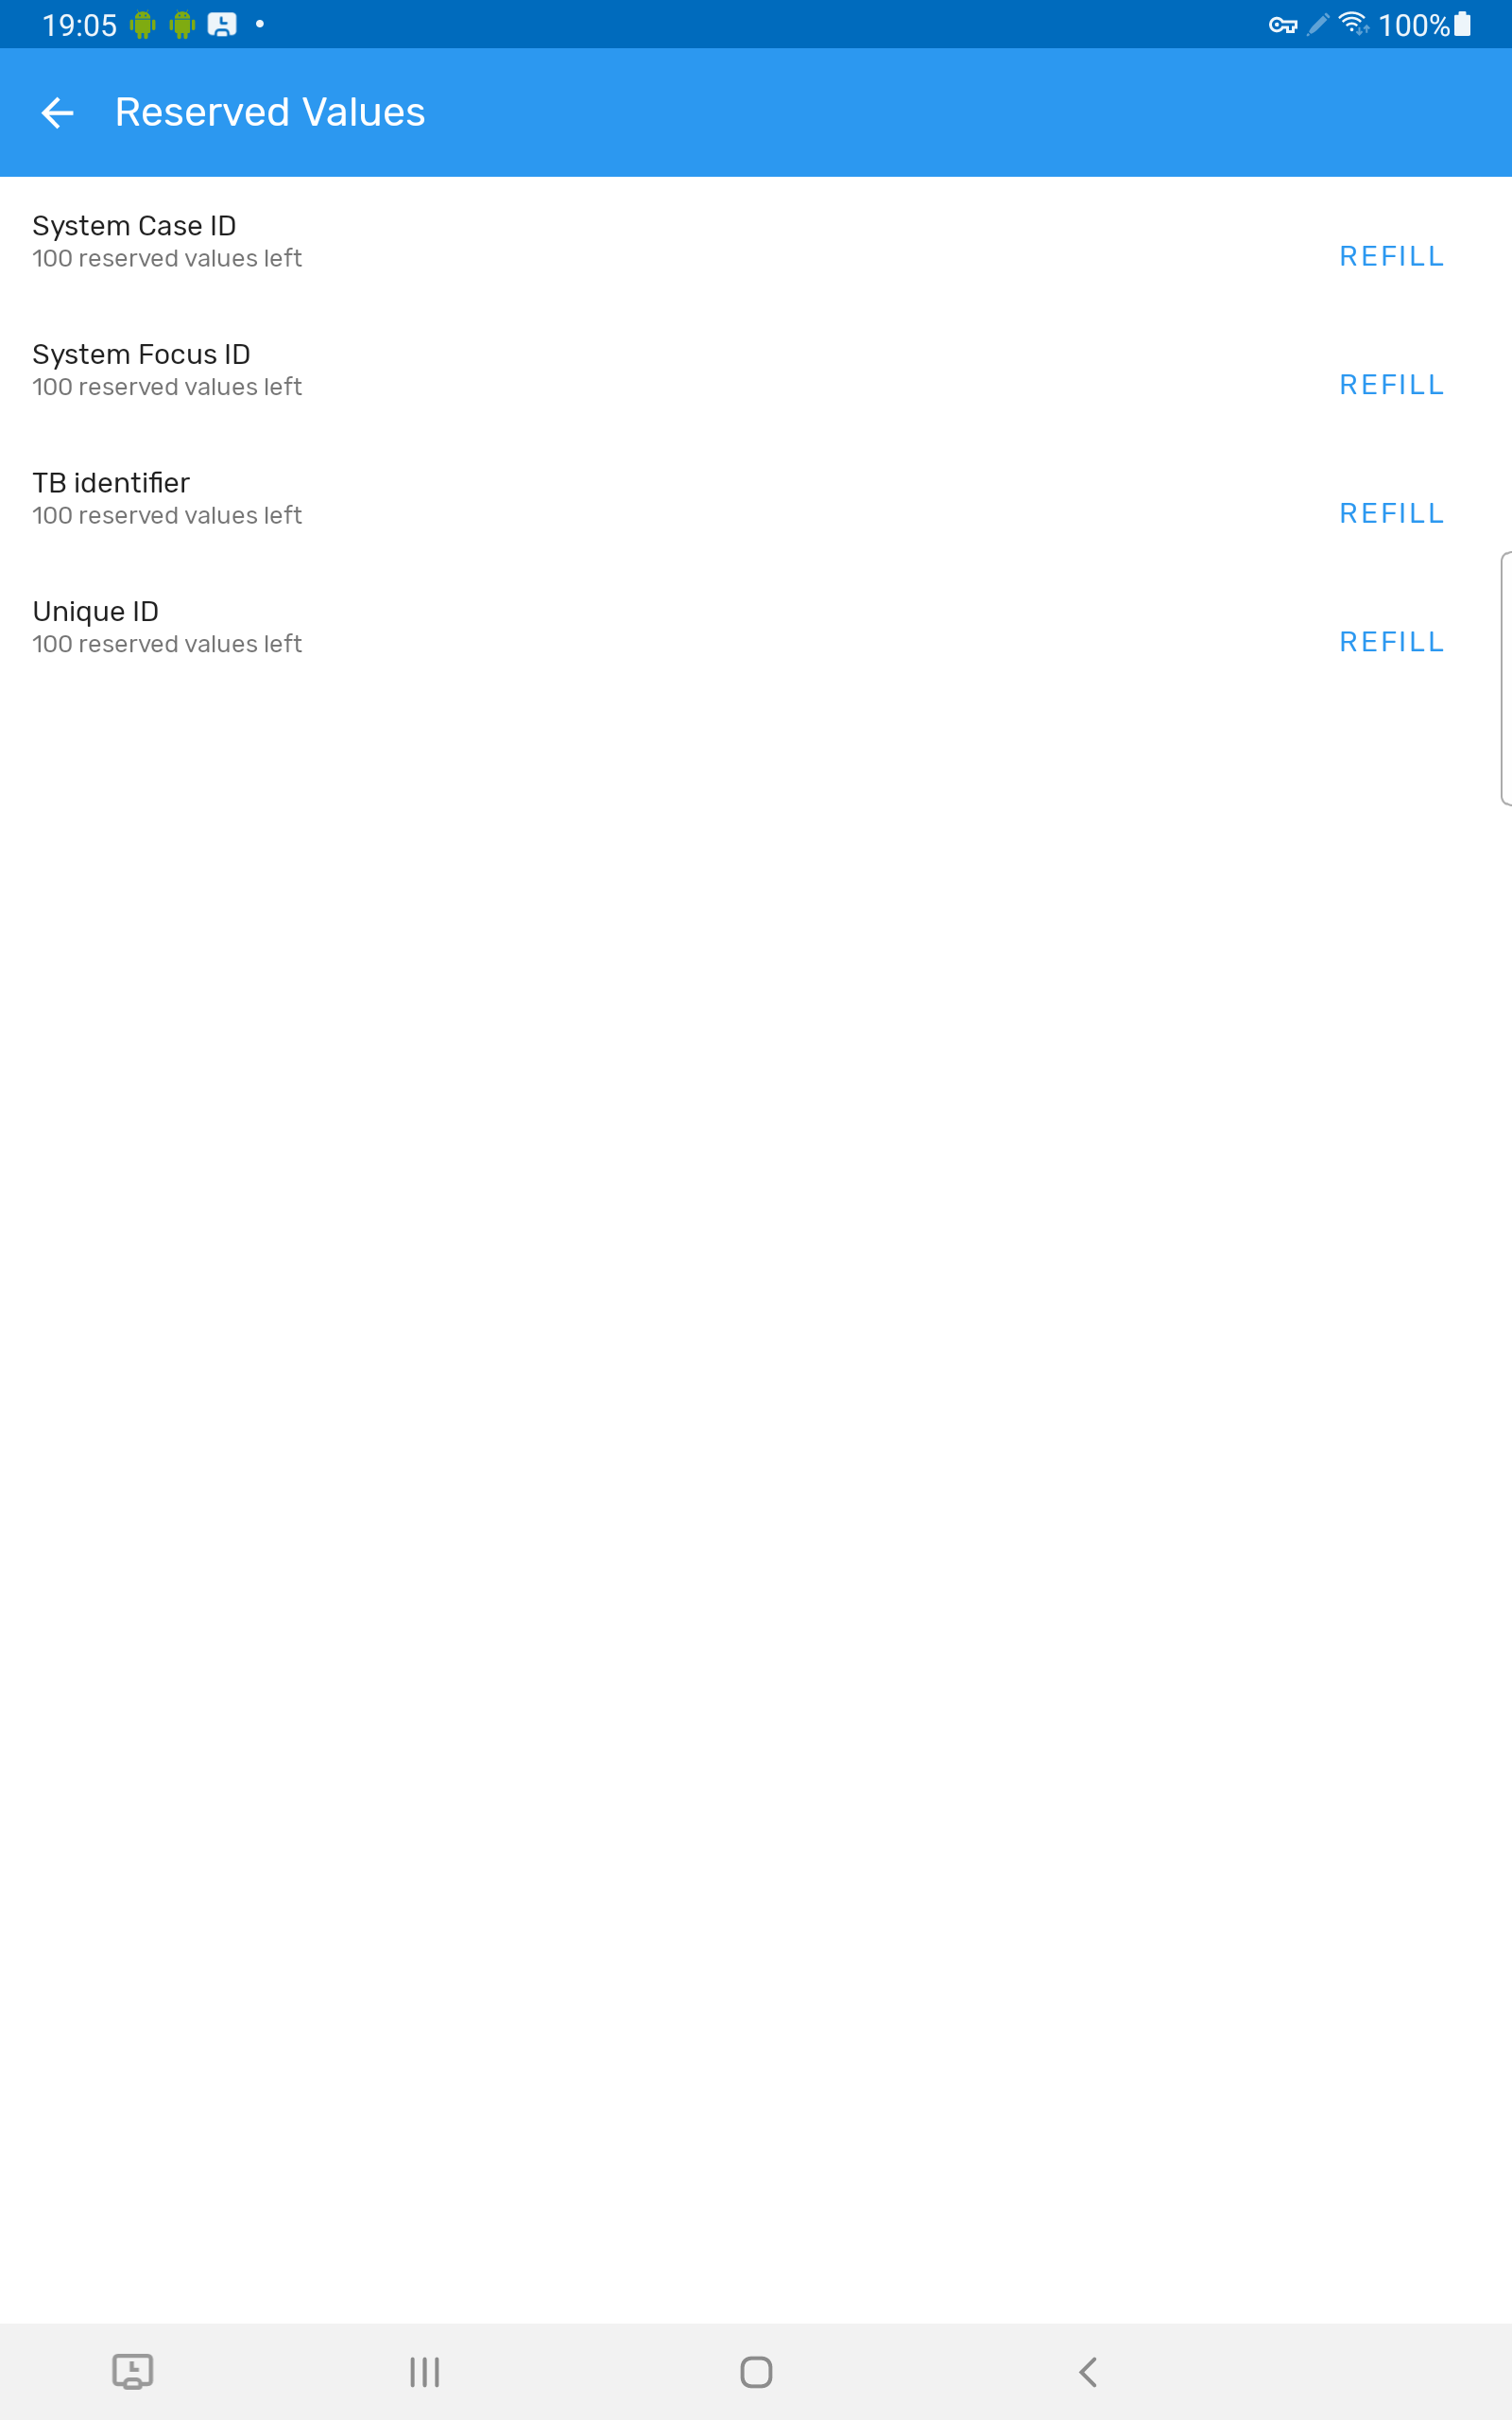
When the app runs out of values and the server cannot provide more, the user will receive a message on the data entry form saying that there are no more available values. Your should fix that on the server side.
There application can be downloaded and installed from two places:
Note
When installing the training APK, you might need to allow 3rd party installs.
Before 2.7 the production version came in two versions: one included SMS capabilities and the other did not.
Please read the section on App distribution for understanding the implications of using the different distribution channels.
Before you start with the installation of the new DHIS 2 Capture Android App in the field, it is important to note that if your users are already using the old generation DHIS 2 Android Event Capture or Tracker Capture, they should follow these steps:
Warning
Deleting the app without syncing can cause information loss.
In order to log in you will need the DHIS 2 server URL, the user name and the password for the user you just created. For testing purposes you can also use the testing servers and credentials:
| URL | User | Password |
|---|---|---|
| Most recent DHIS 2 version https://play.dhis2.org/demo | android | Android123 |
Now that the DHIS 2 server has been initially configured and you have installed the App in one or more devices, you are ready to start testing. While you are planning your testing you need to be aware of upcoming releases. It is important to be a part of the community at https://community.dhis2.org/ and use JIRA, the software management tool that UiO utilizes. This will allow you to learn about the open issues in terms of features and bug fixing that it is scheduled for future releases.
We recommend to test the Android App in parallel with your configuration, to make sure that your changes in the server are properly reflected and working in the app. This is especially important during the configuration of the program rules. In addition to this step by step testing, there are different types of testing that you should conduct before rolling out the application.
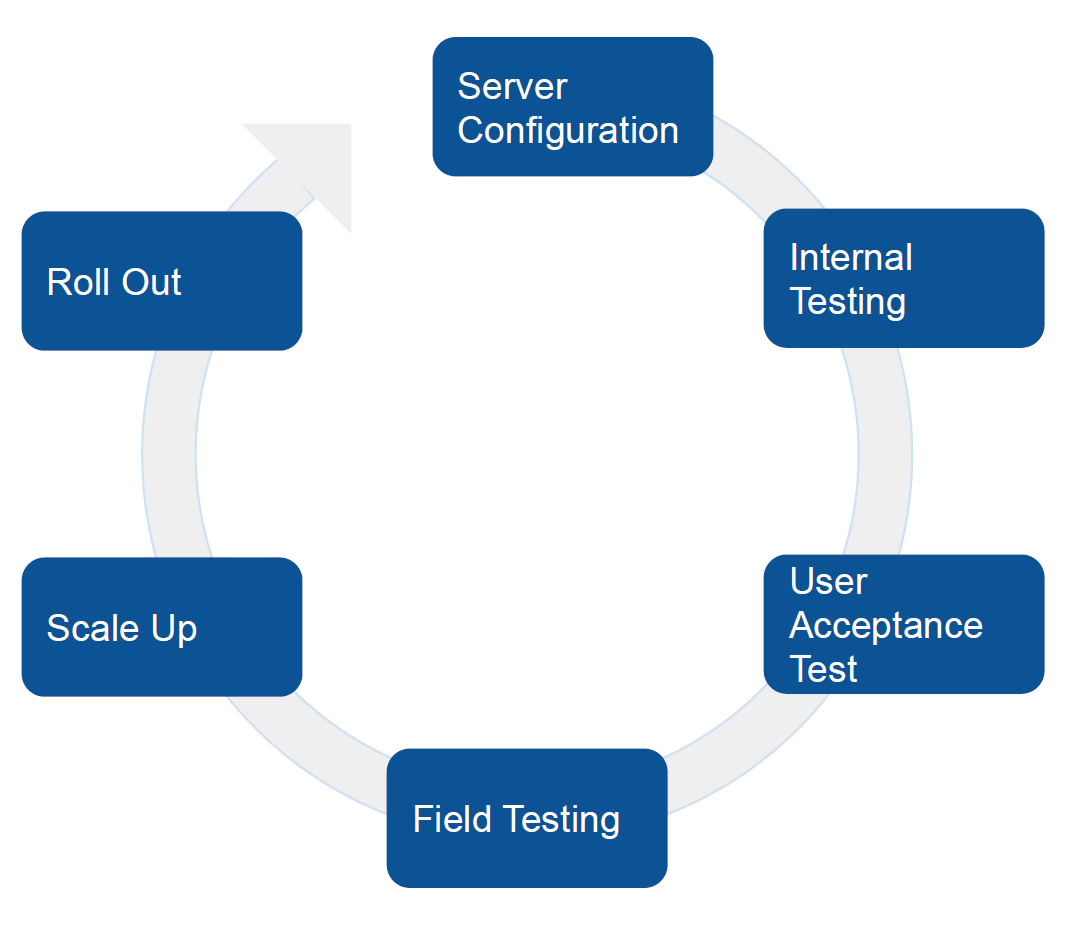
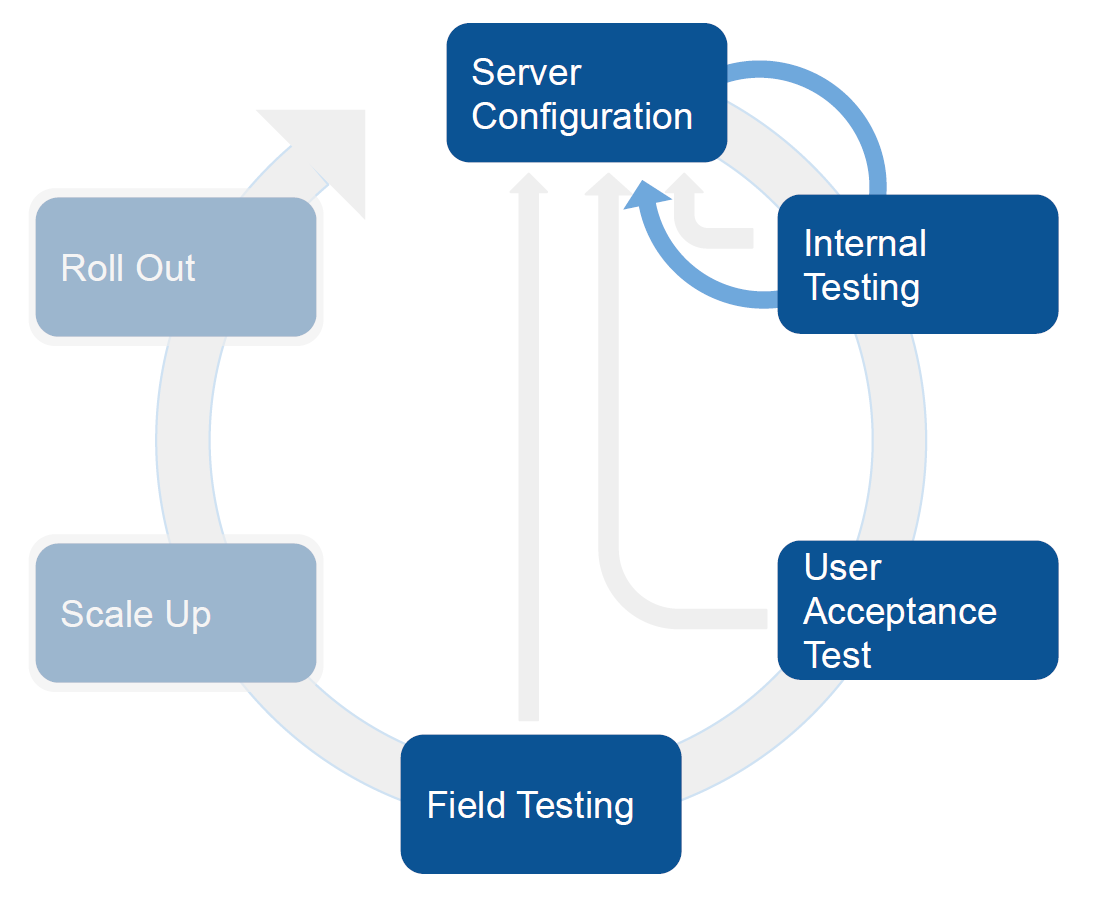
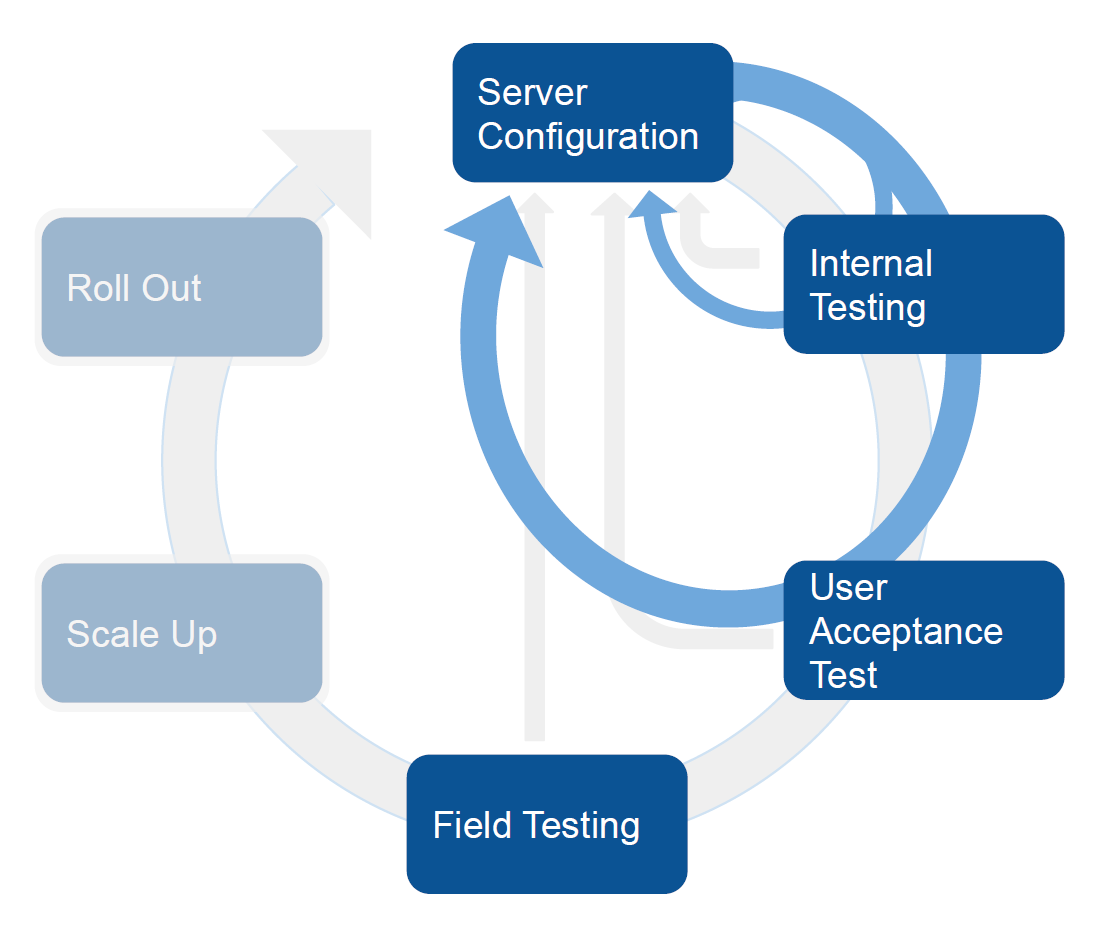
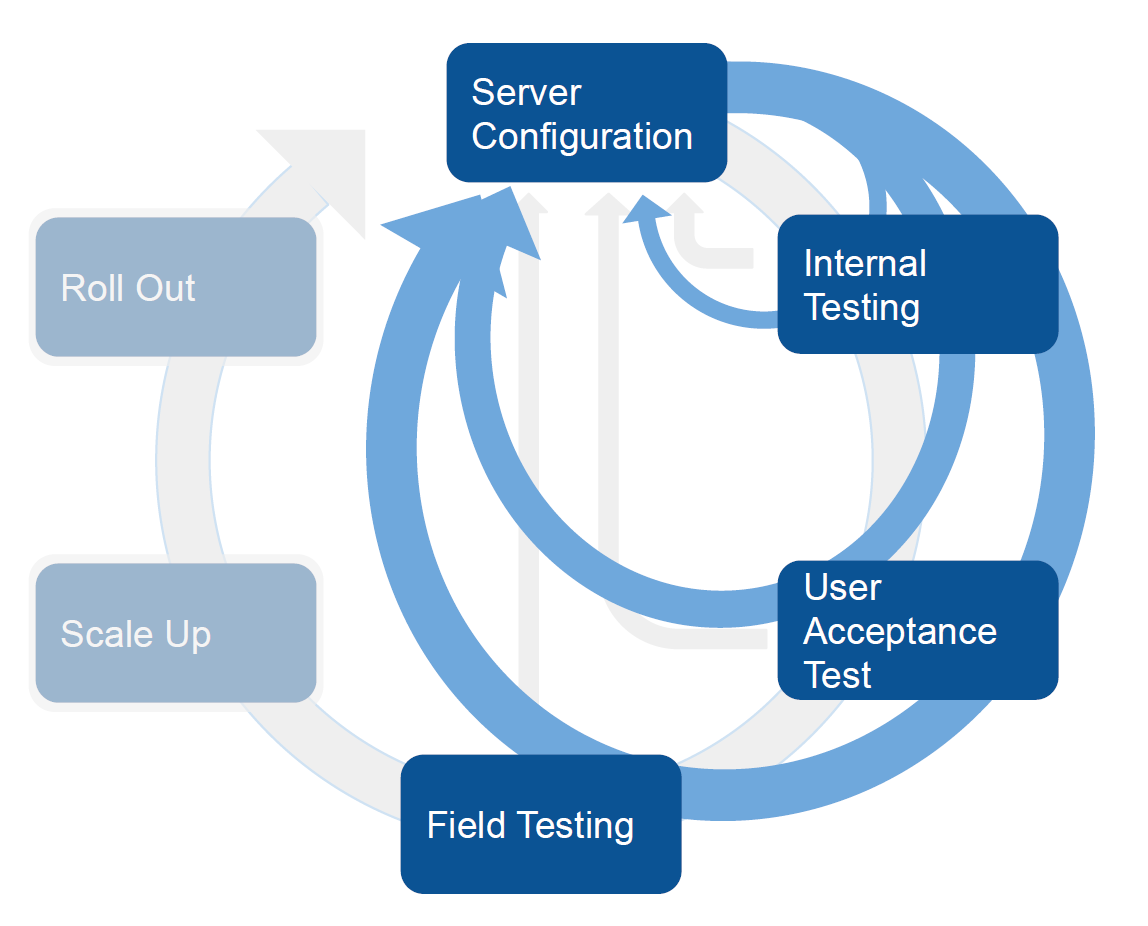
There is an initial set of tests that should be conducted internally with smaller groups to guarantee that the configurations are done correctly, that the functionality is in place and that the look and feel is adequate. As part of this initial phase of testing you will conduct what it is known as internal testing, followed by the UAT (User Acceptance Testing) testing. Later in this section we will elaborate on what these type of tests mean and how to conduct them. After that you will conduct your field testing and pilot. In this phase of the testing you will conduct a set of tests with larger groups to guarantee among other things that your workflows, your infrastructure and architecture is correct. Also later in this section we will elaborate further on these types of tests and how to conduct them.
The following graphs show that the next steps are iterative in nature, including new server configurations based on the results of the testing. You will most likely do several rounds of testing and reconfiguring before you are ready for scale up and roll out.
 |  |
 |  |
Before we go into the different testing phases, we are going to present some general recommendations that can be applied to testing an Android App. In general any process of testing can be summarized in the following steps:
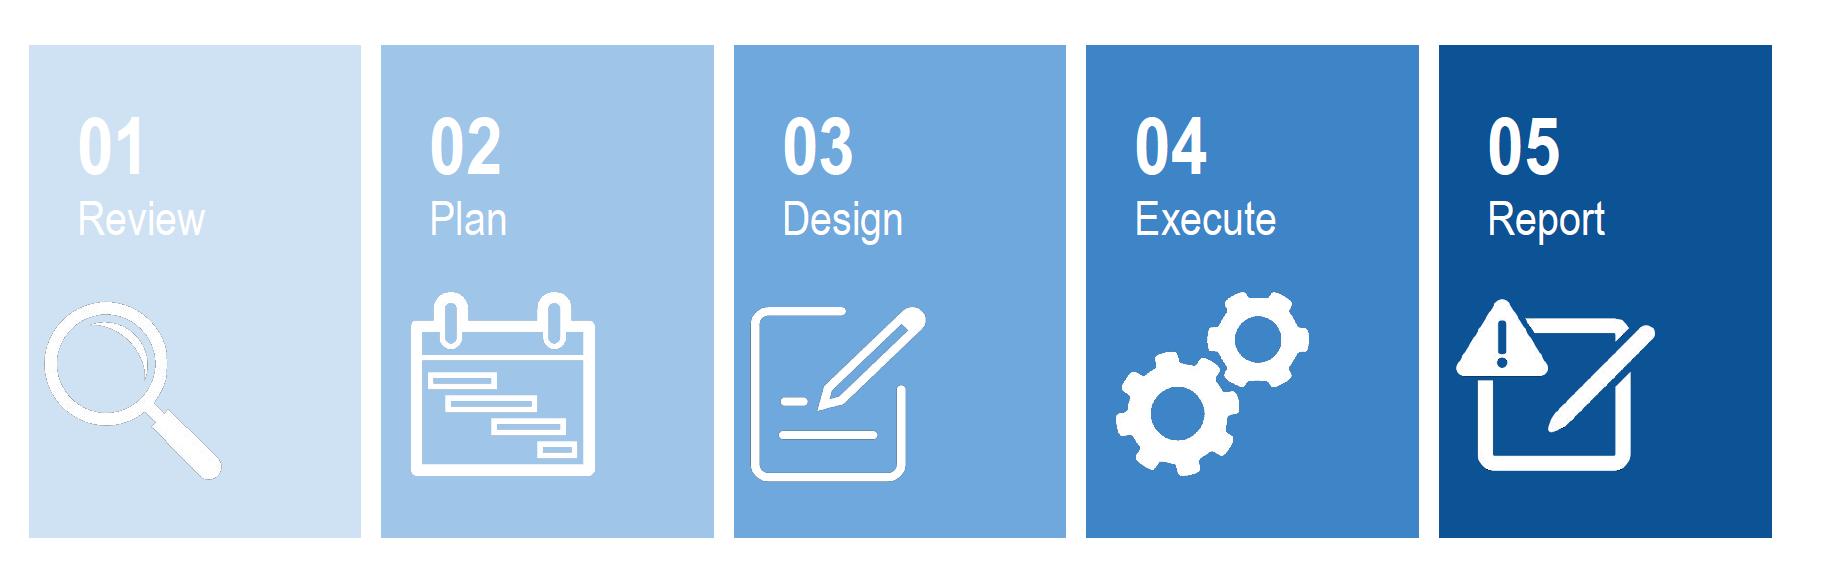
Review. The first step is to review information about the application itself by going to https://www.DHIS 2.org/android-documentation. The documentation will provide you with information about the why’s and what's or your testing. It should help you determine if the app meets your requirements, what the app can and can’t do and help you analyze discrepancies. It should also help you identify new features and settings, features supported.
Plan. In this step you need to identify the time of testing by understanding the timeline for your own implementation. As part of this planning phase you must create a detailed list of requirements and classify them as compulsory (MUST have) or nice to have.
Design. In this step you must develop the test cases, decide the number of test interactions and the tools you will be using for your testing. 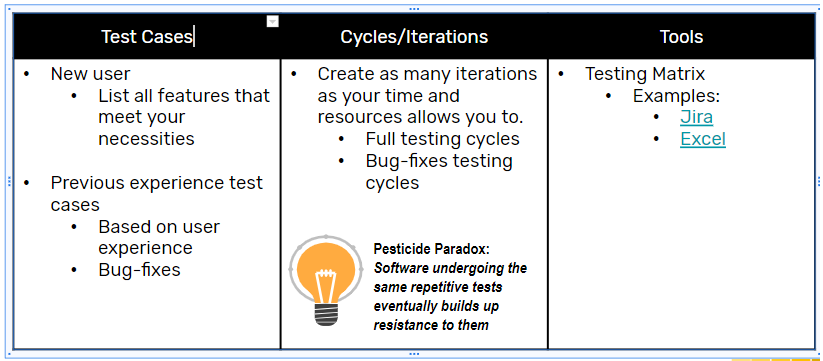

Example of testing tool - Excel 
Every test case should include the following sections. The level of detail and the content of the test to be performed will depend on the level of experience-profile of the user.
Execute. During the execution of your testing please keep in mind two important issues:
 { .center width=80% }
 { .center width=80% }
What are you testing
You are testing your DHIS 2 server configuration and the Android App itself.

What are you looking for?
Program Rules, forms, visual UI, indicators… Bugs, improvements, new requirements, etc.
How?
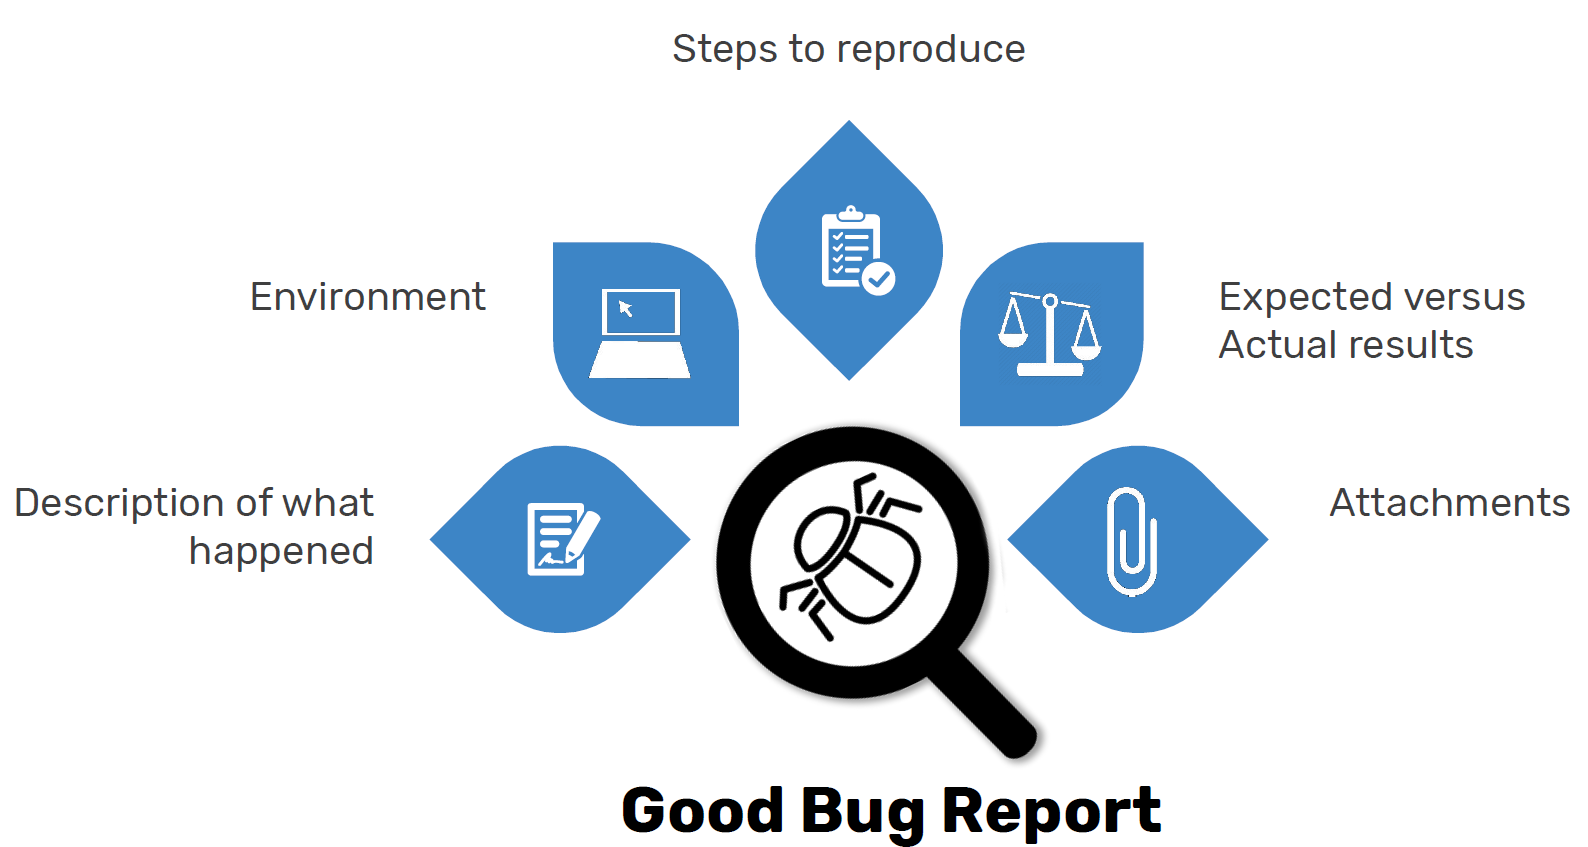
Methods and periods for testing vary from group to group, but it has to be iterative, flexible and it must be done in the early stages of the deployment process. You need to spend time deciding who will participate in the test, develop a test plan and have a strategy to gather the feedback. There are different tools available to report and track bugs and issues. Depending on the complexity of your test you can use trello, JIRA, etc.
Setting the right foundation for your internal testing will increase the quality and the efficiency of the testing sessions. These recommendations apply to any of the different tests that you will need to perform.
What are you testing
You are testing your system configuration (input), your visual UI and icons, usability and your outputs. You can also test at this stage the user experience with different devices (smartphone, tablet, external keyboard, chromebook).

What are you looking for?
Adjustments in the previous items and hardware issues. This is a good time to start identifying champions that will help on future phases. The main purpose of the UAT is having people from different background in agreement with the configuration to execute the field testing. The success of this stage will determine move to the next phase, field testing
How?
Use a controlled environment. Find users with little exposure to the technology, who are not necessarily integrated in work practices. Your users could be: 1) Expert in the health area/s, 2) Field officer, 3) Field user.
The size of the group will vary depending on the type of project you are implementing the App for. An average size UAT test group would be between 5 and 10 people.
When deciding who will participate in your test, think about all the different types of users and their roles. With that in mind, select your testers. You should provide your testers with the right onboarding and guidance. They need to be well informed of the methods you will be using for testing, the expectations and the overall objectives and goals of the testing. It is advisable, if at all feasible, to organize testing sessions with one or two leaders, where testers can help each other and have the possibility to ask questions and get help in the spot from the leaders. Another important aspect to consider is test data. You must have enough data in your test server to allow for the testing of different test cases.
What are you testing

What are you looking for?
How?
20-30 users. Recommended 2 months (plan ahead!). Decide distribution (locations). Do not pick the easiest or the most complex. Keep it simple but challenge your solution.
Considerations for evaluating your pilot
You should define your indicators for evaluating your results and decide your strategy for piloting your system You could use your current system and the new system in parallel for a few months or simply replace it. Both strategies have advantages and disadvantages and you should analyze them carefully with your team before pilotin.
Some advantages of having the current and new system in parallel are:
Some disadvantages are:
Scaling up a DHIS2 Android implementation is a complex but manageable process that begins after thorough testing and piloting. At this stage, decisions must be made regarding hardware acquisition, app distribution strategy, mobile device management, training programs, and—if relevant—SMS infrastructure. Planning well at this stage ensures stability, sustainability, and user satisfaction as the system is deployed at larger scale.
Initially you should buy different devices to allow users to evaluate them and provide you with feedback. Once the device that you will be using is decided upon, you should only buy 10 or less units, or whatever is needed for the testing and the pilot phases. Only when the pilot is coming to completion, you should buy equipment for the next 6 months roll-out. Some very large projects will take years for a national roll-out, and your hardware adquisicion plan should expand across years. Recommendations on the technical specs for devices are in the chapter Mobile devices specifications.
You should consider the feasibility of using a BYOD policy - this format allows users to bring their own devices, as long as they satisfy a minimum technical standard, which you will define for your project. You will normally offer some sort of incentive, likely to be in the form of eCash or airtime. The advantages of this approach are obvious: it avoids the large initial cost for acquisition, as well as it reduces the administration costs and logistics considerations. On the other hand, you will have the challenge of a very heterogeneous hardware environment, meaning different devices and Android OS versions. This mainly affects the debugging process.
The DHIS2 Android Capture App is actively maintained, with four releases per year: two regular feature (minor/major) releases, and two patch releases focused on bug fixes and stability improvements. Each version is tested for compatibility with supported DHIS2 server versions and includes detailed release notes.
In addition to these scheduled releases, interim APKs may also be published when new or updated translations are submitted through Transifex. These APKs reflect the latest available language support and are especially valuable for multilingual implementations or training needs in local languages.
The official distribution channels are:
As an implementer, once your testing and training materials are finalized, it is critical that the app version used during training is frozen and not updated automatically during rollout. New versions can introduce changes in UI, program rule behavior, or compatibility issues with your specific configuration. Each new version should be carefully tested before adoption.
For larger implementations, we recommend:
Note If MDM tools are not available, alternatives include APK distribution via a secure internal portal, shared folders, or QR-based install links generated during configuration.
For detailed guidance on MDM and alternative distribution options, refer to the Mobile Device Management section.
If a full MDM setup is not feasible, there are alternative methods to distribute and manage the DHIS2 Android app, depending on the technical capacity of your team and the scale of the implementation.
To support projects that need controlled rollout without complex infrastructure, the DHIS2 Android team provides an official APK Distribution Web App. This tool allows administrators to host a simple internal or public-facing webpage that shares trusted APK builds.
This method is especially effective when:
The app provides version history, changelogs, and contextual guidance. Devices must allow installations from unknown sources, but this approach is simple to maintain and widely adopted across DHIS2 implementations.
Installing the DHIS2 Android Capture App from the Google Play Store provides convenience, but should be used carefully in structured rollouts. Automatic updates can break compatibility or introduce UI changes unexpectedly. If Play Store is used, configure devices to disable auto-updates for DHIS2, or restrict them via managed Play Store in enterprise setups.
Some implementers prefer using F-Droid, an open-source Android app repository that allows for hosting private app channels. With F-Droid, you can offer secure, controlled app delivery without relying on commercial app stores. However, it has limitations in bandwidth control and device management.
Choosing the Right Approach
Ultimately, the right distribution and device management strategy depends on:
For smaller rollouts or pilots, a shared APK via a webpage or Google Drive folder might suffice. For national programs, an MDM combined with APK hosting and a robust SOP for app version control is highly recommended.
If your installation plans to include the use of SMS for transmitting selected records via SMS when mobile data is not available, you will need to establish a contract with a local aggregator which can provide you with an incoming number to receive the SMS. You should configure your server to receive & send SMSs - please see DHIS 2 developers documentation on SMS connections . You will need to estimate the number of messages per month to be able to forecast the monthly cost.
The process of selecting and signing a contract with an SMS provider varies by country and it depends on the procurement procedures of your organization.
Each project will need a mix of device types: phones, tablets, and Chromebooks. Most mobile devices are likely to be allocated to a dedicated user. Things to consider will include the nature of the job. For example, community workers will use smartphones or tablets. But health workers that work on a facility may prefer a tablet with an external keyboard or a Chromebook.
The actual large-scale acquisition should be delayed as much as possible. Initially, the recommendation is to purchase as few devices as possible for testing the configuration and given some level of choice to future users. Once a decision to move into a pilot is agreed, the second purchase should ideally be limited to the devices needed for the pilot. If the roll-out plan spans over a year, the acquisition of the devices should also be split across time: better devices at the same price point are constantly being offered by manufacturers on cycles that vary between 12-18 months.
Example of a total acquisition of 100 to 1000 devices.
| Project Month | Phase | Acquisition | # of devices |
|---|---|---|---|
| Month 2 | Design and initial configuration | Select 3 or 4 possible form factors. Buy from one or two manufacturer | 2-8 |
| Month 4-6 | Pilot | Buy only the devices required to complete the pilot | 10-30 |
| Month 6-12 | Roll out - phase 1 | First mass-acquisition | 50-500 |
| Month X | Roll out Phase X | → | 50-500 |
| Month 36-48 | Upgrade replacement | Replace devices | X |
Mobile Device Management refers to software used for the administration of mobile devices. You will need an MDM software when you have to support hundreds of devices and it becomes necessary to control the apk file distribution across the devices, provide tech support and enforce institutional policies. Most options are offered as monthly-fee services. Some free apps offer kiosk mode, but charge a monthly fee for basic remote management.
The desirable features of an MDM software can be classified as basic and advanced. Here is a list of the desirable features:
When deciding which is the best MDM software for your needs you should try to answer the following questions:
In the next page you can find a list of available MDM software (please keep in mind that prices and conditions will change over time).
Note
Check the specific Mobile Device Management Guideline for more information about this topic.
An important step before roll up, is the training of the users and if necessary, the training of the teams providing support to the users. There are many training strategies that you can follow and it will depend on the size of the group that needs to be trained, their skill level, the time frame available, the budget, etc. It is important that you put time and energy into designing your training strategy and allocate enough time to accomplish your training goals. Having your users well trained and informed will reduce user’s anxiety and adoption problems and it will also increase the quality of the data collected.
When preparing for the training, ensure that all the practical technical requirements have been met. This includes having the tablets/mobile devices ready, with the new DHIS 2 Capture Android Application installed. Depending on the availability of internet connectivity at the area where you will be performing the training, you might have all the tablets pre-synched with the server, so that you have enough data and the right configuration for the training.. Before doing the training, the exercises should be tested to ensure everything is working. Troubleshoot issues detected during testing so they do not arise during training. You may want to do a second round of the test to spot any issues missed in the first round.
If the training is done with pre-synched data and configuration, at the end of the training, make sure to let the trainees experience the App accessing the DHIS 2 remote server. This will give the trainees the possibility to experience real-life sync experience, which may include delays in the network. Without experiencing delays, they may later interpret network delays as faults in their device.
Following, there are some guidelines on preparing the budget which are taken from the DHIS 2 Community Health Information System Guidelines published by the University of Oslo:
The DHIS 2 Community Health Information System Guidelines document written by the University of Oslo recommends that you consider:
Be aware of the number of attendees you expect at each training, as providing sufficient materials and space will be necessary. Event space should be large enough for the group and also appropriate for the planned activities.
In the same document we find recommendation for the training materials as well, which we include here. The materials you will need for your trainings will depend on your activities. To ensure you are planning for everything, walk through your training agenda with a partner, and discuss what will be done for each part of the training, taking note of the materials needed.
The agenda for training sessions should be defined well-ahead of the training and included in materials distributed.
User documentation should be packaged in Minimal Manuals. These manuals explain a specific work task (e.g. enter monthly data from village health register or compare health in your village with the neighboring villages). After explaining the work task, the Minimal Manual provides numbered step-by-step instructions with screenshots, so that users recognize what to do. Keep in mind that Minimal Manuals do NOT explain the functionality of the app, one by one, like a typical vendor user manual. Since users prefer doing and not reading, the manuals should be a short as possible while still containing all steps.
At this stage you should be ready to roll out the devices and the App to your end users. In this step you will have to prepare for the cut-over and coordinate the go-live, you will need to decide if you will keep parallel systems in case you are using other Apps or do a straight replacement. As far as paper and manual processes go, you will also need to decide if you want to eliminate them, replicate them or keep a duplicate. Make sure you pick carefully the time to go live. Pick a time where teams will be available to spend the extra time and effort adapting to using the new App and also make sure extra support is available during the initial stages.

Following we include recommendations for this phase of the implementation from the DHIS 2 Community Health Information System Guidelines document written by the University of Oslo.
The end users of the newly rolled out App, should have one point of support. Ideally their supervisor can provide this one point of support. Since users know their supervisor and get support for other issues, having the supervisors supporting the App is an advantage.
You might already have in place a multi-tiered support system for the web based DHIS 2 and perhaps you can use it to also provide support with the App. Multi-tiered means simple issues are able to be addressed by lower level supervisors and more difficult or complex issues are move up the tiers until they reach someone who is able to address them. The vast majority of issues requiring support will be simple issues that should be able to be addressed by the first tier of support. Often this first tier is the user’s direct supervisors. This tier should be able to address simple hardware and software issues. If the supervisors cannot resolve the issue that will then have to escalate it to a higher tier. Tier Two requests are often addressed by district level or sub-national information systems officers, who are trained to manage system configuration issues and all advanced issues around the user interface, data imports and exports. Tier Three requests are typically addressed by central level IT support persons. They should be able to respond to any back-end maintenance requests.
The number of tiers of support might vary based on the complexity and size of your project. Regardless of the number of tiers, it is essential that support requests can be submitted by any user directly through either the web, phone or by email. Once a request for support has been sent to the technical team should acknowledges receipt of the request within a short time period like 12 hours (2).
By now you should have a plan on how you are going to keep track of the devices you are handing out to your teams. Here are some best practices you might want to follow when tracking devices (2):
You should also reflect on Device Ownership and Usage. Right at the time of giving the devices (phones, tables, etc.) to the users, it is important to clarify the ‘ownership’ of the devices along with the responsibilities of maintenance, upkeep and loss. There is often confusion on whether the device is owned by the institution or the individual, and what the respective responsibilities are. However, if the end users are expected to use personal devices, it is all the more important to clarify issues on airtime/data cost along with the reimbursement mechanism (2).
| Task | Completed |
|---|---|
| Analysis of Technology Android App and Server Requirements | ☐ |
| Strategy for Data Security and Privacy | ☐ |
| DHIS 2 Server Set Up and Configuration | ☐ |
| DHIS 2 Server Instances | ☐ |
| Data Elements, Option Sets, Programs... | ☐ |
| Visual Configuration | ☐ |
| Defining Program Indicators and Legends | ☐ |
| Setting up the Program Rules | ☐ |
| Creation of Android User | ☐ |
| Sharing Settings and Security considerations | ☐ |
| Installation and App Setup | ☐ |
| Installing the App | ☐ |
| Login into the App | ☐ |
| Testing | ☐ |
| Internal testing | ☐ |
| UAT testing | ☐ |
| Field Testing / Pilot | ☐ |
| Pilot | ☐ |
| Scale Up | ☐ |
| Hardware acquisition | ☐ |
| App Distribution Strategy | ☐ |
| Mobile Device Management Strategy | ☐ |
| Telecommunication contracts | ☐ |
| Training | ☐ |
| Technical preparations | ☐ |
| Budgeting | ☐ |
| Agenda and Participants | ☐ |
| Materials | ☐ |
| Roll Out plan | ☐ |