Aplikace Import / export
In a primary health system, the HMIS typically involves a distributed application, where the same application is running in different geographical locations (PHCs,CHCs, hospitals, districts, and state). Many of these physical locations do not have Internet connectivity, and hence they work off-line. At some point (normally at the district level), the data needs to be synchronised in order to have a consolidated database for the a particular geographical region. For this, it is important to be able to export data from one location (which is working offline, say at the health facility level) and import into another one (say at the district level). This feature of exporting and importing is thus a crucial function of a HMIS. This feature also helps us overcome the dependency on the Internet to some degree, as data updates can be transferred via USB key where there is no connectivity, or through email where there is limited Internet connectivity. DHIS2 provides robust export-import functionality to fulfil these needs.
To access the Import/Export app, search in the top header bar for Import/Export. Import/Export app offers a number of services details for which can be found below.

Import dat
Záznam průběhu importu
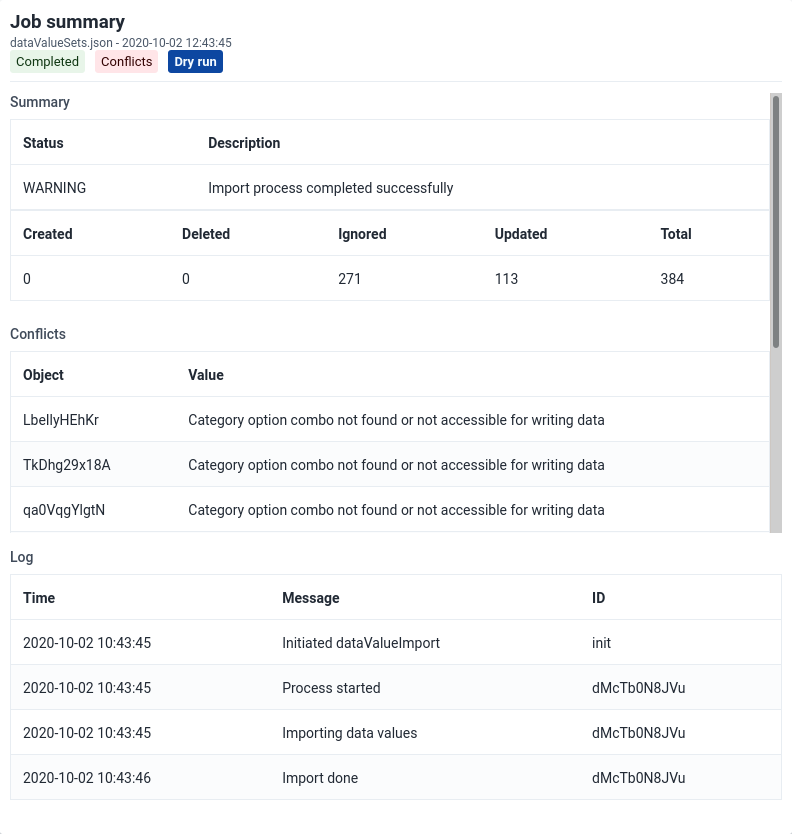
No matter what you import ("Data", "Events", "Org unit geometry", "Metadata" or "Tracked Entity Instances" data), you can always view the progress of the import by looking at the "Job Summary" at the top of the page.
Import souhrnů
On import request completion, we show import summaries above the import form. Any conflicts or errors are shown in the table under the main summary for the import.
Import metadat
Metadata Import can be accessed from the sidebar by clicking on Metadata Import.

-
Vyberte soubor, který chcete nahrát
-
Vyberte formát: JSON , CSV nebo XML
-
Vyberte vhodná nastavení pro:
- Identifikátor
- Režim importu zprávy
- Režim předehřátí
- Importní strategie
- Atomický režim
- Režim sloučení
-
Click Advanced options if you want to adjust one or more of the following settings before importing:
- Splachovací režim
- Přeskočit sdílení
- Přeskočit ověření
- Asynchronní
- Inkluzivní strategie
-
Click on the Import button which will upload the file and start the importing process.
Tip
It is highly recommend to use the Dry run option to test before importing data; to make sure you keep control over any changes to your Metadata, and to check for problems with out-of-sync data elements or organisation unit names
Note
If an organisation unit e.g.
Nduvuibu MCHPhad a unknown reference to an object with IDaaaU6Kr7Gtpidn, it means that the object with IDaaaU6Kr7Gtpidnwas not present in your imported file, and it was not found in the existing database.You can control this using Identifier option, to indicate if you want to allow objects with such invalid references to be imported or not. If you choose to import invalid references you will have to correct the reference manually in DHIS2 later.
Odpovídající identifikátory v DXF2
The DXF2 format currently support matching for two identifiers, the internal DHIS2 identifier (known as a UID), and also using an external identifier called called a "code". When the importer is trying to search for references (like the one above), it will first go to the UID field, and then to the code field. This allows you to import from legacy systems without having a UID for every meta-data object. I.e. if you are importing facility data from a legacy system, you can leave out the ID field completely (DHIS2 will fill this in for you) and put the legacy system's own identifiers in the code field, this identifier is required to be unique. This not only works for organisation units, but for all kinds of meta-data, allowing for easy import from other systems.
Import dat
Data Import can be accessed from the sidebar by clicking on Data Import.

-
Vyberte soubor, který chcete nahrát
-
Vyberte formát: JSON, CSV, XML, ADX nebo PDF
-
Vyberte vhodná nastavení pro:
- Strategie
- Předehřejte mezipaměť
-
Click Advanced options if you want to adjust one or more of the following settings before importing:
- Schéma ID datového prvku
- Schéma ID organizační jednotky
- ID schéma
- Přeskočit stávající kontrolu
-
Click on the Import button which will upload the file and start the importing process.
Tip
It is highly recommend to use the Dry run option to test before importing data; to make sure you keep control over any changes to your Metadata, and to check for problems with out-of-sync data elements or organisation unit names
PDF Data
DHIS2 supports import of data in the PDF format. This can be used to import data produced by off-line PDF data entry forms. Please refer to the section Data set management for details on how to produce a PDF form which can be used for off-line data entry.
To import a PDF data file, navigate to the PDF Data Import item in the side menu. Upload the completed PDF file and click Import.
Import událostí
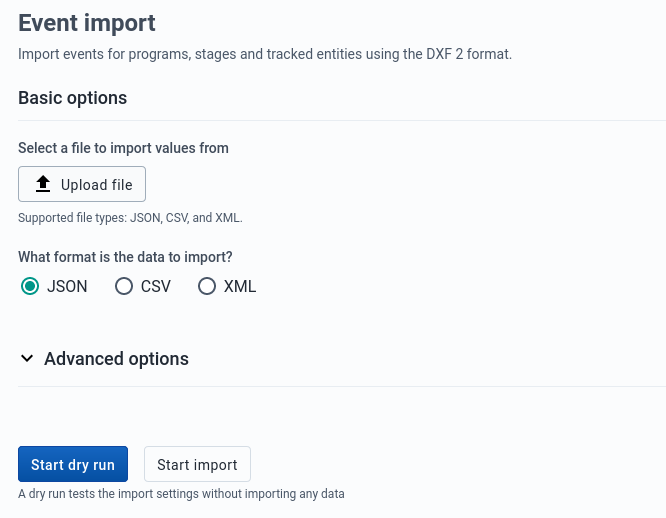
Event Import can be accessed from the sidebar by clicking on Event Import.
-
Vyberte formát: JSON , CSV nebo XML
-
Click Advanced options if you want to adjust one or more of the following settings before importing:
- Schéma ID události
- Schéma ID datového prvku
- Schéma ID organizační jednotky
- ID schéma
-
Click on the Import button which will upload the file and start the importing process.
Earth Engine Import
Earth Engine Import can be accessed from the sidebar by clicking on Earth Engine Import.
Import high resolution population data from WorldPop using Google Earth Engine. A Google Earth Engine account is required to use this importer.

Select which Earth Engine data should be imported
The first section of the form is used to configure the Earth Engine data to import.
-
Select which Earth Engine dataset should be imported. Currently the choices are Population and Population age groups.
-
After a dataset has been selected, a period must be selected. Only one period can be imported at a time.
-
Choose how the data should be rounded. By default data is not rounded.
-
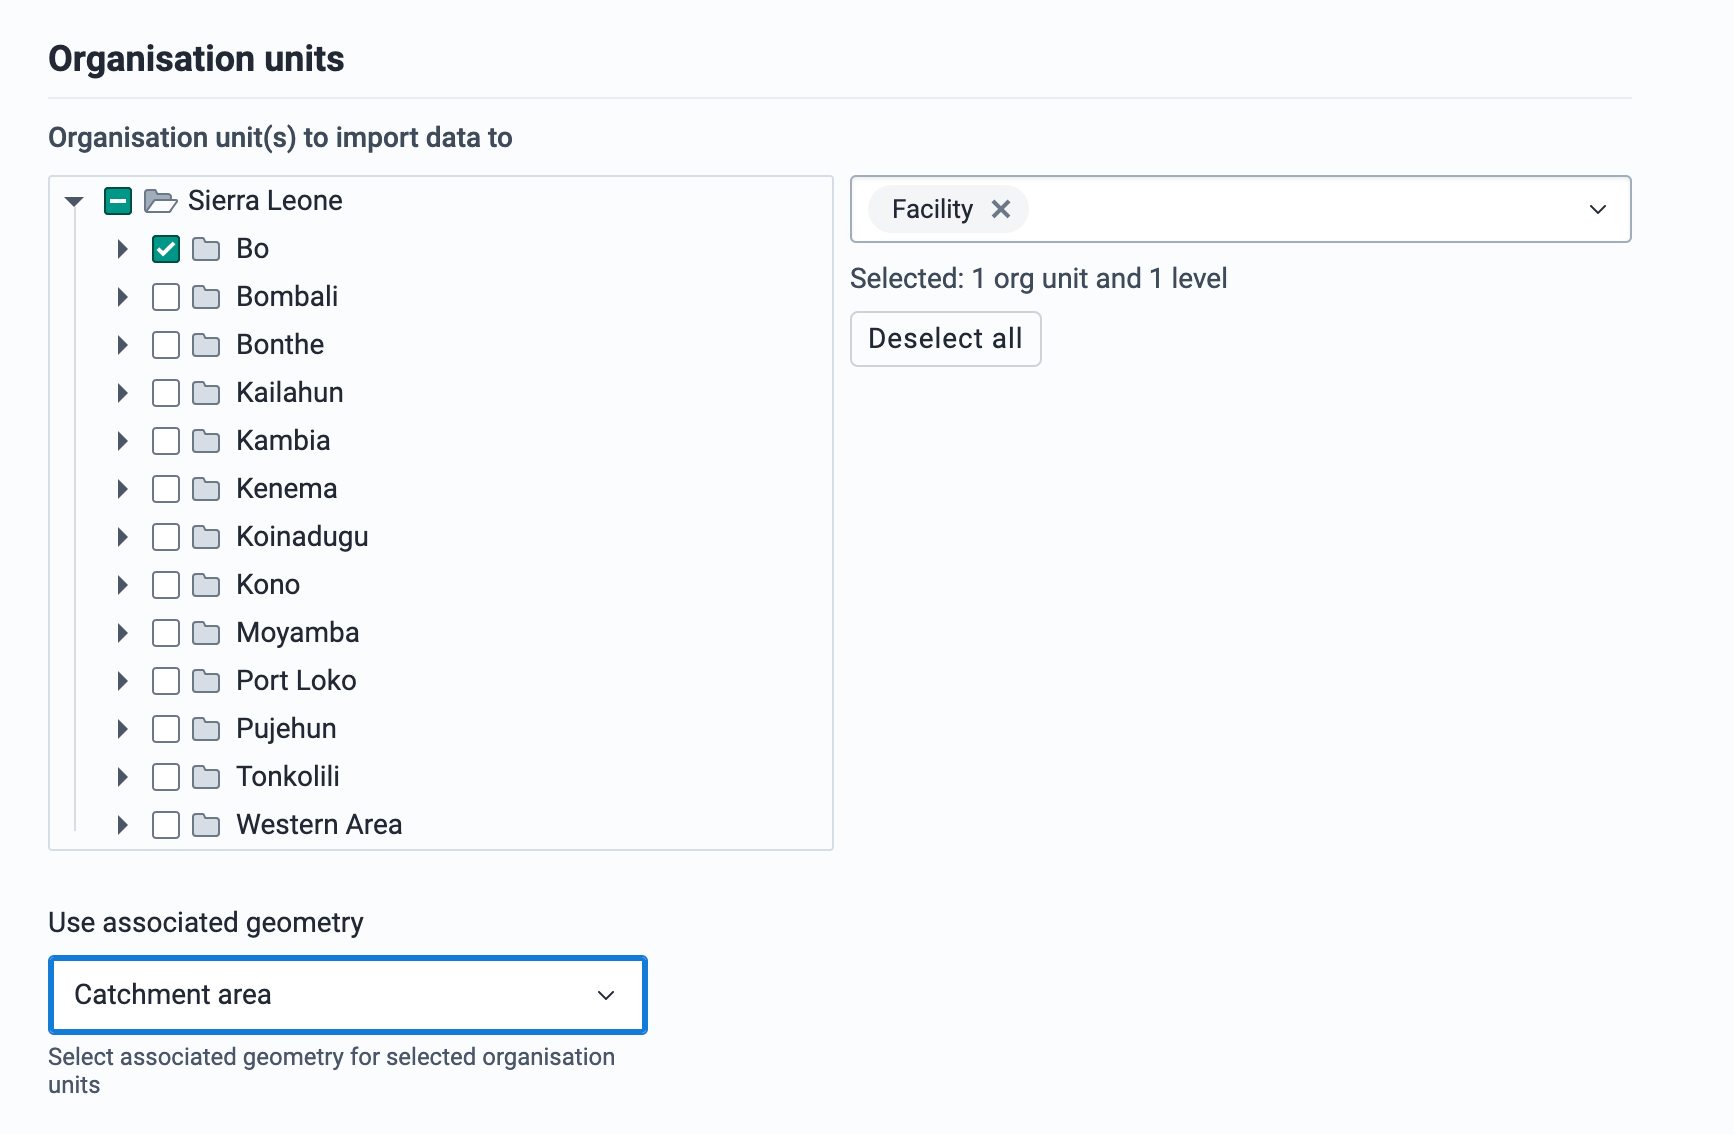
Select which organisation units to import data to. If you select facility level organisation units, then you must choose an associated geometry for the facilities. Without an associated geometry for facilities, the Earth Engine cannot determine the population.
Select the data elements to import the Earth Engine data into
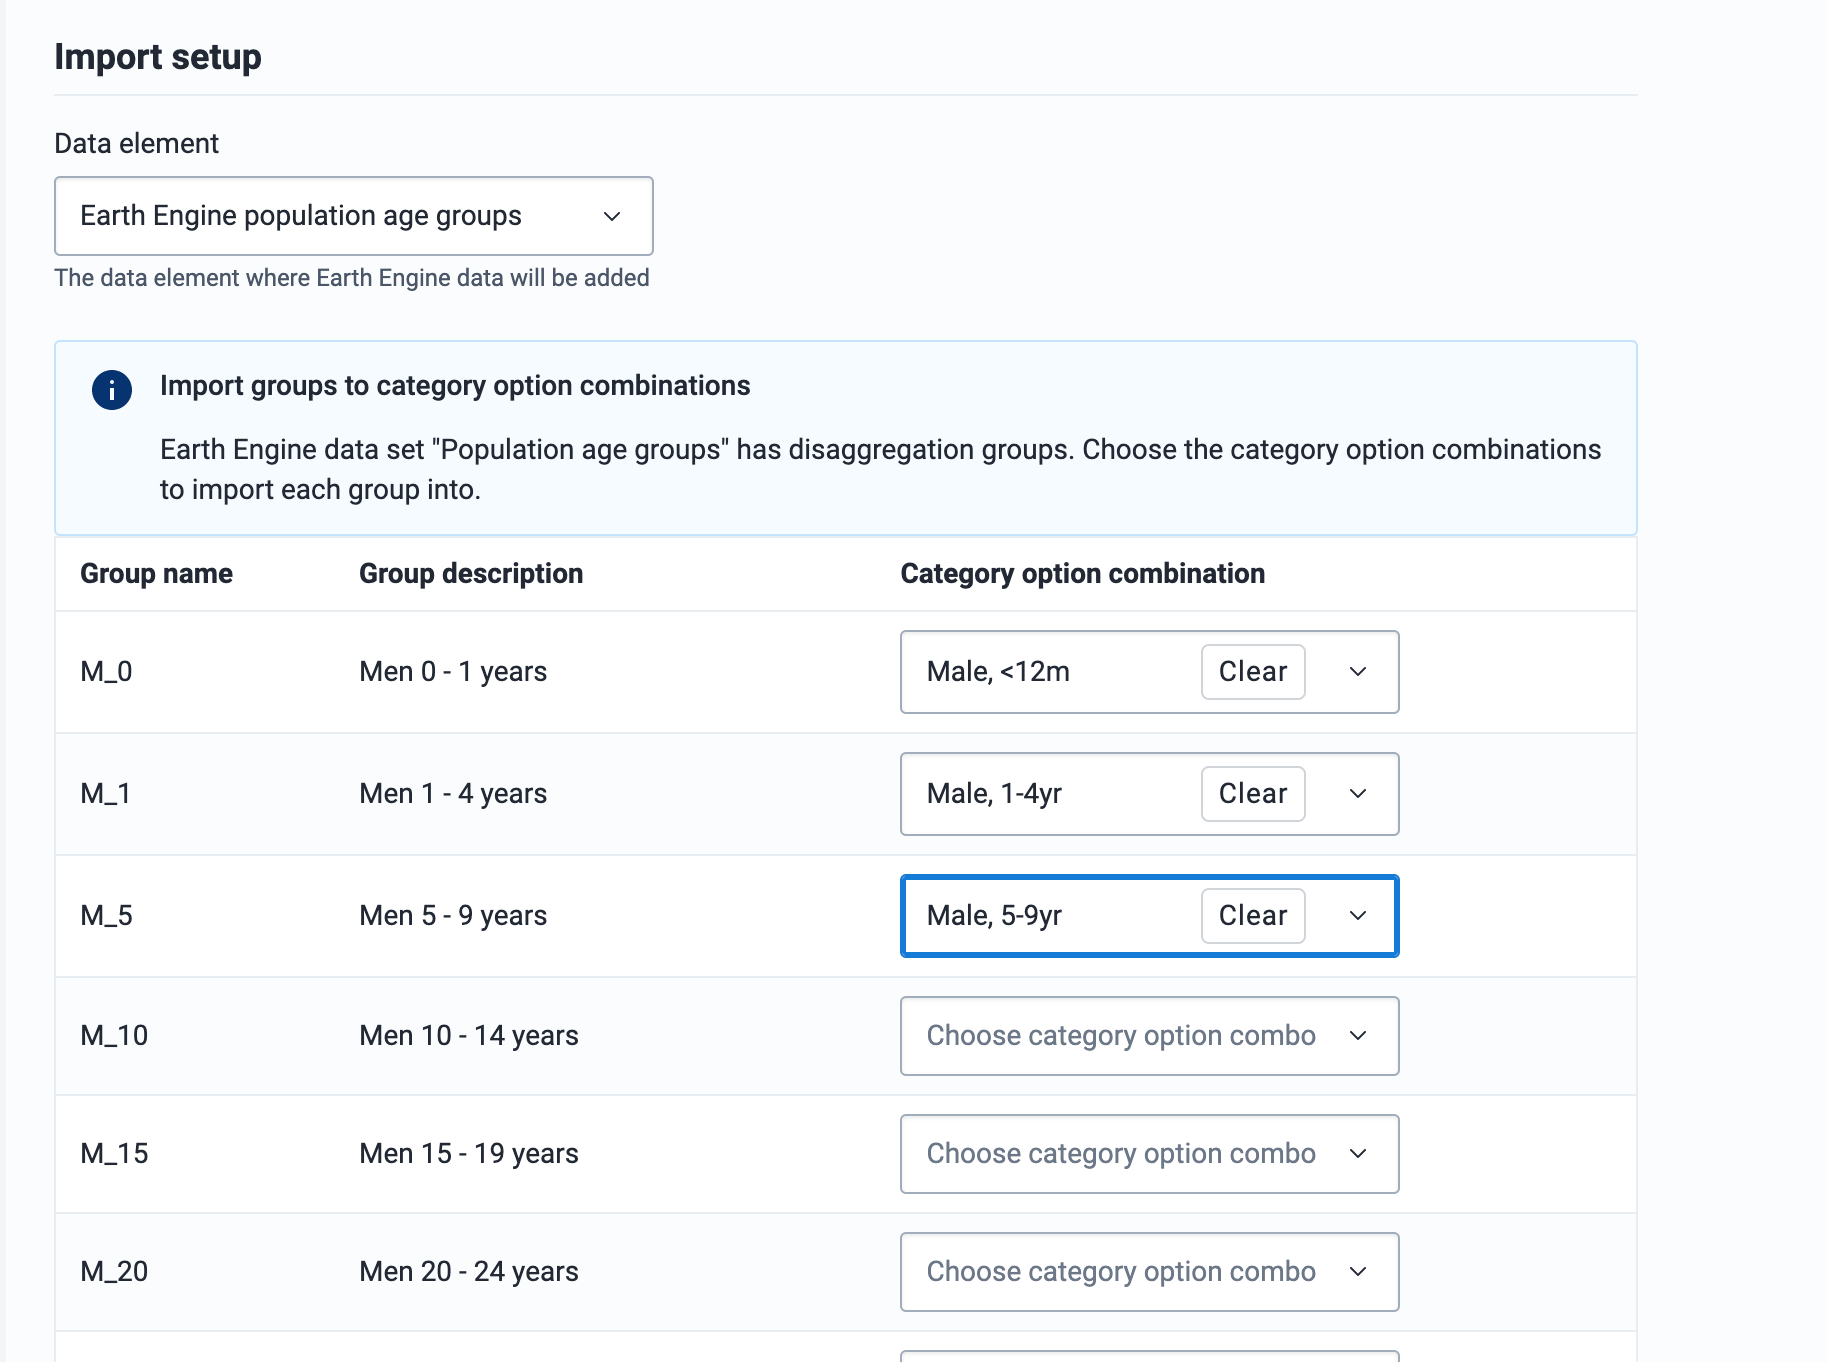
Once you have configured the Earth Engine dataset, you need to select which data element to import the data to. For datasets with disaggregation groups, such as "Population age groups", the DHIS2 data element must have disaggregations in the form of category option combos that match the Earth Engine dataset disaggregation groups.
Configuring data elements for Earth Engine import
When configuring the DHIS2 data elements that will contain Earth Engine data, if you plan to import data to multiple org unit levels, ensure that those levels are added as Aggregation Levels in the data element configuration.
Some Earth Engine datasets contain disaggregation groups, the DHIS2 data element must be configured with corresponding category option combos. For example the "Population age groups" dataset is disaggregated by gender (Male, Female) and 5-year age groups.
In DHIS2 this means that you must have a Male/Female category, and a 5-year age group category (<1yr, 1-4yr, 5-9yr, 10-14yr... 80+yr). These are combined into a category combination.
Pro-tip: To automatically match the category option combo to the Earth Engine disaggregation group, add a Code to each category option combo that matches the earth engine group name. For example, with "Population age groups", the groups are named: F_0, F_1, F_5..., M_0, M_1, M_5...
Run the import
Once the data element and category option combos have been selected, the Preview button is enabled. After reviewing the data you want to import, you can do a dry run first, or proceed with the actual import.

Organisation Unit Geometry Import
Accessed from the sidebar by clicking on Org Unit geometry import. Two geometry formats are supported: GeoJSON and GML. GeoJSON is the recommended format and can also be used to import associated geometries (catchment areas).
GeoJSON import

-
Upload a file using the GeoJSON format.
-
By default the GeoJSON feature id should match the organisation unit id.
-
Check Match GeoJSON property to organisation unit scheme to match by a feature propery. Type the GeoJSON property name and select the Organisation unit ID scheme (Id, Code or Name).
-
Check Import as associated geometry to import the GeoJSON features as associated geometries the organisation units (e.g. catchment areas). Select at geometry attribute where the data should be imported. This requires an attribure of type GeoJSON applied to Organisatiot unit. This attribute can be defined in the Maintenance app.
-
Click on the Start import button which will upload the file and start the importing process.
Tip
It is highly recommend to use the Dry run option to test before importing data; to make sure you keep control over any changes to your organisation unit geometries.
GML import
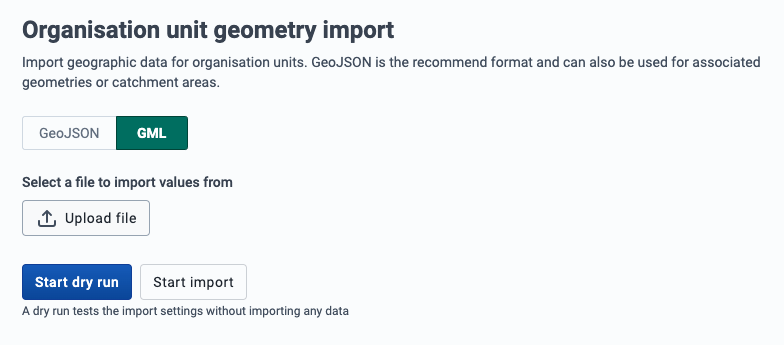
-
Upload a file using the GML (Geographic Markup Language) format.
-
Click on the Import button which will upload the file and start the importing process.
Import instancí trasovaných entit
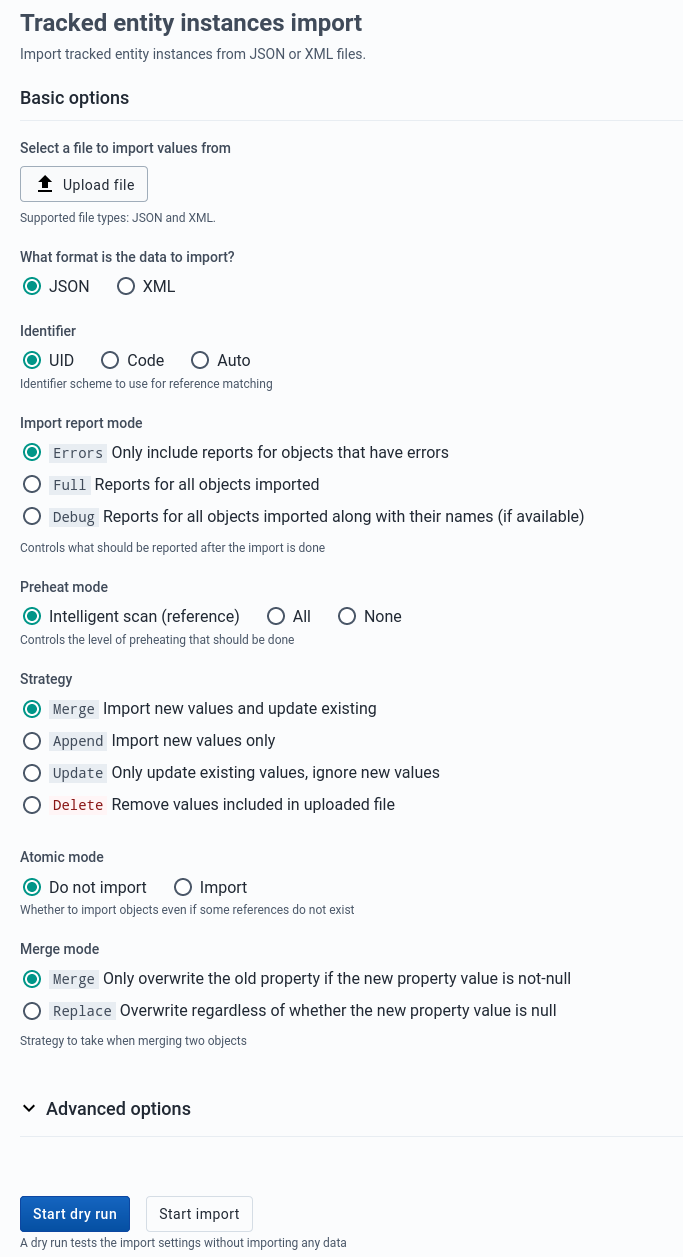
Tracked Entity Instances Import can be accessed from the sidebar by clicking on TEI Import.
-
Vyberte soubor, který chcete nahrát
-
Vyberte formát: JSON nebo XML
-
Vyberte vhodná nastavení pro:
- Identifikátor
- Režim importu zprávy
- Režim předehřátí
- Importní strategie
- Atomický režim
- Režim sloučení
-
Click Advanced options if you want to adjust one or more of the following settings before importing:
- Splachovací režim
- Přeskočit sdílení
- Přeskočit ověření
- Inkluzivní strategie
-
Click on the Import button which will upload the file and start the importing process.
Tip
It is highly recommend to use the Dry run option to test before importing data; to make sure you keep control over any changes to your Tracked Entity Instances.
Export dat
Export metadat
Metadata export can be accessed from the sidebar by clicking on Metadata export.

-
Vyberte seznam objektů, které chcete exportovat.
-
Select a format: JSON
-
Vyberte typ komprese: zip, gzip nebo uncompressed
-
Rozhodněte se, zda chcete zaškrtnout Přeskočit nastavení sdílení a přístupu
-
Click Export metadata which will open a new web-browser window that will give you a file to download to your local computer.
Export metadat se závislostmi
Metadata export with dependencies lets you create canned exports for metadata objects. This type of export will include the metadata objects and the metadata object's related objects; that is, the metadata which belong together with the main object.
Tabulka: Typy objektů a jejich závislosti
| Typ objektu | Závislosti zahrnuté v exportu |
|---|---|
| Datové sady | Datové prvky Sekce Indikátory Typy Indikátorů Atributy Formuláře zadávání dat Sady Legend Legendy Kombinace kategorií Kategorie Možnosti Kategorie Kombinace možností kategorií Sady možností |
| Programy | Formulář zadání dat Trasované entity Programové fáze Atributy programu Programové indikátory Programová pravidla Akce programových pravidel Proměnné programových pravidel Atributy Program Datové prvky Kombinace kategorií Kategorie Možnosti kategorií Kombinace možností kategorií Sady možností |
| Kombinace kategorií | Kombinace kategorií Kategorie Možnosti kategorií Kombinace možností kategorie Atributy |
| Ovládací panel | Položky Ovládacího panelu Grafy Grafy událostí Kontingenční tabulky Zprávy o událostech Mapy Zprávy Zdroje |
| Skupiny datových prvků | Datové prvky Kombinace kategorií Kategorie Možnosti kategorií Možnost kombinací kategorií Sady možností Atributy Sady legend Legendy |
| OptionSets | Možnost |


-
Select an object type: Data sets, Programs, Category combination, Dashboard, Data element groups or OptionSets.
-
Vyberte objekt.
-
Select a format: JSON
-
Vyberte typ komprese: Zip , GZip nebo Uncompressed
-
Click Export metadata dependencies which will open a new web-browser window that will give you a file to download to your local computer.
Export dat
Data export can be accessed from the sidebar by clicking on Data export.

-
Vyberte organizační jednotky, ze kterých chcete exportovat.
-
Select if you want export to include descendants of organisation units selected in Step 1 or only the manually selected organisation units.
-
Vyberte, které datové sady chcete exportovat.
-
Nastavte počáteční a koncové datum.
-
Vyberte formát: JSON, CSV, XML nebo ADX
-
Vyberte režim komprese: Zip , GZip nebo Nekomprimovaný
-
Click Advanced options if you want to adjust one or more of the following settings before exporting:
- Zahrnout smazané
- Schéma ID datového prvku
- Schéma ID organizační jednotky
- ID schéma
-
Click Export data which will open a new web-browser window that will give you a file to download to your local computer.
Export událostí
Event export can be accessed from the sidebar by clicking on Event export.
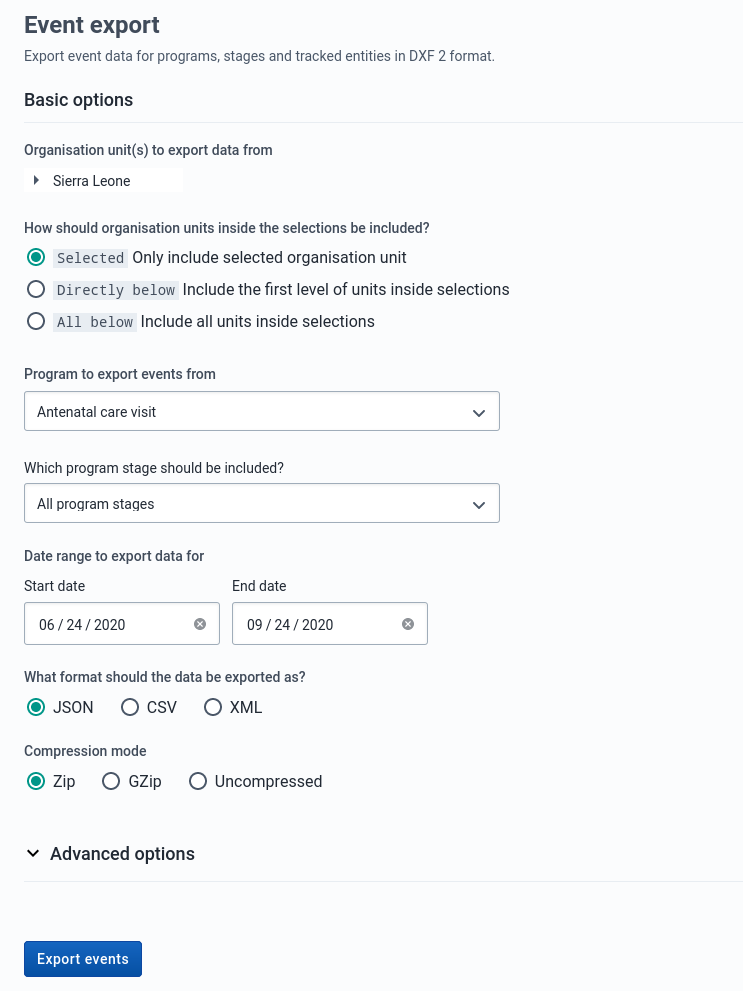
Data událostí nebo sledování můžete exportovat ve formátech JSON, CSV nebo XML.
-
Vyberte organizační jednotku.
-
Vyberte zařazení:
-
Selected: Export event data only for the selected organisation unit
-
Directly below: Export event data including the first level of the organisation units inside the selections as well as the selected organisation unit itself.
-
All below: Export event data for all organisation units inside the selections as well as the selected organisation unit itself.
-
-
Vyberte program a fázi programu (je-li k dispozici).
-
Nastavte počáteční a koncové datum.
-
Vyberte formát: JSON, CSV nebo XML.
-
Vyberte režim komprese: Zip, GZip nebo Uncompressed.
-
Click Advanced options if you want to adjust one or more of the following settings before exporting:
- Zahrnout smazané
- Schéma ID datového prvku
- Schéma ID organizační jednotky
- ID schéma
-
Click Export events which will open a new web-browser window that will give you a file to download to your local computer.
Export instancí trasované entity
Tracked entity instances export can be accessed from the sidebar by clicking on TEI export.
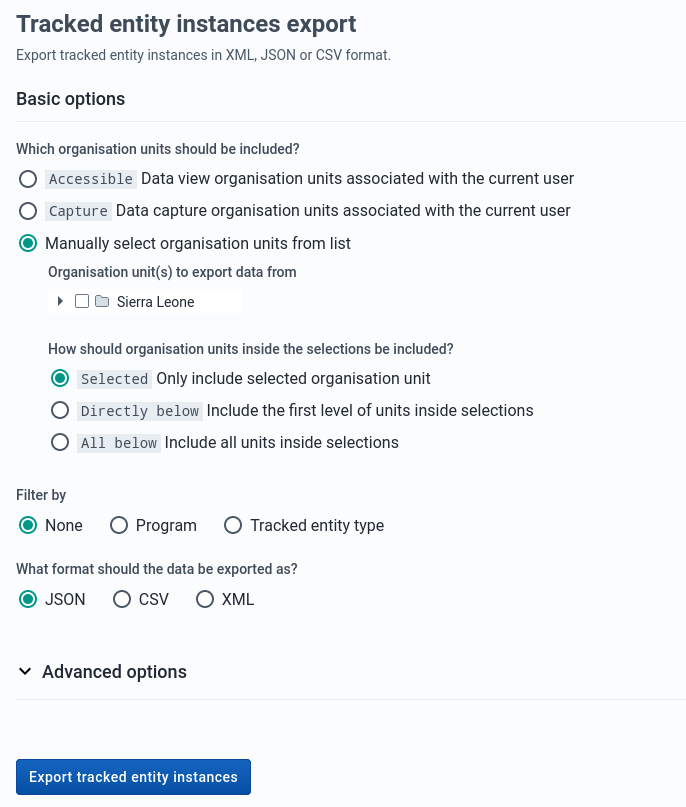
Data událostí nebo sledování můžete exportovat ve formátu JSON, CSV nebo XML.
-
Vyberte organizační jednotky, které mají být zahrnuty.
-
Rozhodněte se, zda chcete filtrovat podle programu nebo typu sledované entity.
-
Vyberte formát: JSON, CSV nebo XML.
-
Click Advanced options if you want to adjust one or more of the following settings before exporting:
- Filtrovat podle data poslední aktualizace
- Přiřazený uživatelský režim
- Zahrnout smazané
- Zahrnout všechny atributy
- Schéma ID datového prvku
- Schéma ID události
- Schéma ID organizační jednotky
- ID schéma
-
Click Export tracked entity instances which will open a new web-browser window that will give you a file to download to your local computer.
Přehled úloh
The job overview page can be accessed from the sidebar by clicking on Job Overview.

This page allows you to see the progress of all the imports you have started this session. You can see the list of all jobs on the left side and details about a specific selected job on the right.
Filtrování podle typu úlohy importu

By default jobs of all import types are shown in the job list, but you can filter categories you are interested in by clicking on the job type filters above the job list.
Obnovení předchozí úlohy

You can recreate previously run import jobs by clicking on the Recreate job button at the bottom of the page, assuming you have selected a job from the list. This will take you to the correct import page and fill in all the form details exactly as the job you chose to recreate.
Schémata
The various schemes used in many of the import and export pages are also known as identifier schemes and are used to map metadata objects to other metadata during import, and to render metadata as part of exports.
Tabulka: Dostupné hodnoty
| Schéma | Popis |
|---|---|
| ID, UID | Shoda na stabilním identifikátoru DHIS2, toto je výchozí schéma ID. |
| CODE | Shoda na kódu DHIS2, který se používá hlavně k výměně dat s externím systémem. |
| NÁZEV | Shoda se jménem DHIS2, mějte prosím na paměti, že toto používá to, co je k dispozici jako object.name, a nikoli přeložený název. Všimněte si také, že jména nejsou vždy jedinečná a v takovém případě je nelze použít. |
| ATTRIBUTE:ID | Shoda s atributem metadat, tento atribut je třeba přiřadit typu, ke kterému se shodujete, a také to, že je jedinečná vlastnost nastavena na true. Hlavním využitím je také výměna dat s externími systémy, protože oproti CODE má určité výhody, protože lze přidat více atributů, takže jej lze použít k synchronizaci s více než jedním systémem. |
ID schéma
The ID scheme applies to all types of objects, but can be overwritten by more specific object types.