Programy
Společné funkce událostí a sledování
Navigation Bar
Pomocí spodního navigačního panelu se můžete pohybovat z jedné obrazovky na druhou.
Event Dashboard
Při zadávání informací o události umožňuje spodní navigační lišta uživateli vybrat si mezi:
- Detaily
- Vstup dat
- Analytika (pokud je k dispozici)
- Poznámky

Ovládací panel TEI
Na hlavním panelu TEI umožňuje spodní navigační lišta uživateli vybrat si mezi:
- Detaily
- Analytika (pokud je k dispozici)
- Vztahy
- Poznámky

Seznam událostí pro programy pro sledování událostí a tracker
Spodní navigační lišta také umožňuje přepínání režimu vizualizace, pokud byl program události nebo sledovací program definován souřadnicemi. Více informací o zobrazení mapy naleznete v konkrétní sekci níže.
- Zobrazení Seznam
- Zobrazení mapy


Data Entry Flow
creating/editing an event
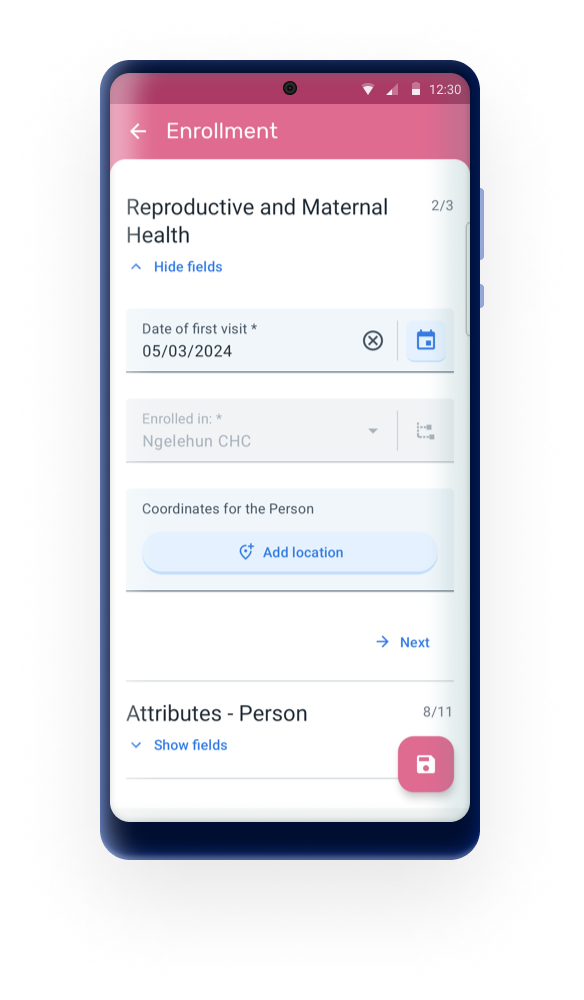
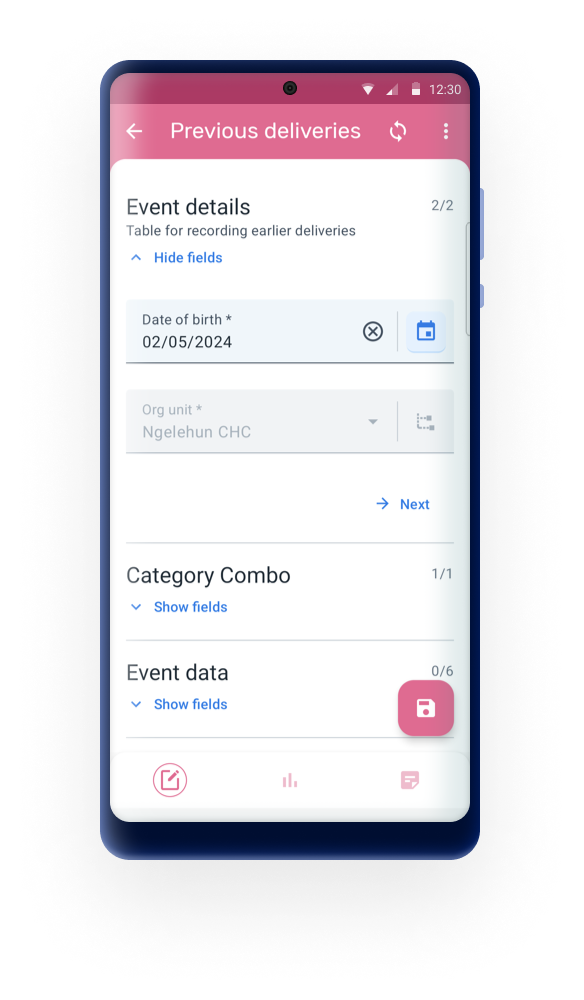
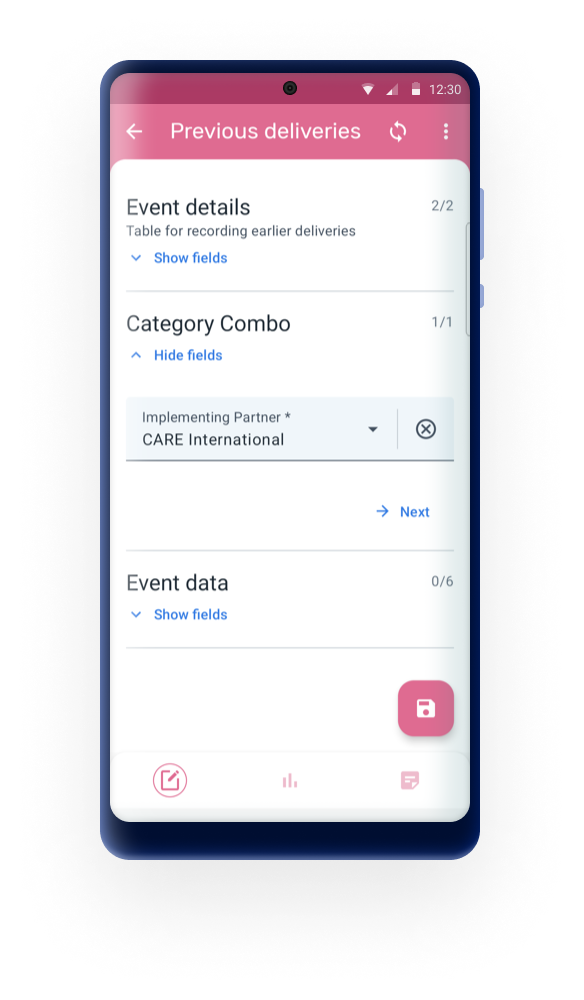
When creating an event or an enrollment, there are a number of fields that are not data elements or attributes, for example, event date, org unit, coordinates, enrollment date, category combinations.
Those elements are referred to as event/enrollment details and in previous versions they were displayed in different screens separated from the data elements or attributes. From 3.0, the details are displayed inside the form, as the first opened section for completion. Once they are filled in, for example when the user reopens the event or enrollment form, the details section will be visible and easily available, but collapsed to leave more space for the data collection.
Complete/Re-open event
When adding an event to an event program or inside a tracker program the user should fill the information and scroll down to make the save icon appear at the bottom right corner.

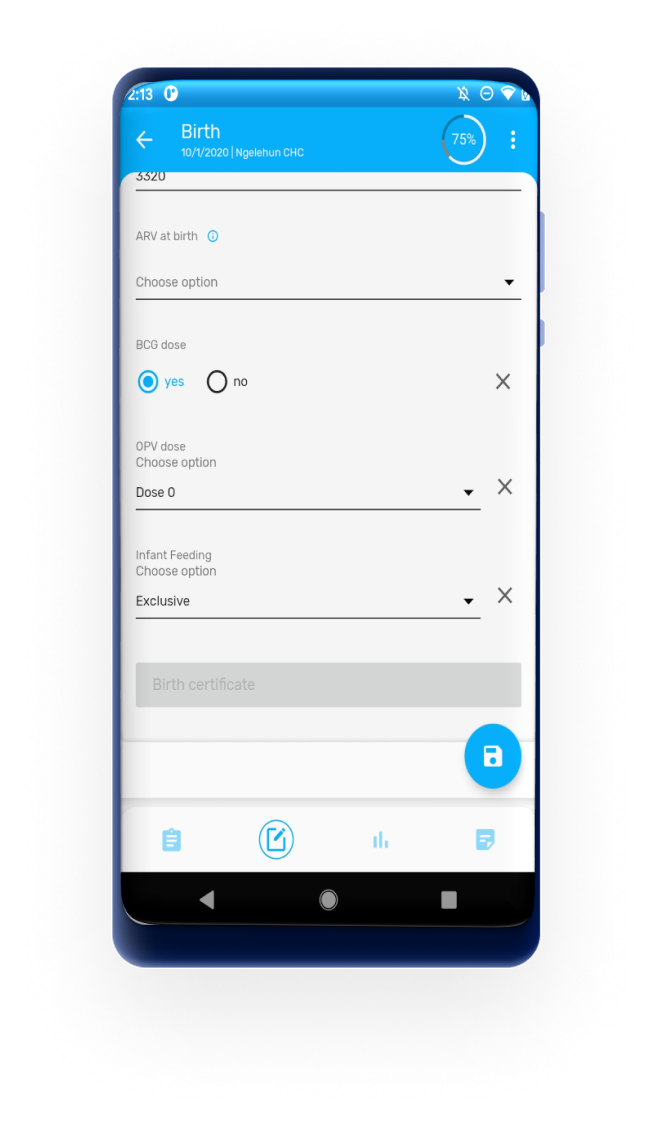
After tapping on the 'save' button, if the form does not contain any errors, warnings or empty mandatory fields, the app will ask if the user wants to complete the form. Two options are given to the user:
- 'Not now': The app saves the form and go back to the event listing screen (or TEI dashboard for tracker programs). The status of the event will remain open.
- 'Complete': The app saves the form and go back to the event listing. The status of the event changes to completed.

Note
To verify if an event is completed look at the icon, it must be a green checked box.
Note
If the event is non-editable, the app will hide the 'save' button
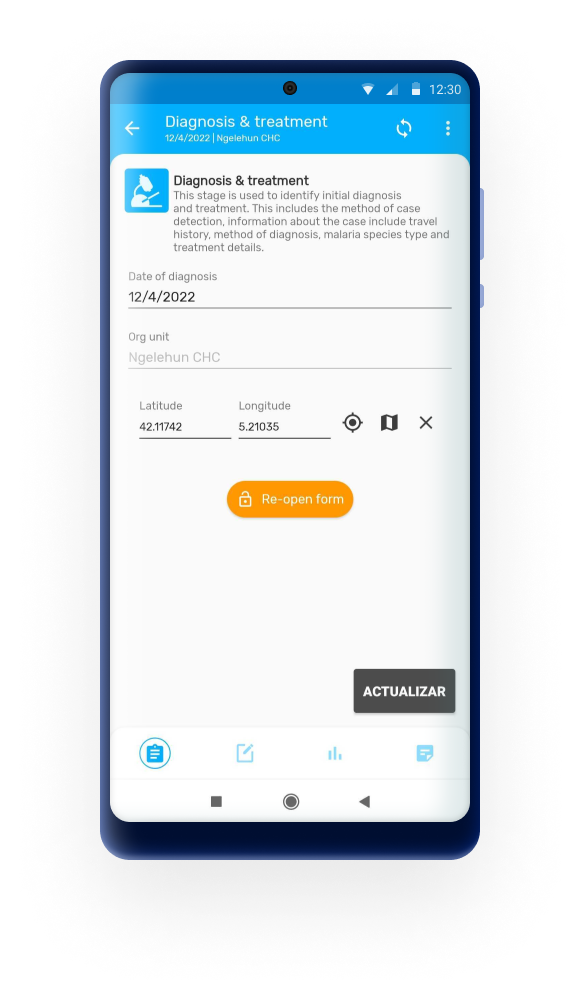
To re-open an event, the app now displays a "Re-open form" button in the Details screen. This button will be available only if the user has the correct authority (‘Uncomplete events’) to reopen a completed event.
Discard changes
Tapping the back arrow in an enrollment or event form now provide two options:
- 'Discard changes', which allows the user to restored the fields to their previous values or,
- 'Review' to remain in the form and update the fields.
If the user is in a new enrollment or event, the options allow the user to:
- 'Discard changes': The enrollment or event is not created or,
- 'Keep editing': Allowing the user to finish the enrollment or event.

From 3.1.0 Discard changes will not only apply to new events but also when edit them.
Procento dokončení pole
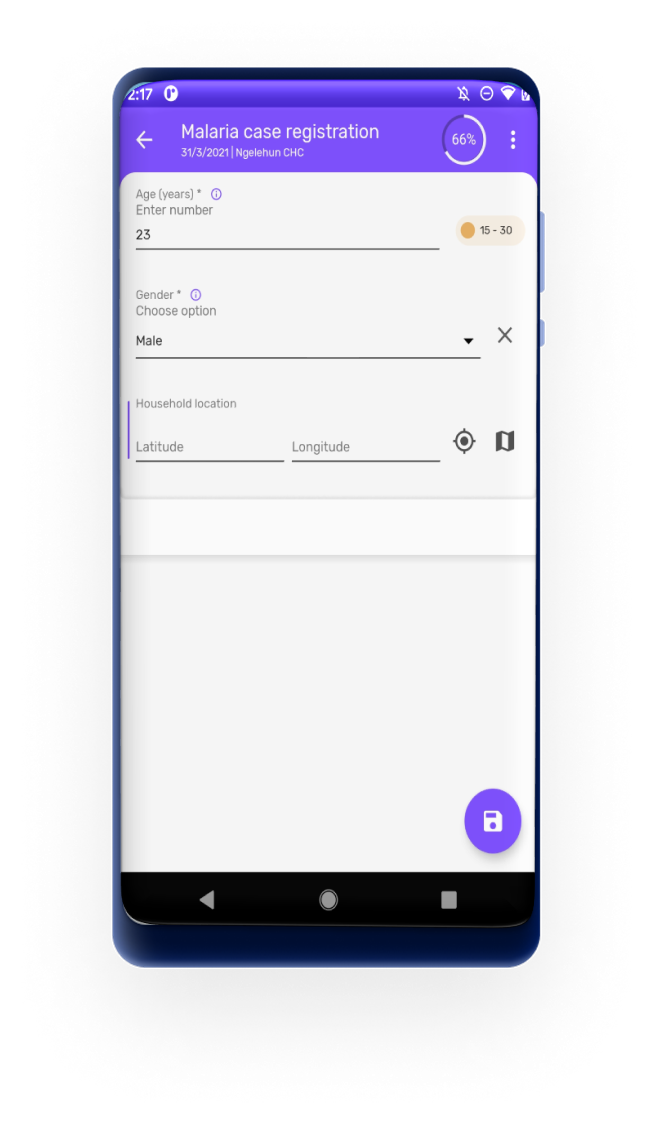
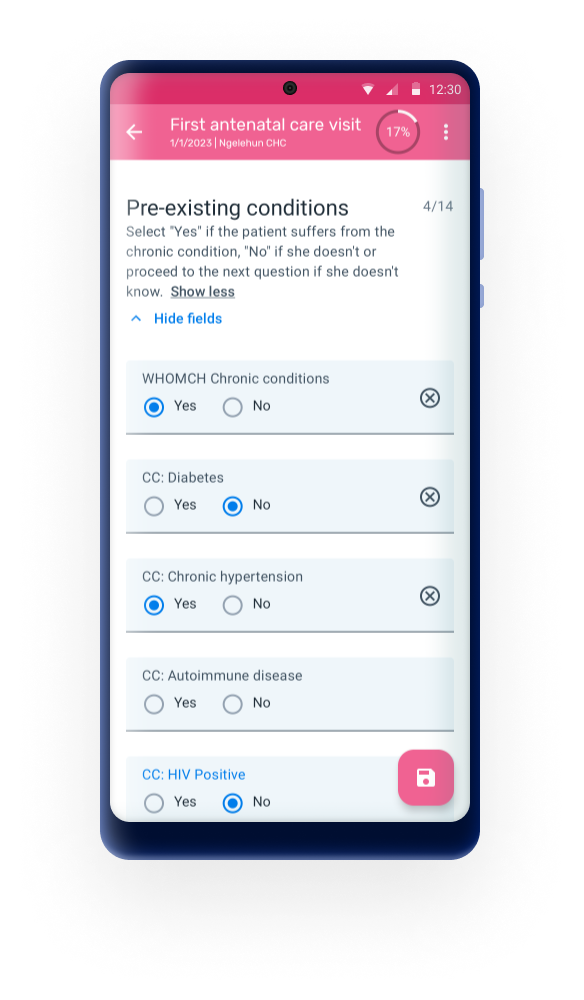
Procento dat dokončených v každé události se zobrazuje v pravém horním rohu události, když je otevřena po první registraci.
Poznámka
Zobrazení procent lze nastavit tak, aby se zobrazovalo nebo nezobrazovalo pomocí #capture_app_android_settings_webapp_appearance_program
Navigace sekcí
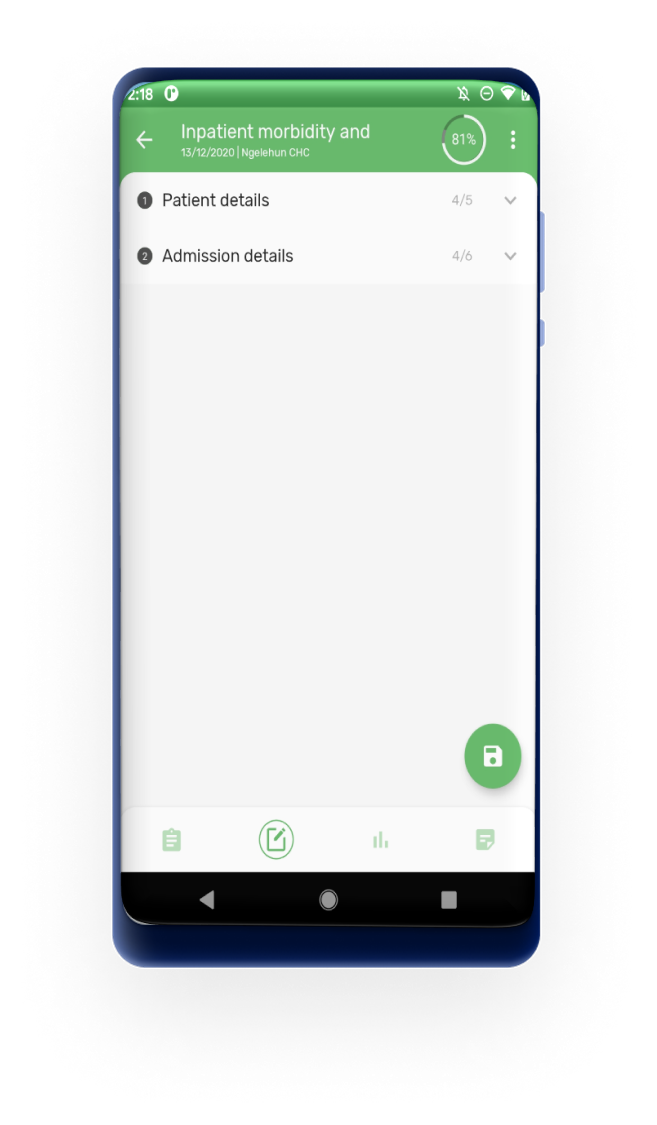
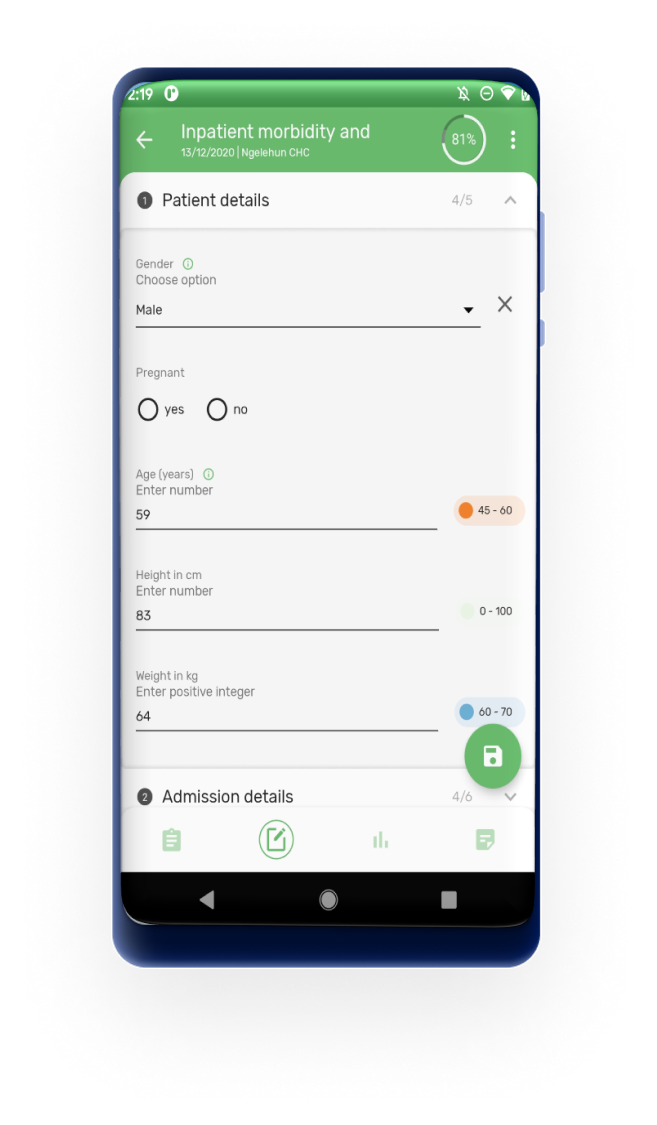
The sections can be collapsed for a simpler user experience. Sections in enrollment forms are also supported and are aligned with the design of the event sections.
Chybové zprávy
Když se uživatel pokusí dokončit událost nebo registraci, aplikace zobrazí seznam chybějících povinných polí. Sekce obsahující chybějící pole budou zvýrazněny, aby uživatel mohl chybějící pole najít.
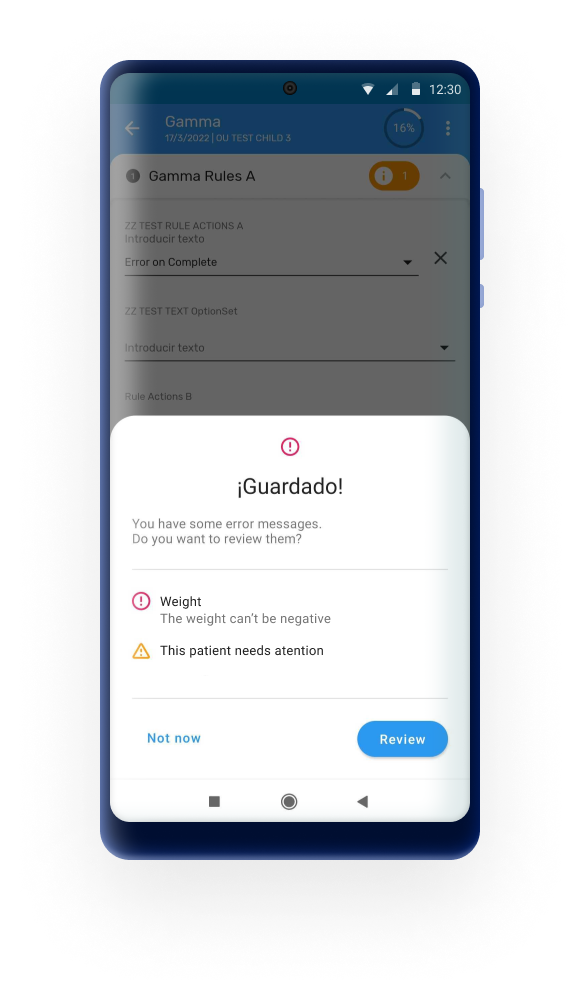
After tapping on the 'save' button, the app will display two options:
- 'Not now': Allowing the user to save the form with an 'open' status or,
- 'Review': The app will remain in the form for the user to fill the empty mandatory fields.
The errors and warnings are also shown as an indicator next to the section name including the number of errors for each section. A list of the fields with the errors/warnings when the user tries to save the form will be displayed.
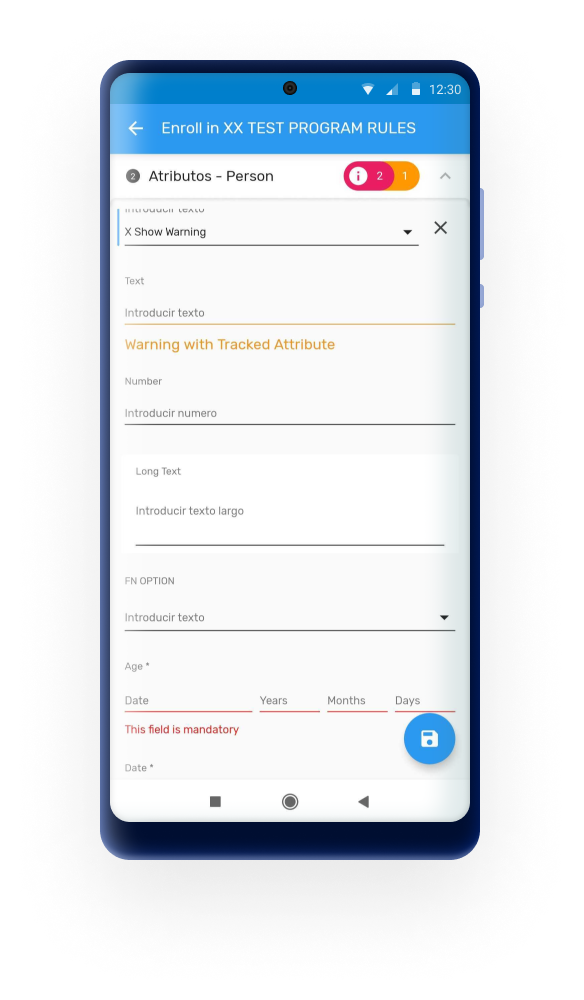
After tapping on the 'save' button, the app will display two options:
Warnings
- 'Not now': Allowing the user to save the form with an 'open' status or,
- 'Complete': The form is saved and its status changes to 'complete'
Errorrs
- 'Not now': Allowing the user to save the form with an 'open' status or,
- 'Review': The app will remain in the form for the user to review the fields with errors
If there is a combinantion of errors, warnings and missing mandatory fields, the app will display the 'Not now' and 'Review' options only.
Poznámky k události
K událostem je možné přidávat poznámky v programech jednotlivých událostí a událostech programových scén. Poznámky jsou k dispozici na nové kartě ve formuláři pro zadávání údajů.


Mapy
Map Layers
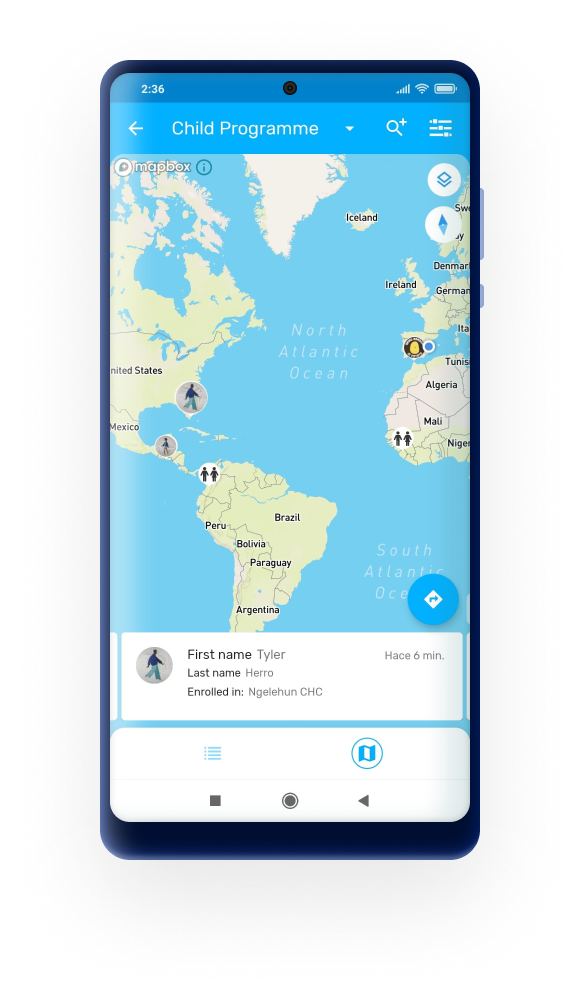
Při zobrazování map existují různé vrstvy, které lze zobrazit kliknutím na konkrétní tlačítko v pravém horním rohu. Uživatel si může vybrat jednu nebo více vrstev, které se mají zobrazit. Zobrazí se typy souřadnic i polygonů. Vrstvy jsou závislé na typu programu, jak je vysvětleno níže:
- Zobrazit události (pro programy bez registrace)
- Satelitní pohled
- Souřadnice TEI (standardně v programech s registrací)
- Souřadnice zápisu (pouze pro programy s registrací)
- Souřadnice fáze programu (pouze pro programy s registrací)
- Vztahy (pouze pro programy s registrací)
- Teplotní mapa (pouze pro programy s registrací)
- Atributy trasované entity (typ hodnoty souřadnic – pouze pro programy s registrací)
- Datové prvky (typ hodnoty souřadnic)

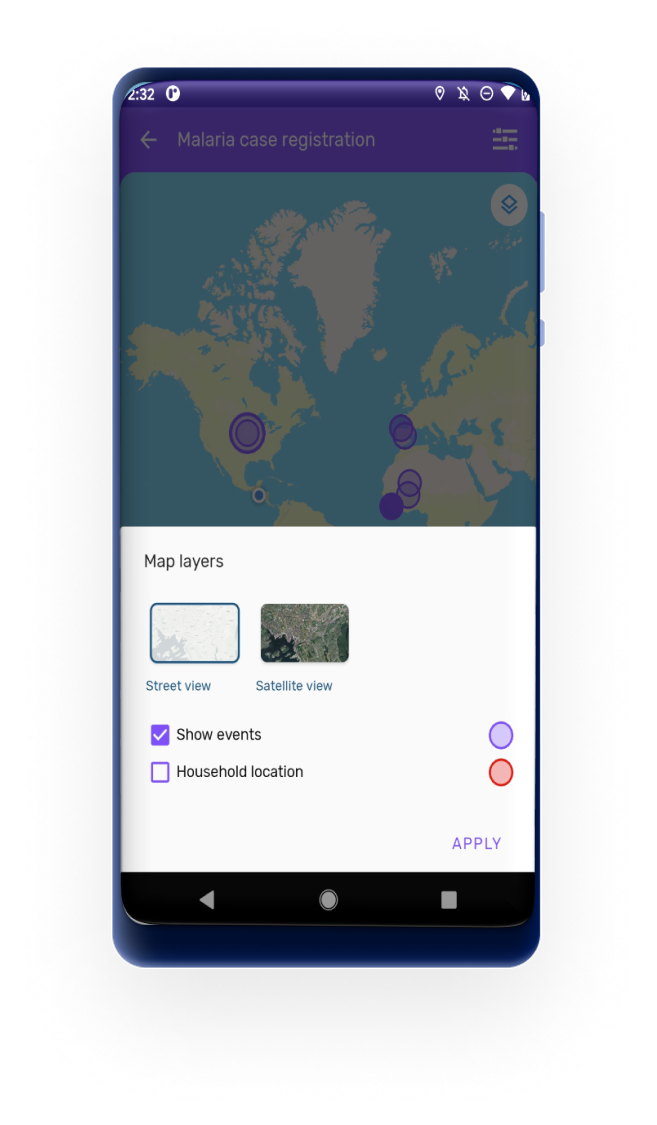
From 3.0 custom map layers are also supported by the Android App. These custom layers, configured in the maintenance app, will be downloaded and displayed as additional layers to the default ones. 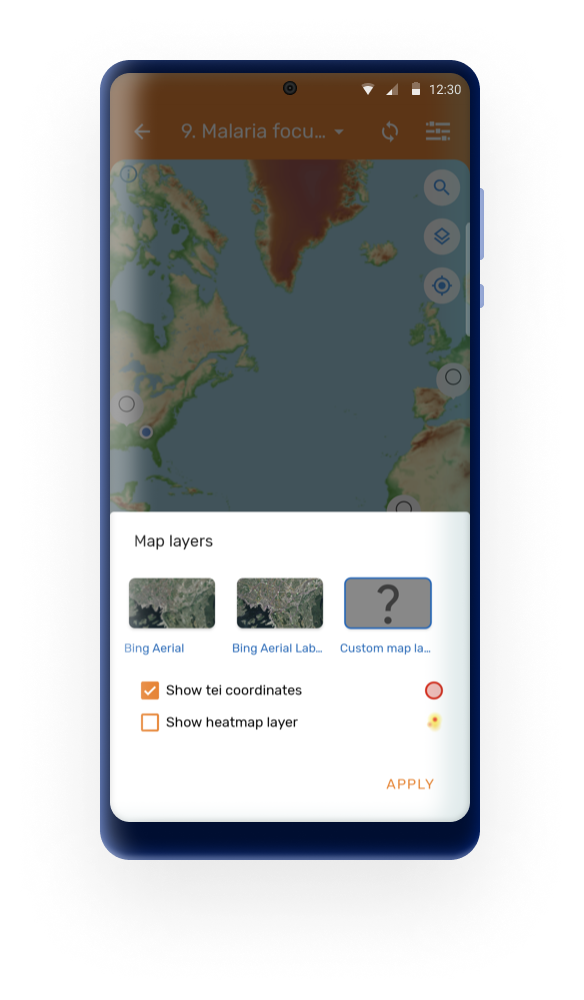
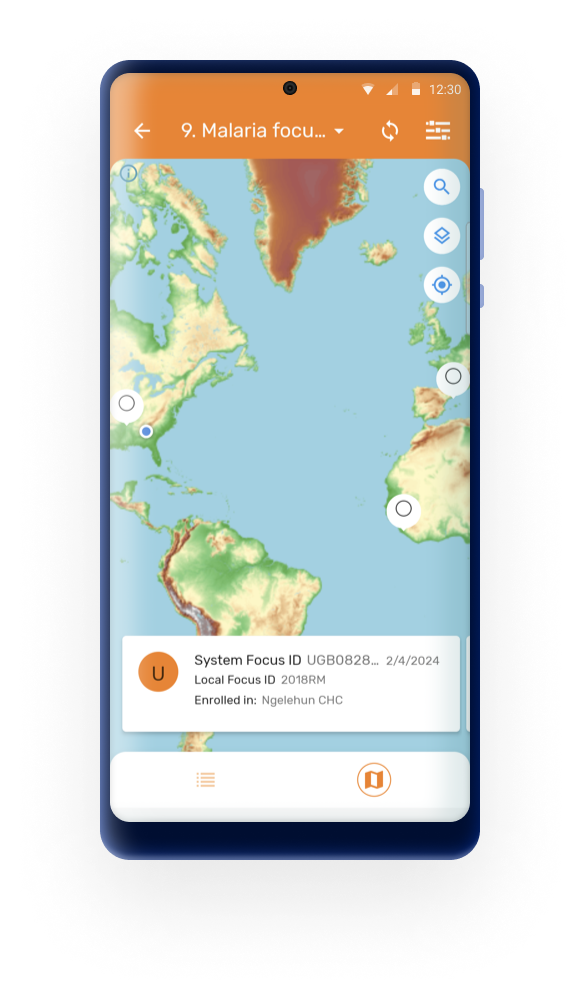
Mapový kolotoč
Na mapovém zobrazení programu je zobrazen karusel karet, jedna pro každý přihlášený TEI (programy Tracker) nebo Událost (programy událostí).
- Karty TEI na karuselu mají stejný design jako zobrazení seznamu TEI.
- Při vodorovném posouvání karuselu se mapa přiblíží na vybrané souřadnice. Pokud je pole souřadnic prázdné, místo toho se zobrazí zpráva.
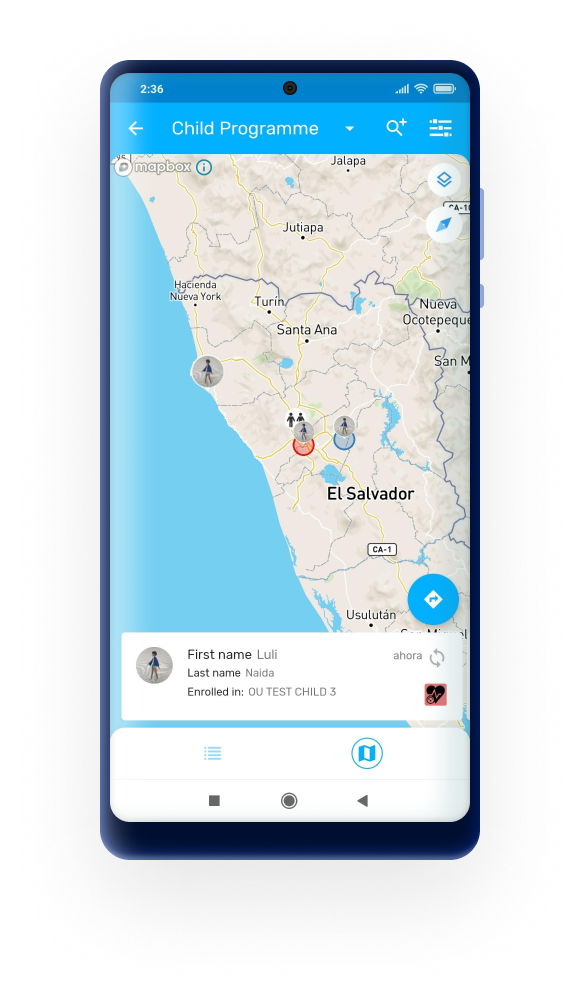
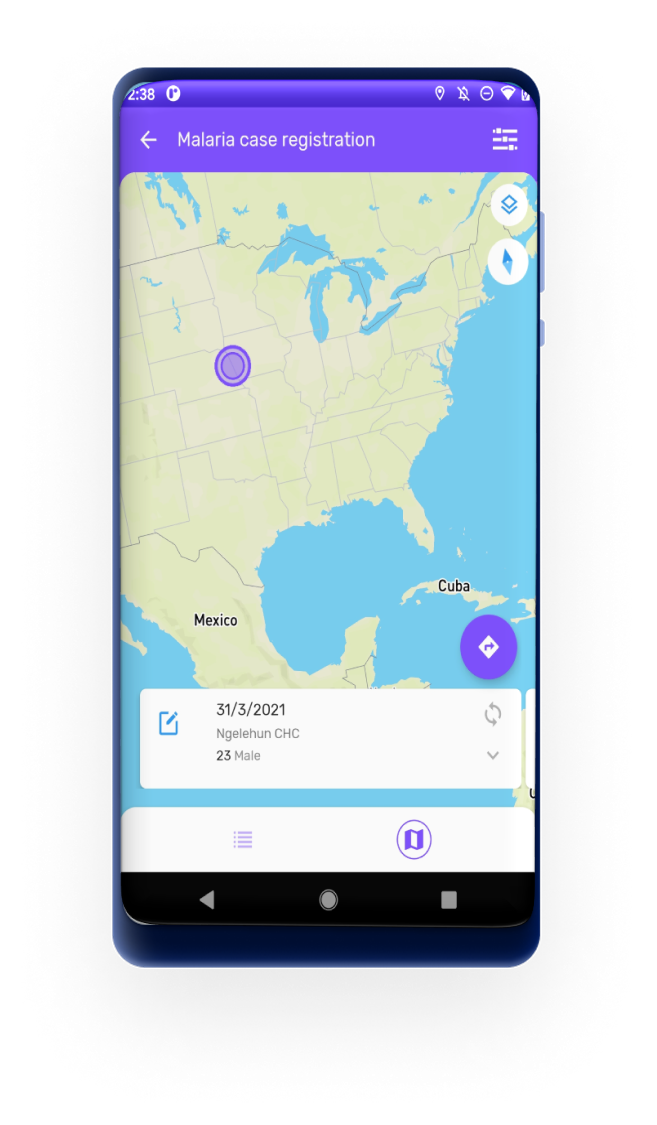
Každá karta zobrazuje trasované atributy entit (pro programy Tracker) a datové prvky (pro programy událostí) nakonfigurované jako 'Zobrazit v seznamu'.
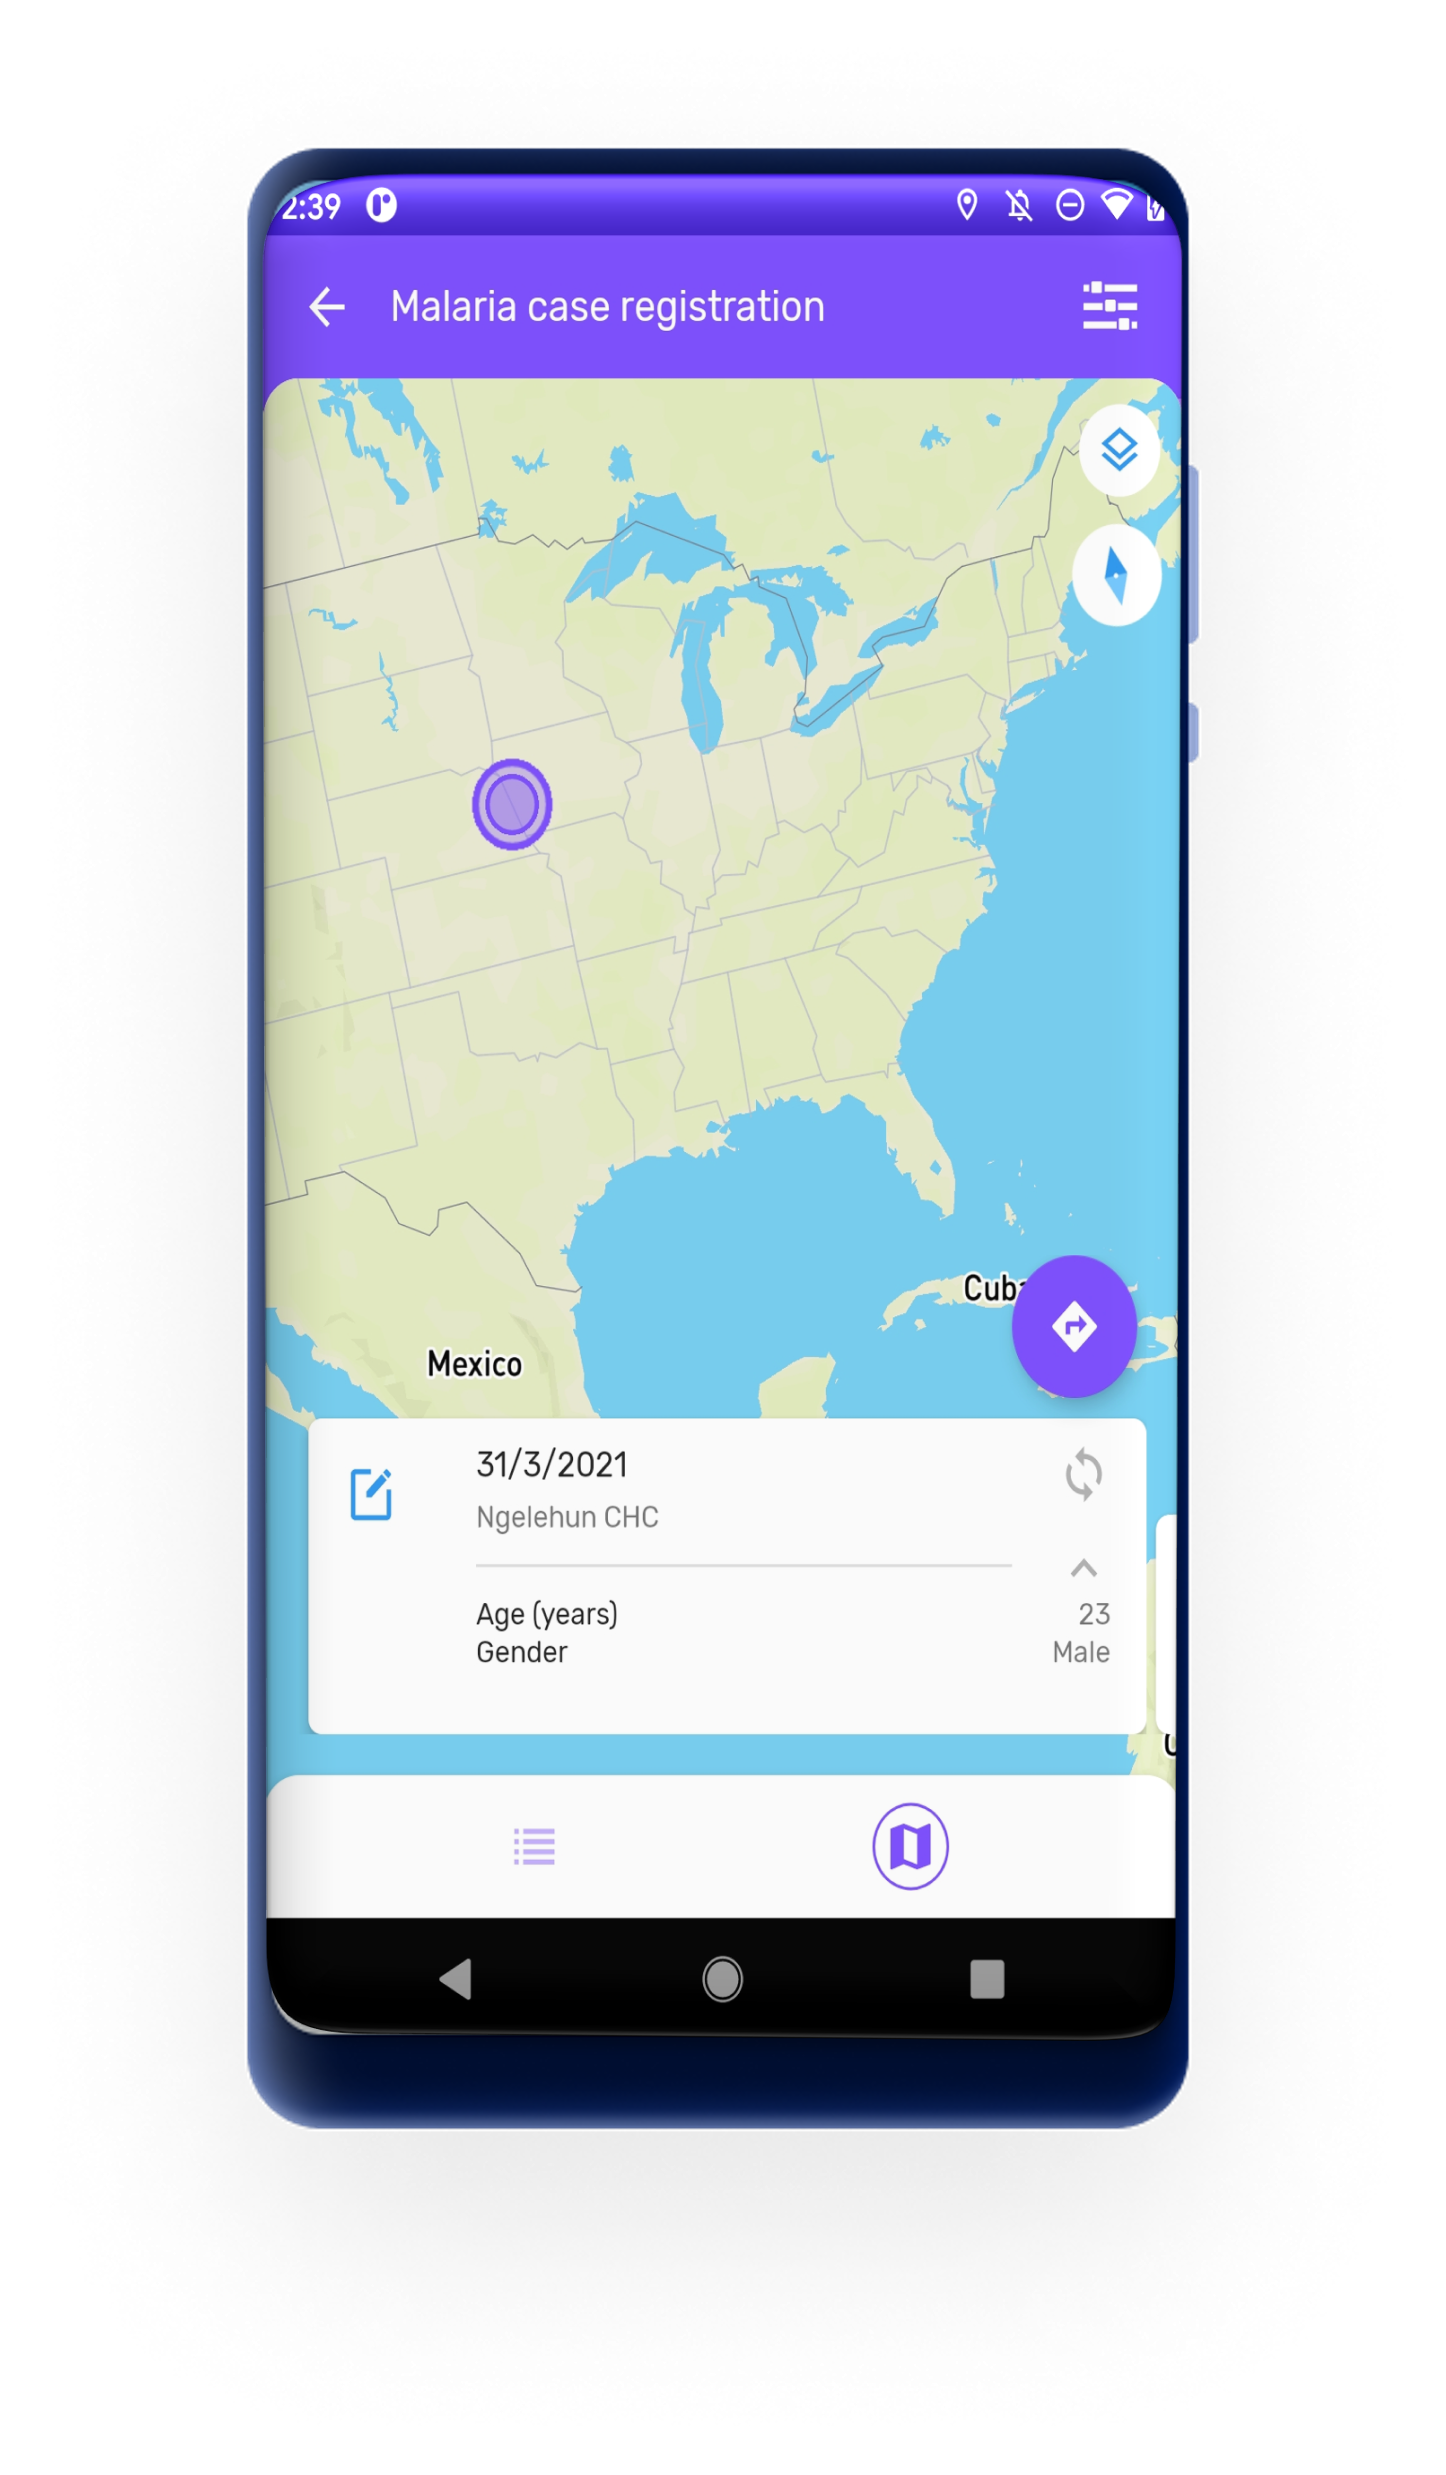
Current Location displayed in maps
Pokud uživatel aplikaci udělil oprávnění k poloze, mapa zobrazí aktuální polohu znázorněnou jako modrý barevný bod. Mapy v aplikaci DHIS2 Android Capture App obsahují možnost vycentrovat mapu na místo uživatele.

Navigation to Specific Location
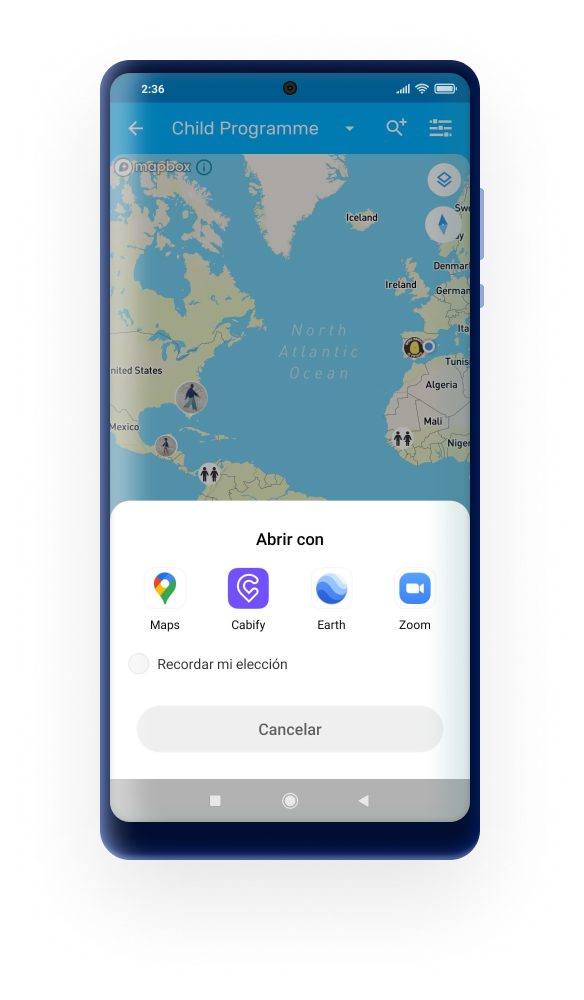
Pokud má TEI nebo událost souřadnice, zobrazí se v pravé horní části karty navigační ikona. Kliknutím otevřete umístění ve výchozí aplikaci map nakonfigurované v zařízení.

Maps Accuracy
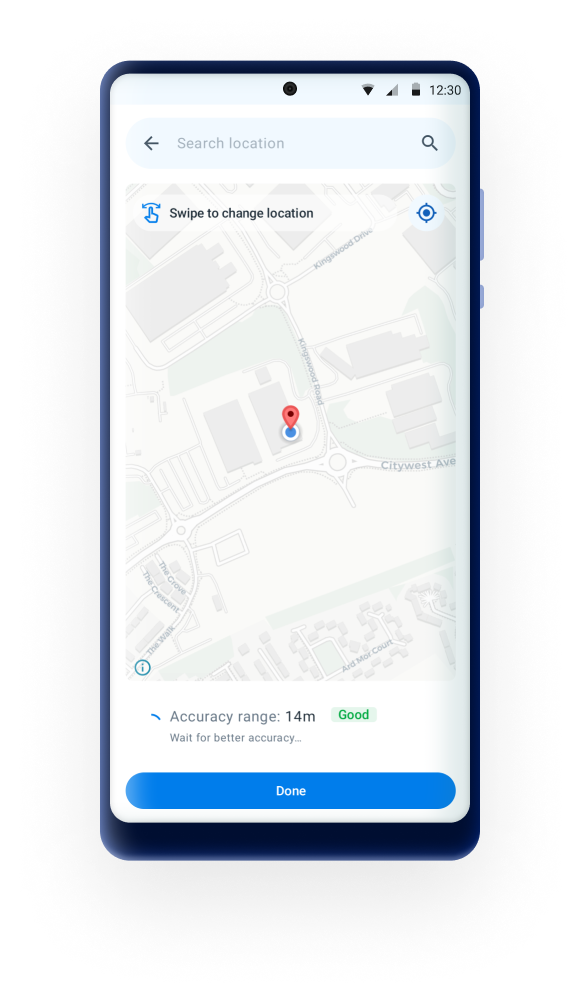
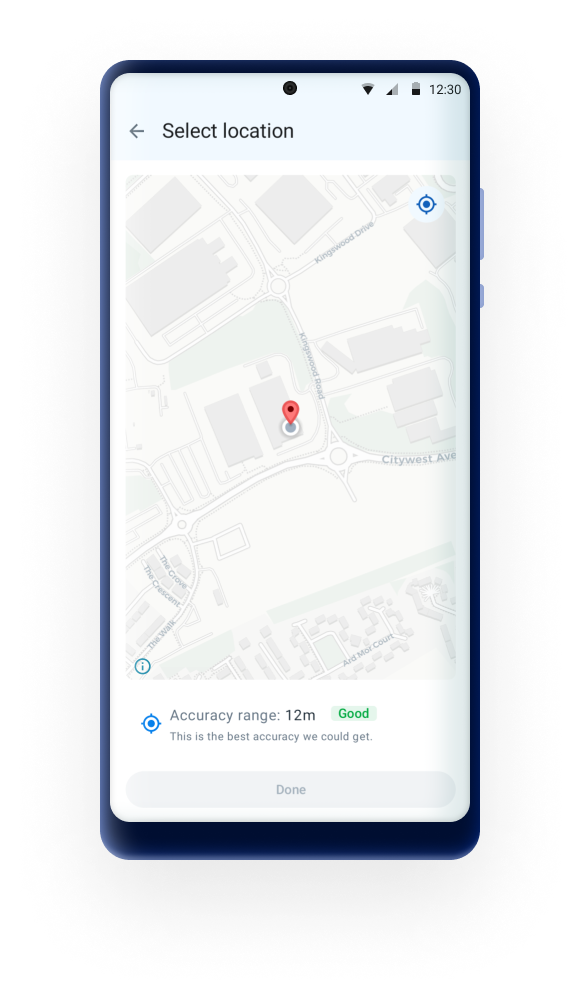
From 3.1.0, the capture coordinates process now includes a feature that displays the precision of the captured location. This allows users to see how accurate their location data is in real-time.
The user will see the tags according to the following ranges:
- Low: >= 100m
- Medium: < 100m to 25m
- Good: < 25m to 6m
- Very good: < 6m
The coordinate can be captured even if the accuracy is low, but this behavior can change if there is a restriction/limit on the precision (configured in Android Settings WebApp). When there is a restriction, the “Done” button will remain disabled until the precision meets the required threshold.

Maps Search
A new search functionality has been added, allowing users to look up specific locations by name or address. Once the user tap on the search bar, the keyboard will open and the user can enter any street or location name. The user can select any of the locations of the list or tap on the "select in map" to display all the locations in the map (blue pins).


When a place is selected, the location will be displayed as a card below the map, the pin will be positioned on the selected place and the search bar will be filled up with the place name.
The list of pins is based/limited on the current location. But once the search is done, if the user moves to a different area, the search can be done within the new area by tapping on the "search on this area" button.
Maps Manual Capture
By dragging the map the user can choose the pin location manually. At the bottom of the map, the label "selected location" will be displayed with the respective coordinates.
In 3.1 the manual capture can be disabled (Android settings webApp configuration).This will hid the search bar and won't allow the user to select any location on the map. It will be restricted to save the current location only.
Working Lists
Pracovní seznamy jsou k dispozici v programech událostí a sledování, jakmile je seznam vybrán, filtry budou zablokovány a nebude povoleno je měnit, dokud uživatel neobnoví vyhledávání.
The Android App supports the new tracker working lists, allowing users to filter by data elements. The working lists need to be configured in web using the web Capture App. The Android app will download the working lists that are configured and saved on the server side.
In 2.9, the working lists have been moved from the filters section to the main program screen. In earlier versions the user had to open the filters to be able to see and select a working list, from this version the working lists are always visible under the search bar facilitating its selection for filtering out Tracked Entity Instances

Synchronization based on working lists
From version 3.3.0, the Android Capture App supports synchronization based on working lists defined in the Capture web app and assigned through the Android Settings Web App (ASWA). Working lists allow administrators to specify exactly which tracked entity instances (TEIs) or events should be downloaded to a device, ensuring focused, context specific data for each group of users.
When working list based sync is enabled for a program:
- If a user has access to only one assigned working list, the Android app will synchronize only the data contained in that list.
- If a user has access to multiple working lists for the same program, the app will automatically merge all assigned lists into a single dataset during synchronization.
- If no working list is assigned or shared with the user, standard program-level synchronization rules apply.
This feature helps deployments reduce sync time, limit unnecessary downloads, and ensure that each user receives only the data relevant to their workflows.
Configuration note:
Working list assignments and synchronization rules are configured in the Android Settings Web App (ASWA). For instructions on how to assign working lists, manage sharing, and control synchronization behavior, see the Synchronization settings section of the ASWA documentation.
Programové Indikátory
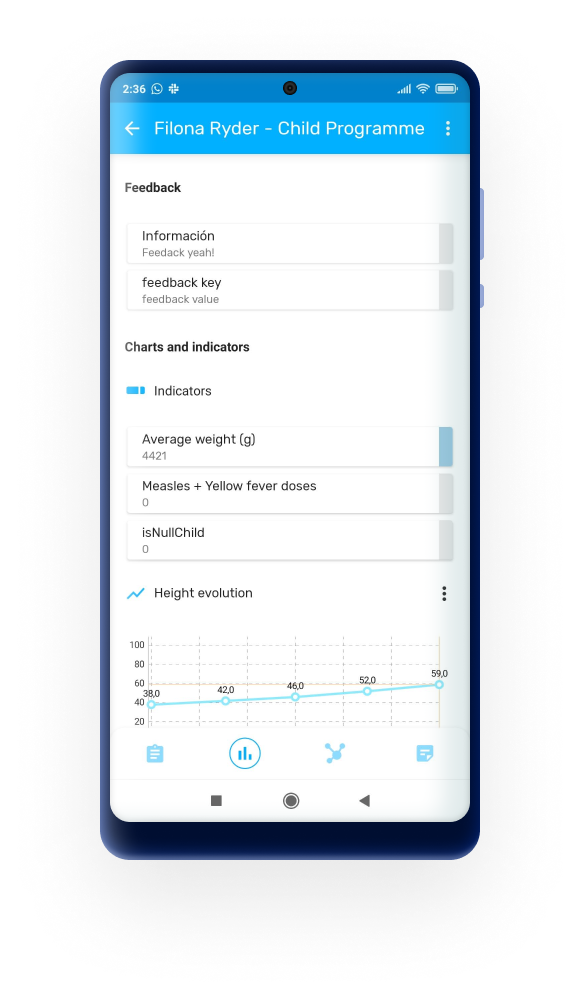
Karta Analytika podporuje zobrazení textu a páru klíč / hodnota v sekci zpětné vazby nebo indikátoru.
Legends
K datovým prvkům lze přiřadit legendy, které se zobrazí vedle hodnoty s příslušnou barvou a štítkem.

Feedback rendering (New in 3.4)
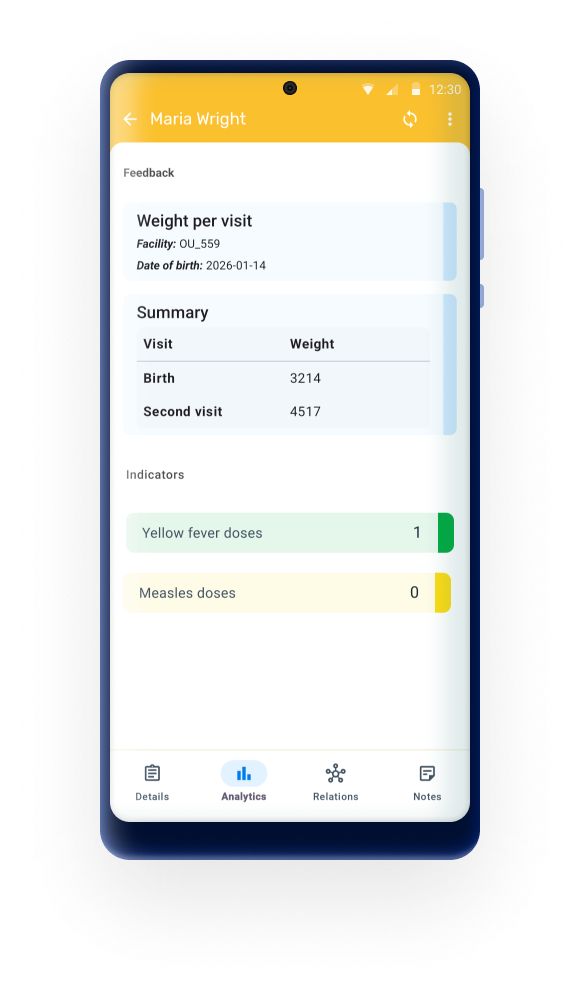
Feedback messages generated through Display Text and Display Key Value Pair program rule actions support Markdown formatting. This allows structured and more readable content to be displayed directly in the app, including headings, lists, tables, links, and emphasized text.
In addition, legend-based styling enables feedback values to be visually highlighted using predefined legend sets. When numeric values are present in the content, they are evaluated against the configured legend ranges and rendered with the corresponding color. This allows dynamic color coding of key values, helping users quickly interpret results and identify important conditions.
Supported Markdown formatting
The following Markdown elements are supported in feedback content:
- Paragraphs: plain text separated using
\n\n - Headings:
#to###### - Bold text:
**bold text** - Italic text:
*italic text* - Unordered lists: prefix items with
- - Ordered lists: prefix items with numbers (
1.,2., etc.) - Links:
[text](https://example.com) - Images:
(public URLs only) - Tables: defined using pipe (
|) notation
Spacing and line breaks
Spacing within feedback content must be explicitly defined using line break characters.
- Use
\n\nto create a new paragraph or visual separation between sections. - Single line breaks may not be preserved consistently.
- Proper spacing is required for Markdown elements such as tables and lists to render correctly.
Example
The following example demonstrates how Markdown can be used within program rule actions to render structured feedback content, including formatted text and tables.
Action 1: Display text
Static text: ## Weight per visit
Expression:
d2:concatenate(
"\n\nFacility: ", V{orgunit_code},
"\n\nDate of birth: ", V{incident_date}
)
Action 2: Display text
Static text: ## Summary
Expression:
d2:concatenate(
"\n\n|Visit|Weight|\n|---|---|\n|Birth|", #{weightbirth},
"|\n|Second visit|", #{weight2}, "|"
)
Notes
- Table columns are rendered with equal width
- Tables can be scrolled horizontally if they exceed screen size
- All text is left-aligned by default
- Markdown support is limited to the elements listed above
Data Entry Form
Hint messages
The input fields will display had a hint message saying "Insert value here" which will remain until a value is entered by the user.

Navigation button
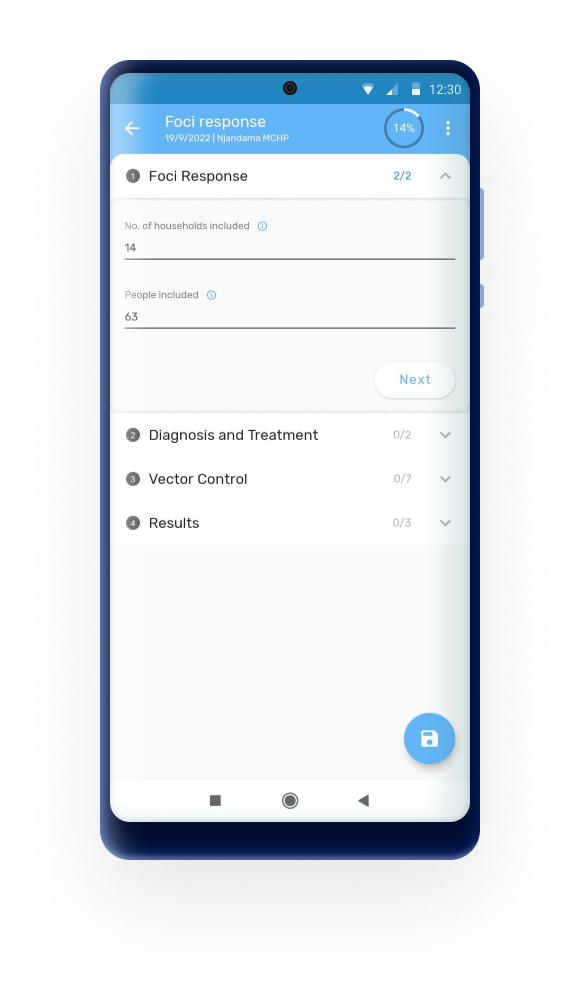
In forms with multiple sections, the App includes a "Next" button at the end of each section which calls the user to action. The funtion of the button is to close the current section and open the new one.
Program Stage section description
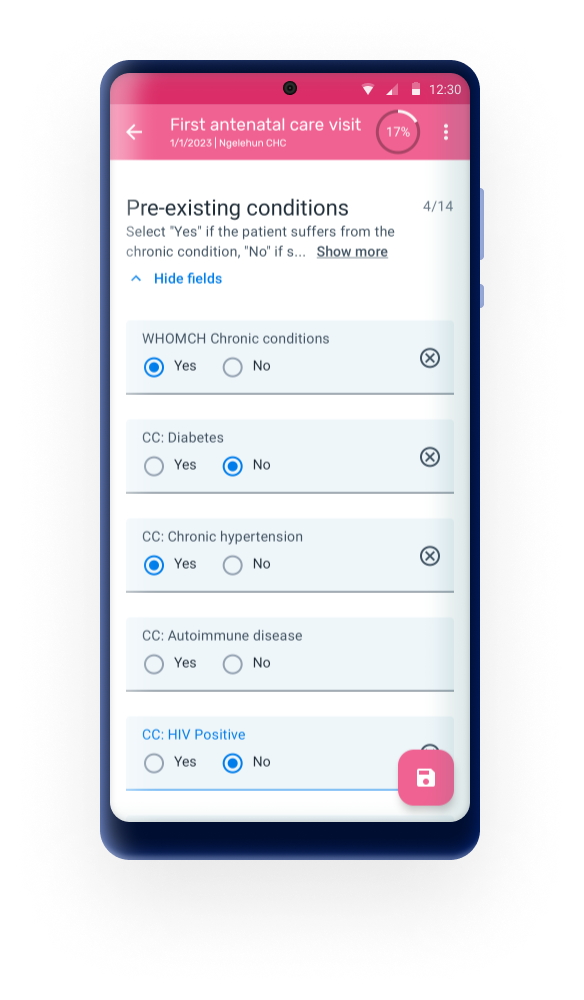
To provide more context and information at the moment of data collection the description has now been brought to the user interface and will be displayed below the section name. The description will always be visible but if the text is too long (more than 3 lines) the app will add an ellipsis and a show more/less button to expand or collapse.
Enable/disable collapsible sections in forms
Stage sections in the Android App are displayed with collapsible menus that enable the user to open one section at a time. The purpose of this accordion-like implemementation is to help the user navigate very long forms, however some implementations would prefer to list the sections one after the other.
This new version of the application enables the admin use to decide if the sections should appear in extended mode. This configuration is made through the Android Settings Web App and will display the sections one after the other with the name the secion acting as a separator. In extended mode, the "next" button at the end of each section is removed.

New inputs per value types
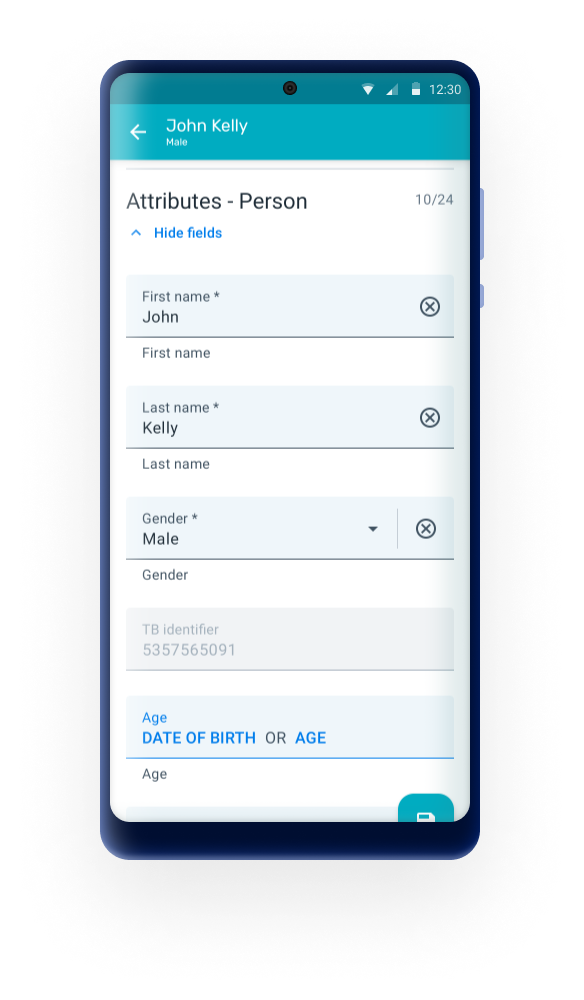
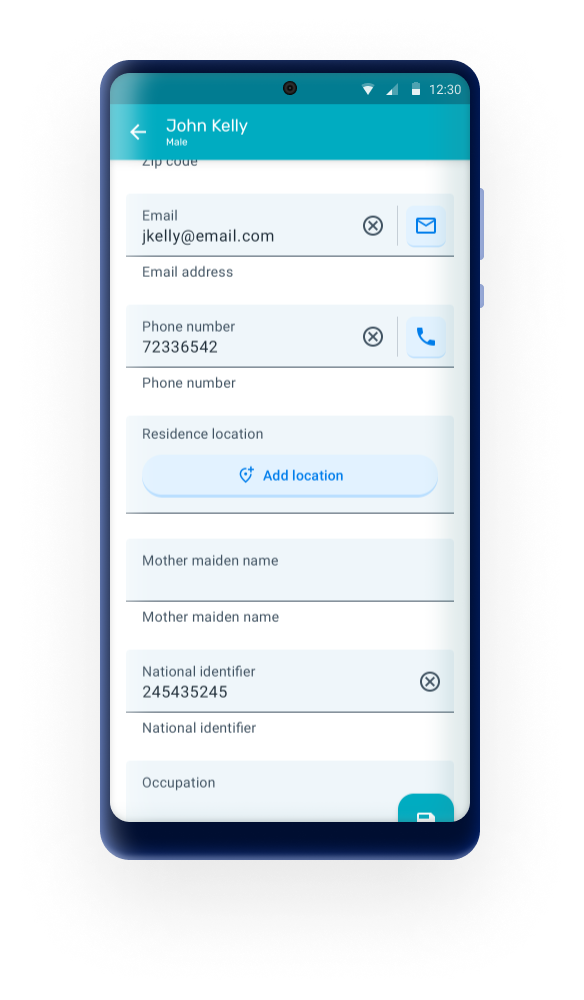
The inputs for all value types have been redesigned. Tappable areas and texts have been increased and selection modes are improved to offer cleaner and more intuitive user experience. By default the Android App will display the current forms. Admin users are able to opt-in to use the new forms through the Android Settings WebApp.

Actionable Icons
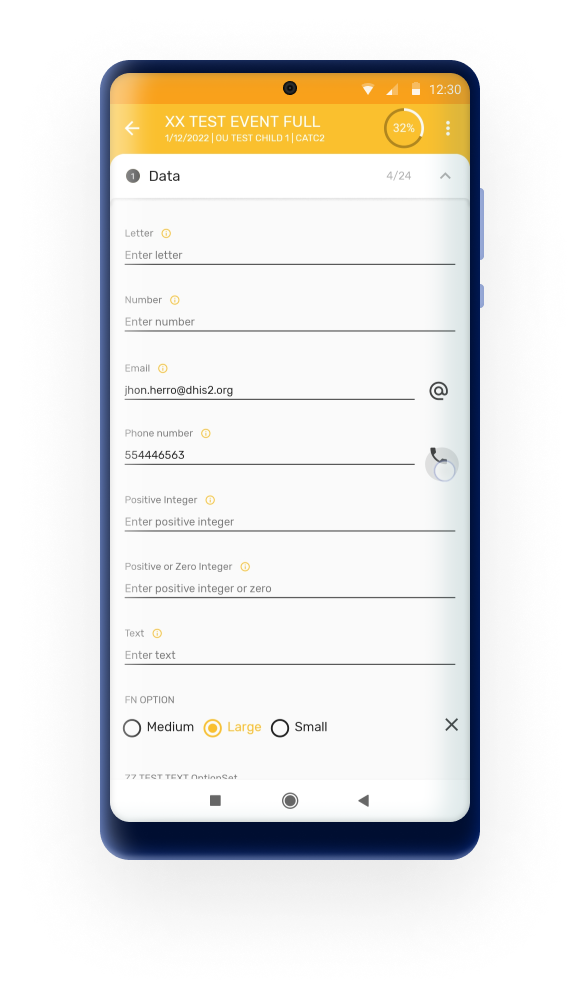
This feature enables users to take action on phone numbers and email addresses directly from the app. When tapping on the icons, the app will dial a phone number or open an email app copying the address from the event or enrollment data entry form.
Customized Tracker Terminology
In order to facilitate the terminology used in DHIS2, it has been decided to gradually enable the possibility to customize certain terms to each particular use case. In 3.0, the terms "event" (used in a program stage context) and "enrollment" are customizable.
To customize the terms, the admin can go to the Maintenance and when creating or editing the program add a text to:
- "Custom label for enrollment" in the Enrollment details section OR
- "Custom label for event" in the stage details section
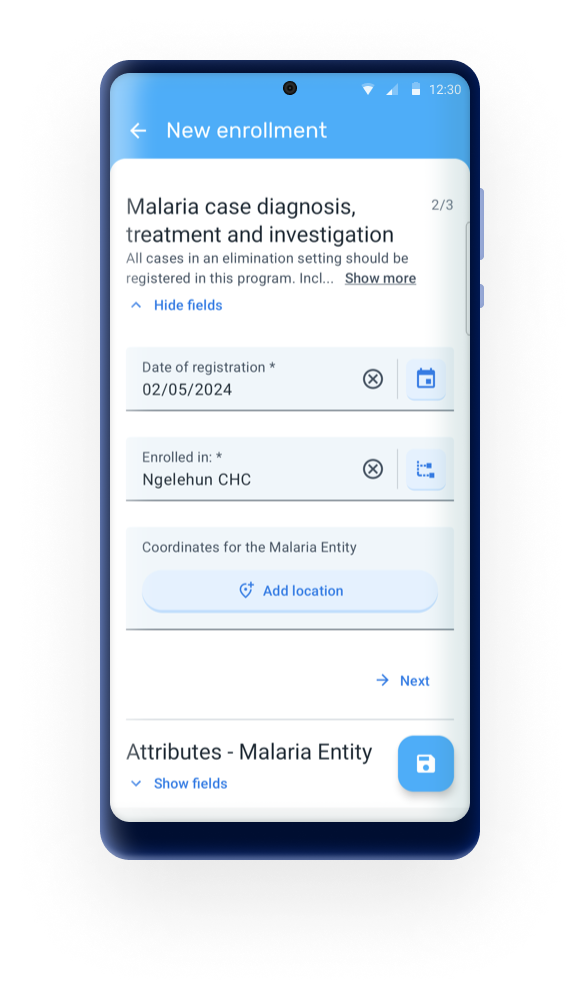
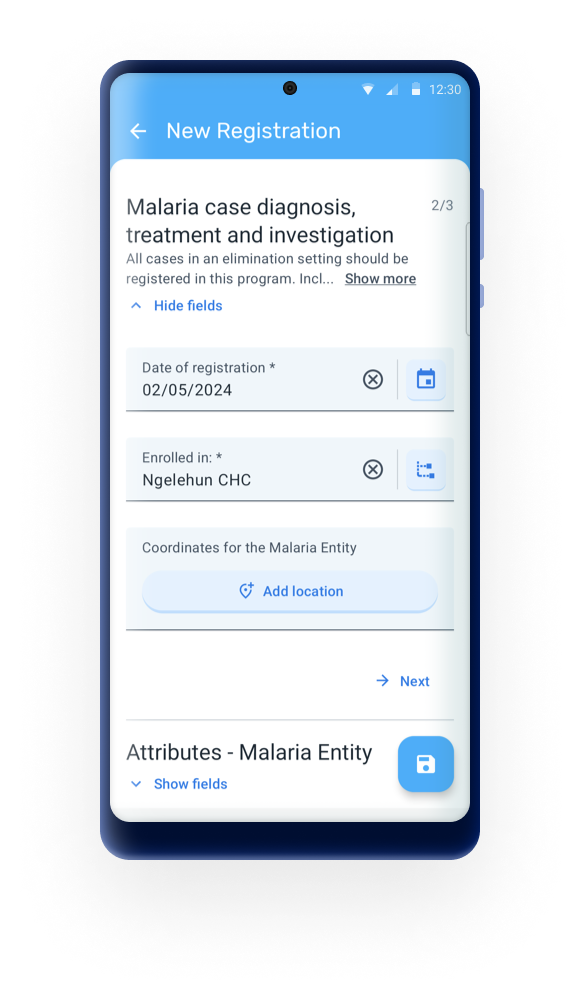

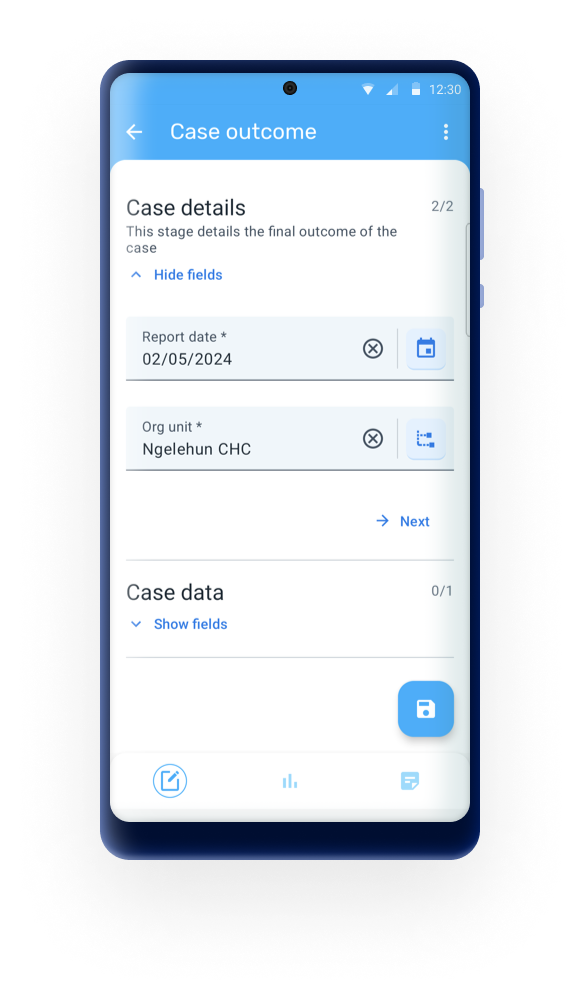
In 3.1, the term "event" (program context) is now customizable.
Relationships
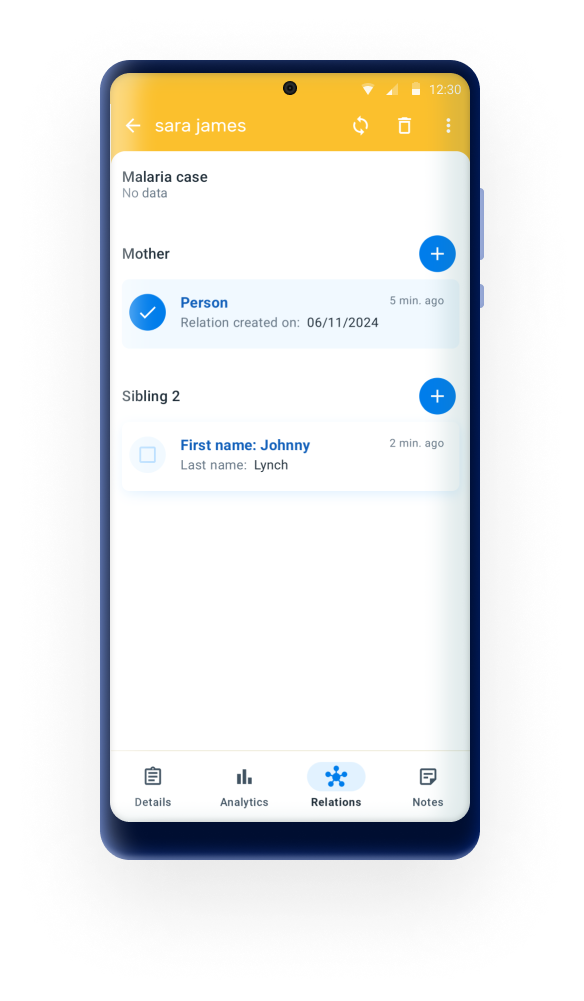
The relationship tab displays sections once the tab is open. Each section represents a different relationship type and the + icon will be available only if the user has capture access to the relationship type.
The name of the section will be the "relationship name seen from the initiating or receiving entity" depending on the configuration of the relationship.
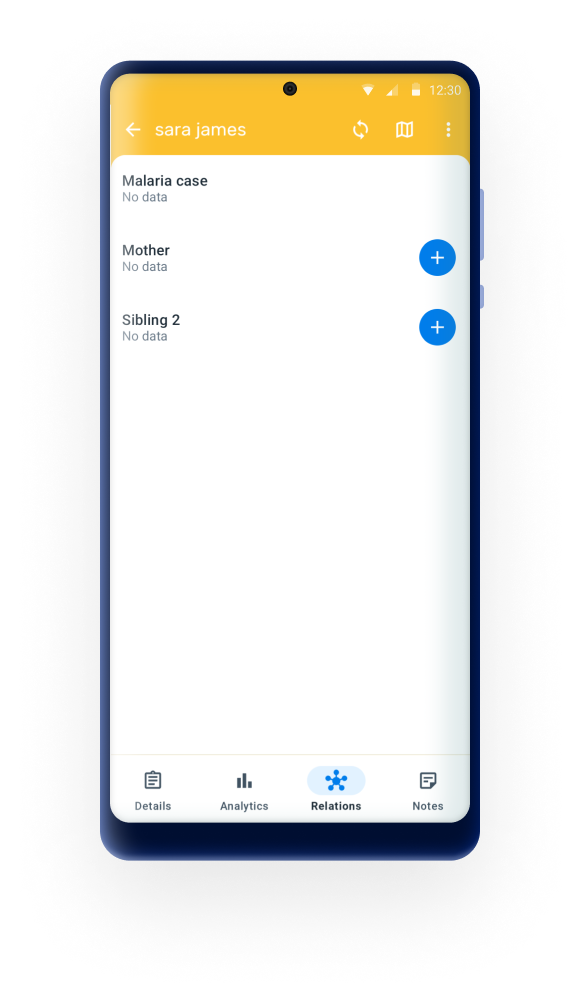
In 3.1.0, the relationship cards have also been updated with a new design to offer a more intuitive and visually appealing experience. The new design emphasizes clarity and usability, making it easier to view and manage relationships at a glance.

Delete a relationship
To delete a card, long press on it and select one or more. Then, tap on the remove icon to display the dialog. Finish the process by tapping on the "Remove" button.
To prevent accidental deletions and enhance user control, a new confirmation dialog also has been added when deleting a relationship. This dialog will prompt users to confirm their action, ensuring that relationships are only deleted intentionally.

Custom Intents
This feature is available from Android Capture App version 3.3.0.
Custom Intents is a powerful feature that allows the DHIS2 Android Capture App to integrate with third-party Android applications. By configuring custom intents, administrators can enable the Android app to launch external applications, send data to them, and receive data back to populate fields automatically.
This feature enables seamless integration with specialized apps such as: - Barcode and QR code scanners - GPS and mapping applications - Biometric identification systems - Custom data collection tools - Camera applications - Medical device applications - Any other Android application that supports intent-based communication
Custom Intents are configured using the Android Settings Web App and can be linked to Tracked Entity Attributes or Data Elements.
Note
Custom Intents leverage the Android Intent system, which is a fundamental component of Android's inter-app communication mechanism. Understanding basic Android Intent concepts can be helpful when configuring this feature.
When a custom intent is configured for a tracked entity attribute or data element, the field will only accept data from the configured third-party application. Manual data entry will not be available for that field.
Data Entry Flow
- User navigates to the form containing the configured field
- User taps the custom intent button/icon next in the field
- The third-party application launches with the configured request parameters
- User completes the action in the third-party app (e.g., scans a barcode, captures location)
- The third-party app returns the result to DHIS2
- The configured response value is automatically populated in the field
- User can review the value before saving

Note
When the Extra Type is List of JSON Objects, the returned values will be concatenated into a single string separated by commas (e.g.,
120,118,122). This allows storing multiple values from the list in a single field.
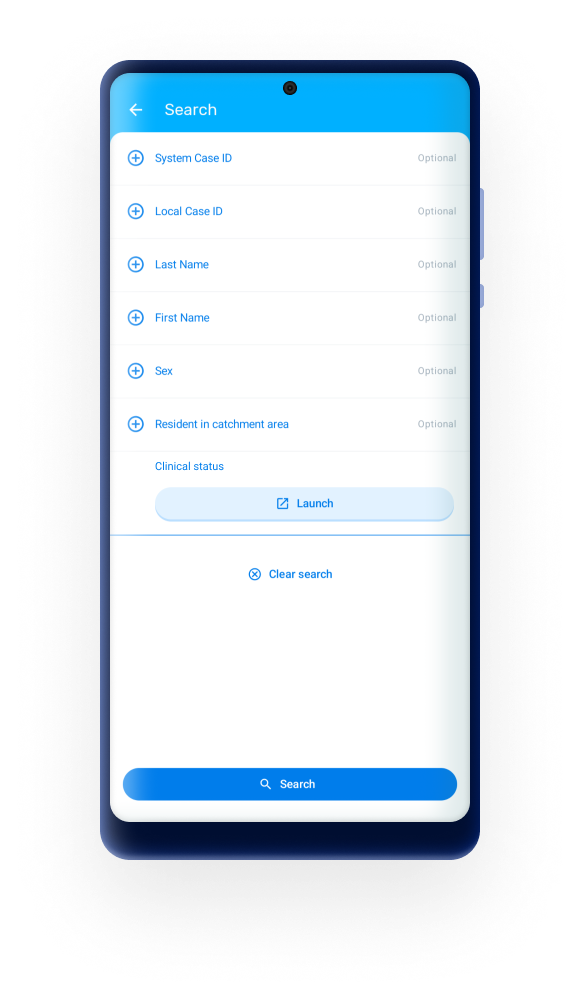
Search Flow
When configured for the SEARCH screen:
- User navigates to the search screen for tracked entities
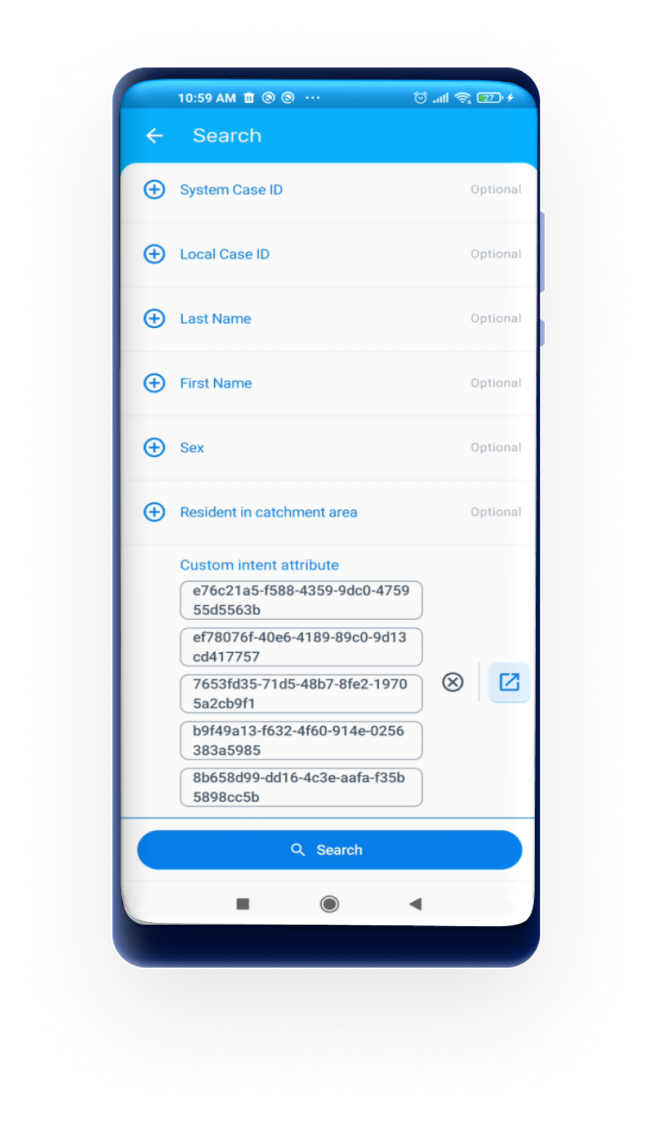
- User taps the custom intent button for the search field
- The third-party application launches
- The returned value is used as a search parameter
- Search results are displayed based on the captured value
Note
When the Extra Type is List of JSON Objects, the search will match tracked entity instances that contain any of the values in the returned list. This allows searching for multiple entities at once.

For configuration steps, see the Custom Intents section of the Android Settings Web App documentation.
Specifické funkce programů událostí
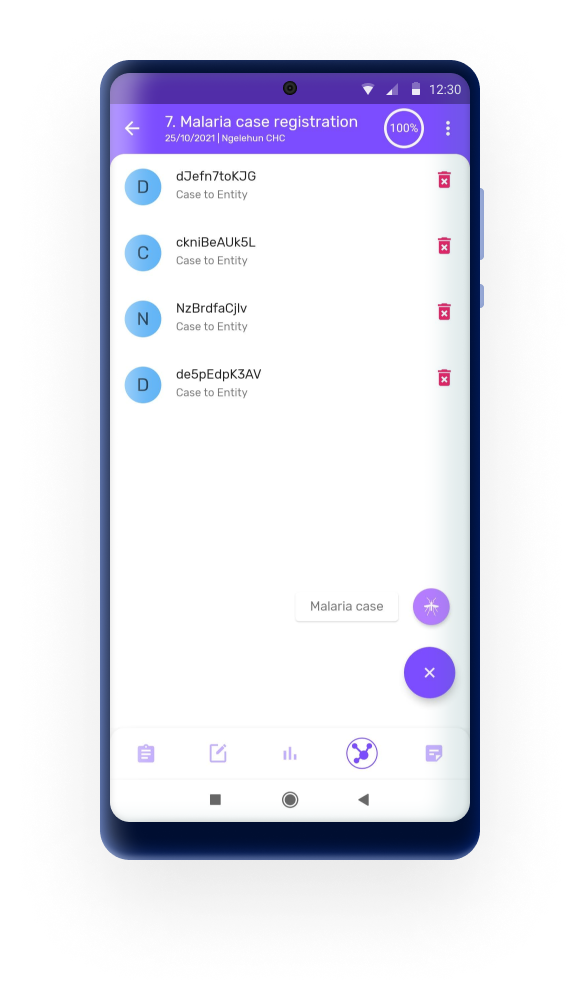
Event - TEI relationships
Aplikace umožňuje přidávat vztahy z jednotlivých akcí (v programech akcí) do TEI. Na obrazovce události je nová karta s názvem vztahy, která se zobrazí pouze tehdy, když je tento typ vztahů na serveru nakonfigurován pro konkrétní program.
Poznámka
Aktuální verze neumožňuje TEI vztahovat se k událostem nebo používat události, které patří k zápisu.
Cards design
The new design of cards offers a cleaner and more intuitive layout replacing the use of coloured icons by explicit text when relevant.
Main changes
Sync button: It now appears as a button at the bottom of the card and it is only displayed if there are unsynced data or an error or warning after a sync.
Event status: After an event program is completed, the app will add a label in each card to specify the status.

Specifické vlastnosti sledovacích programů (program s registrací)
Vztahy v mapách
V trasovacích programech může uživatel vidět vztahy na mapě klepnutím na ikonu mapy na kartě vztahů.
- Ve směru vztahu je zobrazena šipka.
- U obousměrných vztahů ukazuje šipka na obě strany.
- Každý typ vztahu zobrazuje jinou barvu.
- Pokud má jeden nebo oba TEI jako souřadnici polygony, čára jde od nejbližšího bodu jednoho (a k nejbližšímu druhého) polygonu obou TEI.

TEI Dashboard
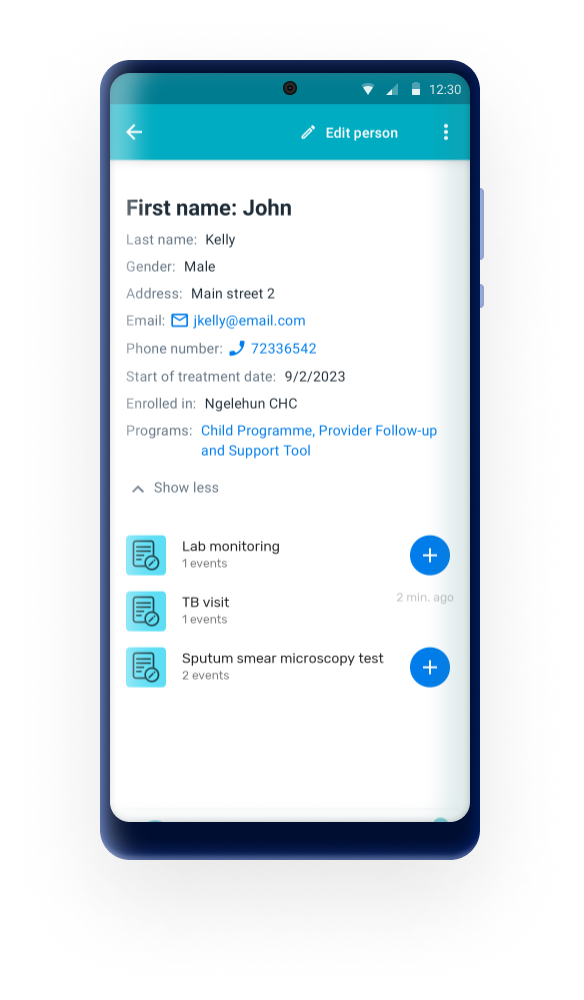
The TEI Dashboard has been redesigned for both portrait and landscape view. The new design offers a cleaner and more intuitive layout replacing the use of coloured icons by explicit text when relevant and moving some secondar actions to the hidden menus.
Dashboard card
Main changes in 2.9:
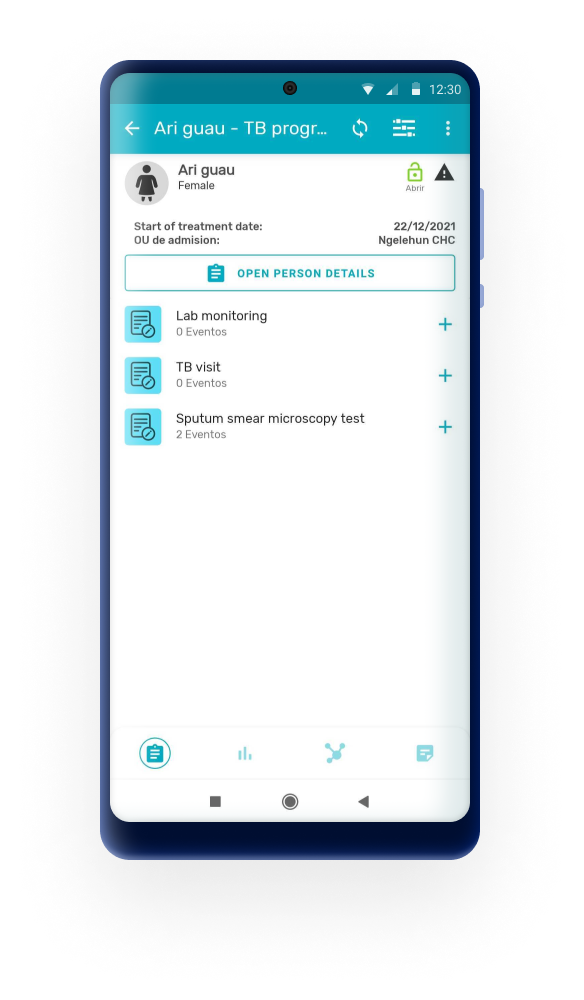
Edit registration form: In previous versions, there was a button "Open TET details" at the bottom of the TEI dashboard card. Now, the button is located at the top bar of the screen with the label "Edit TET" (For example: Edit Patient)
Follow-up: In previous versions, there was an icon at the top right corner of the card to mark the TEI. Now, to mark for follow up, the user needs to tap the three dot menu and select the "Mark for follow-up" option.
Card title In previous versions, the title included the values of the first 3 tracked entity attributes marked as Display in List. Now, the tile of the card can bdisplay the first Tracked Entity Attribute marked as Display in list OR a customize text, called TEI header, using program indicators and the Android Settings web App.
More information here on how to configure the TEI header.
Tracked Entity Attributes: From 2.9, the complete list of tracked entity attributes marked as Display in List will be display in the dashboard card. The first three will always be visible and if there are more, a show "more" button will appear to expand the list.
Programs: From 2.9, if the TEI is enrolled to more than one program, a list of the programs will be display and will also allow the user to tap on the label and navigate to full list of enrollments.
Program stages
Main changes in 3.0:
Event list: fresh and more clean look of the list of events, with more space and less -not critical- information displayed.
Timeline view: the button for creating new events has been moved to the top.
Navigation panel
To simplify and personalize the user experience, the user interface actions offered to the user at the TEI dashboard will be tailored to the specific configuration of each program.
- Karta Vztahy nebude viditelná, pokud nejsou nakonfigurovány vztahy programu
- Tlačítko „Vytvořit událost“ bude skryto, když uživatel nemůže vytvořit další události na základě konfigurace měřiče.
- Záložka Indikátor nebude viditelná, pokud program nemá nakonfigurovány žádné indikátory programu.
- Filtr organizačních jednotek nebude viditelný, pokud má uživatel nakonfigurovanou pouze jednu organizační jednotku.
Creating A Stage
To create a new event, the user needs to tap on the plus icon on the stage card. This icon is always visible unless the stage is non-repeatable and already created.
When the user taps on the button, that program stage will unfold showing to the user all the already existing events of that particular program stage
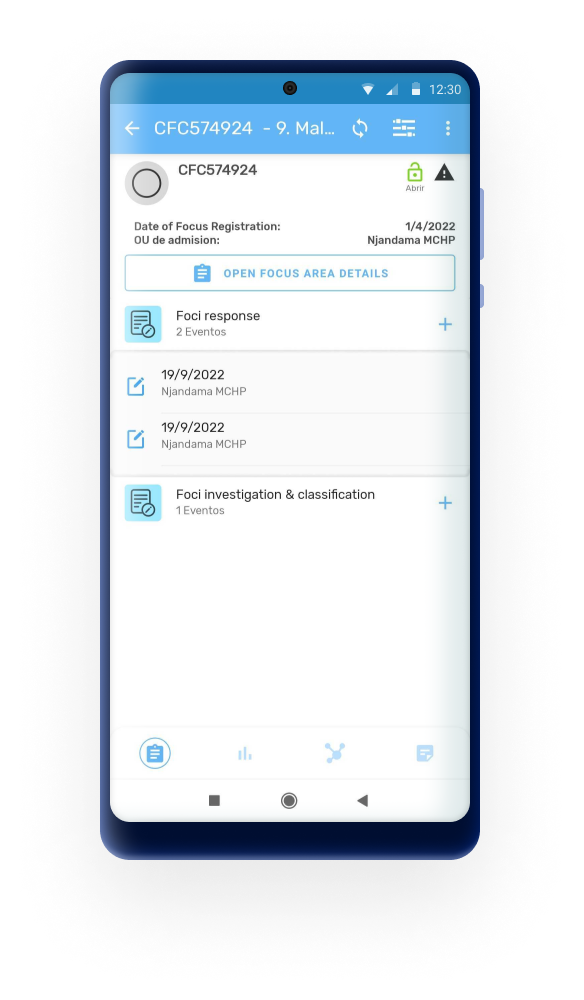
If the user is creating a new stage and there is only one option based on the program configuration, the available program stage is selected automatically and program stage selection step is skipped.
Share a TEI
The "Share" button has been removed from the TEI dashboard and the functionality to share a TEI through QR code has been relocated on the three vertical dot menu, at the top right corner of the screen.
TEI Card Design
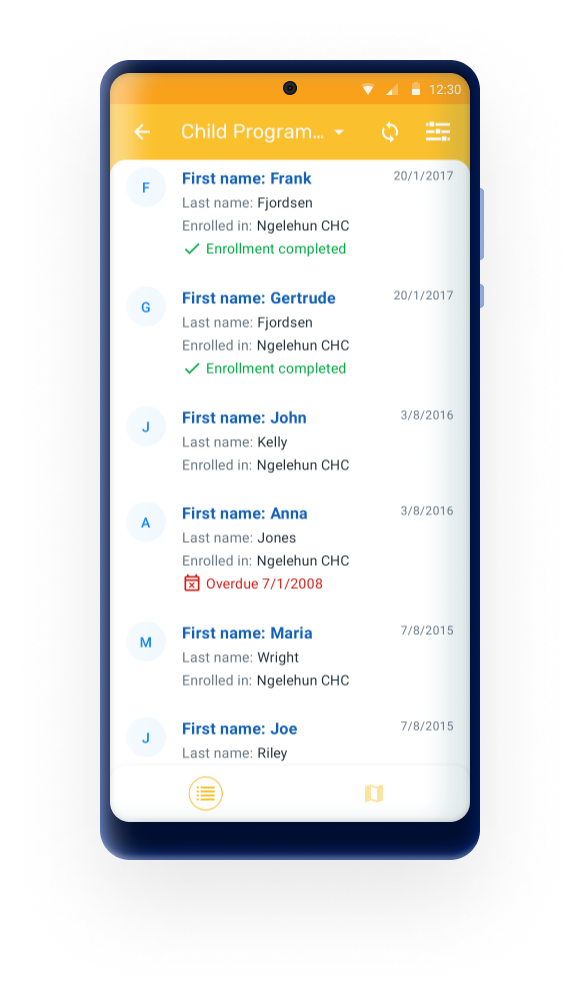
The TEI Card has been designed to display as much information as possible considering the constrains of screen size.
From 2.9 the card has been redesigned to offer a cleaner and more intuitive layout replacing the use of coloured icons by explicit text when relevant.
The main changes are:
Card title The tile of the card can be composed by the first Tracked Entity Attribute marked as Display in list or a customize text, called TEI header, using program indicators and the Android Settings web App. More information here on how to configure the TEI header.
Sync button: It now appears as a button at the bottom of the card and it is only displayed if there are unsynced data or an error or warning after a sync.
Enrollment status: After a program is completed or cancelled, the app will add a label in each card to specify the status.
Overdue events: Is now displayed as a red label with the text: "Overdue" + date of the event
Follow-up: After a TEI is marked for follow-up, an orange label with the text "Marked for follow-up" is added to the card
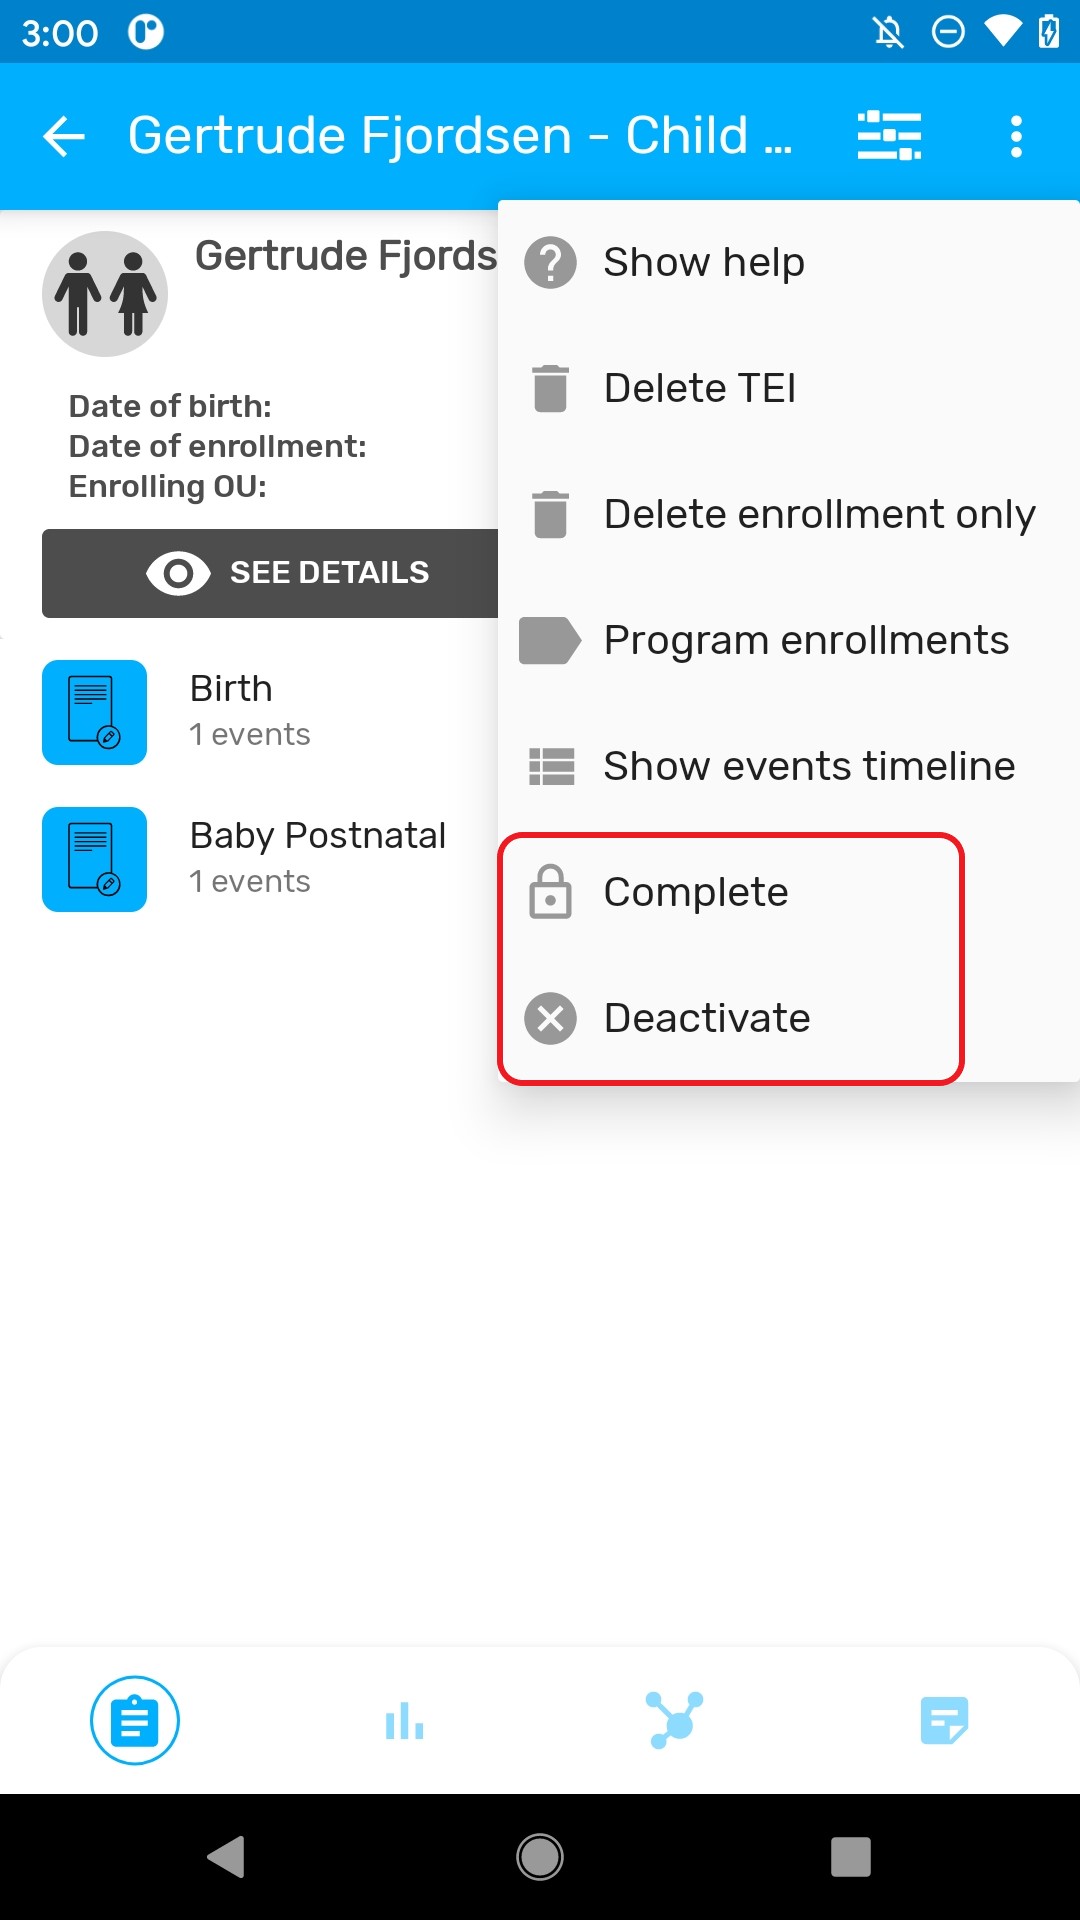
Complete Enrollment / Deactivate TE
To complete an enrollment or deactivate a TE, click on three dot menu in the uppper right corner and select "Complete" or "Deactivate".
Search Flow
Configurable TEI Search
Searching TEIs before creating is not mandatory now. Using the Android Settings App (v2.2.0) it is possible to configure the mandatoriness of the TEI search before creating an enrollment. Follow the steps below to enable the creation of TEIs without searching:
- Open the Appearance menu in the Android Settings App
- In 'Program' add a Program Setting
- Select a tracker program
- Tick the "Allow the user to create a TEI without searching" checkbox
- Uložit
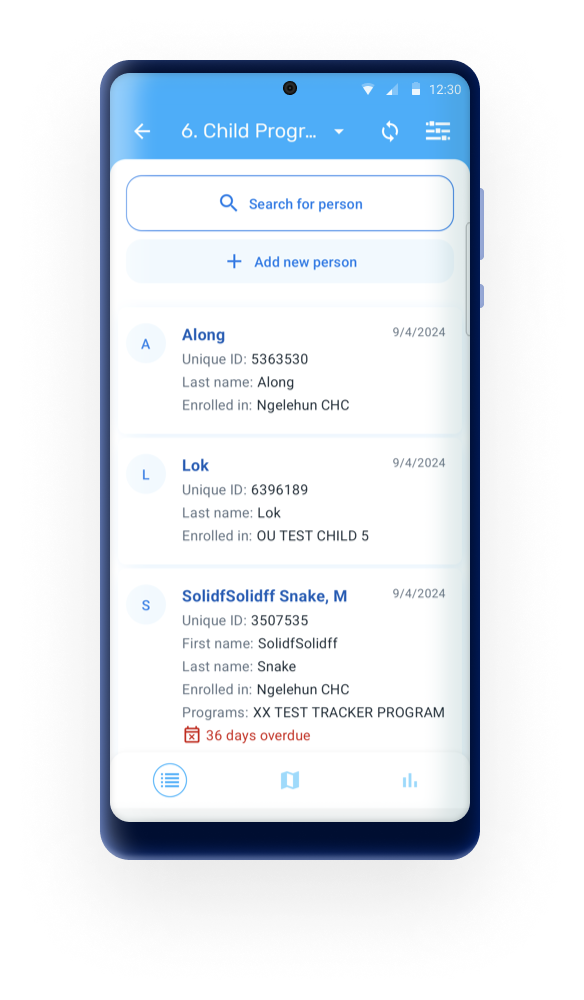
If the feature is enabled, the Android App will display a "create new" button after opening a program and a search won't be required. If the feature is not enabled or the user is in a previous version of the app, a search must be performed to avoid possible duplicates. Once the search is performed the search button will become "Add" button for the user to create a new enrollment.
Search by unique QR/bar Codes
In 3.0, the search form has been improved to provide a cleaner look and a more intuitive user experience. The buttons have been made more explicit for differencing search from creation. In addition the flow for searching TEIs using attributes rendered as bar / QR codes has been made more agile. If there is only one result and the attribute is unique, the app will open the TEI Dashboard directly. If there are multiple results, the app will display all the cards on the TEI list (this is equal to the current workflow), and if there are no results, the app will display the create button and allow the user to “search outside the program” if the configuration allows it.
Aimed at aligning it with the web instance for a more consistent user experience, 3.1.0, by default, sorts the unique attributes (QR, barcode) at the top of the list of searchable attributes. Users can quickly and easily find the attributes for a more exact search.
The sort of the attributes will follow:
- At the top: QR/barcode attributes (unique)
- QR/barcode attributes (not unique)
- Other Attributes (unique)
- Configured order or default order (if not configured)
Offline and Online Search
To improve the response time in the search results, the Android App now searches offline first and displays the results while making an online search as a second step, transparent to the user.
Searching outside the program is offered as a second step when the attributes used in the search contain at least one Tracked Entity Type (TET) attribute
Resetujte vyhledávací pole
The search fields are used to look up for a specific entity, and the circled arrow to reset the search. All fields will be blank for the user to do a new search.

Obrazovka vyhledávání všech typů sledovaných entit
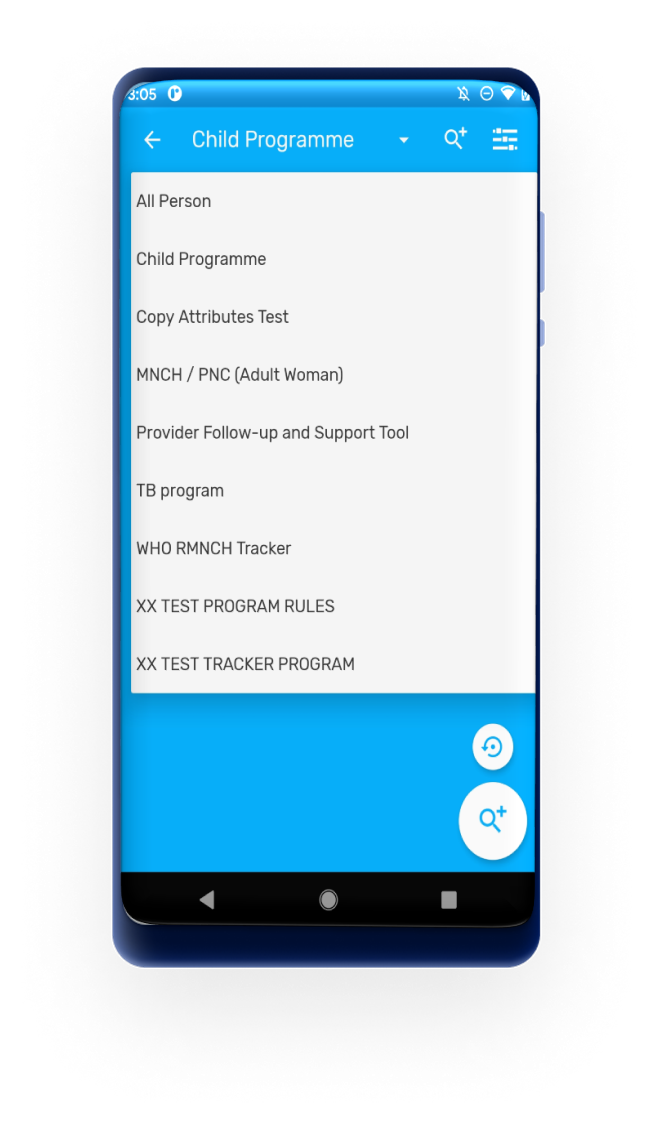
User can search across all programs by specific tracked entity type (TET). In the Search screen there is a drop down which shows all the programs available for the active TET (active TET is defined by the selection of the program in the home screen). That drop down should also have an option with TET name, for example: All Person.
Když uživatel vybere tuto možnost, budou vyhledávacími poli k dispozici pouze atributy TET (žádné atributy specifické pro program). Omezení vyhledávání neplatí, protože patří k programům.
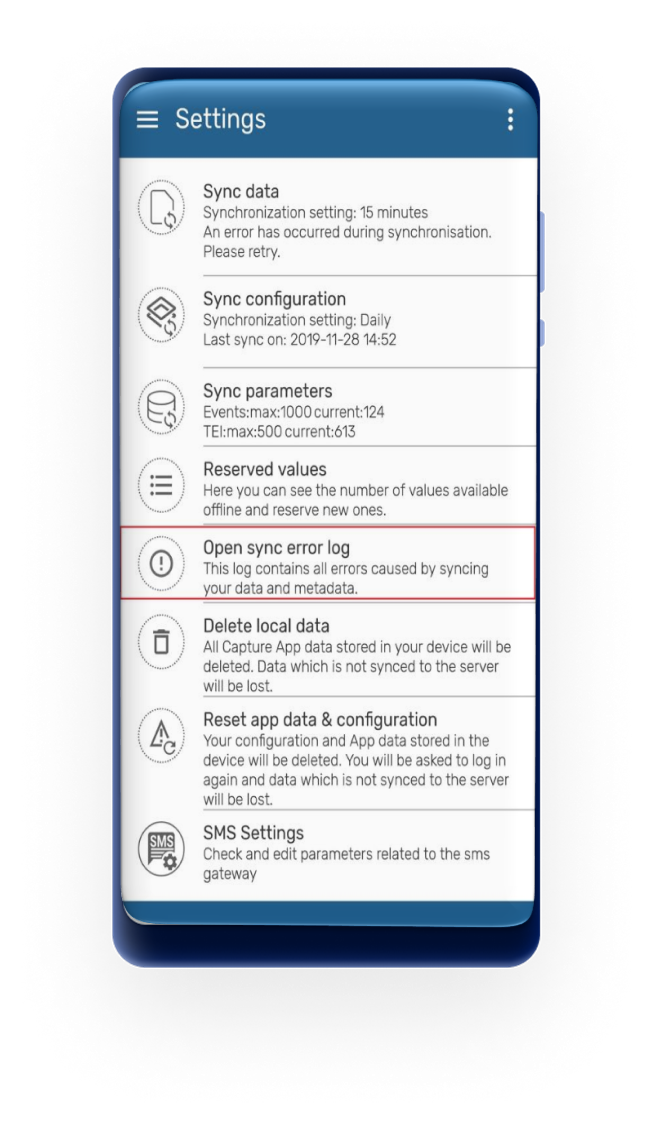
Hledání vrátí nalezené TEI v místní databázi a také ty ve vyhledávací organizační jednotce uživatele (když je uživatel online). U uživatelů nalezených online je bude muset uživatel vybrat a stáhne se celý záznam.
Poznámka
Při konfiguraci vyhledávací organizační jednotky se ujistěte, že vaše zachycené org. jednotky jsou obsaženy ve vašem vyhledávání org. jednotek, aby to zachytilo org. jednotky které musí být vybrány, stejně jako vyhledávací org. jednotky.
Ovládací panel TEI napříč programy
Uživatel může zobrazit panel TEI bez jakéhokoli programu výběrem TEI v seznamu, pokud bylo vyhledávání bez programu.
Na ovládacích panelech se zobrazí seznam aktivních registrací.

Historie zápisu TEI a nový zápis
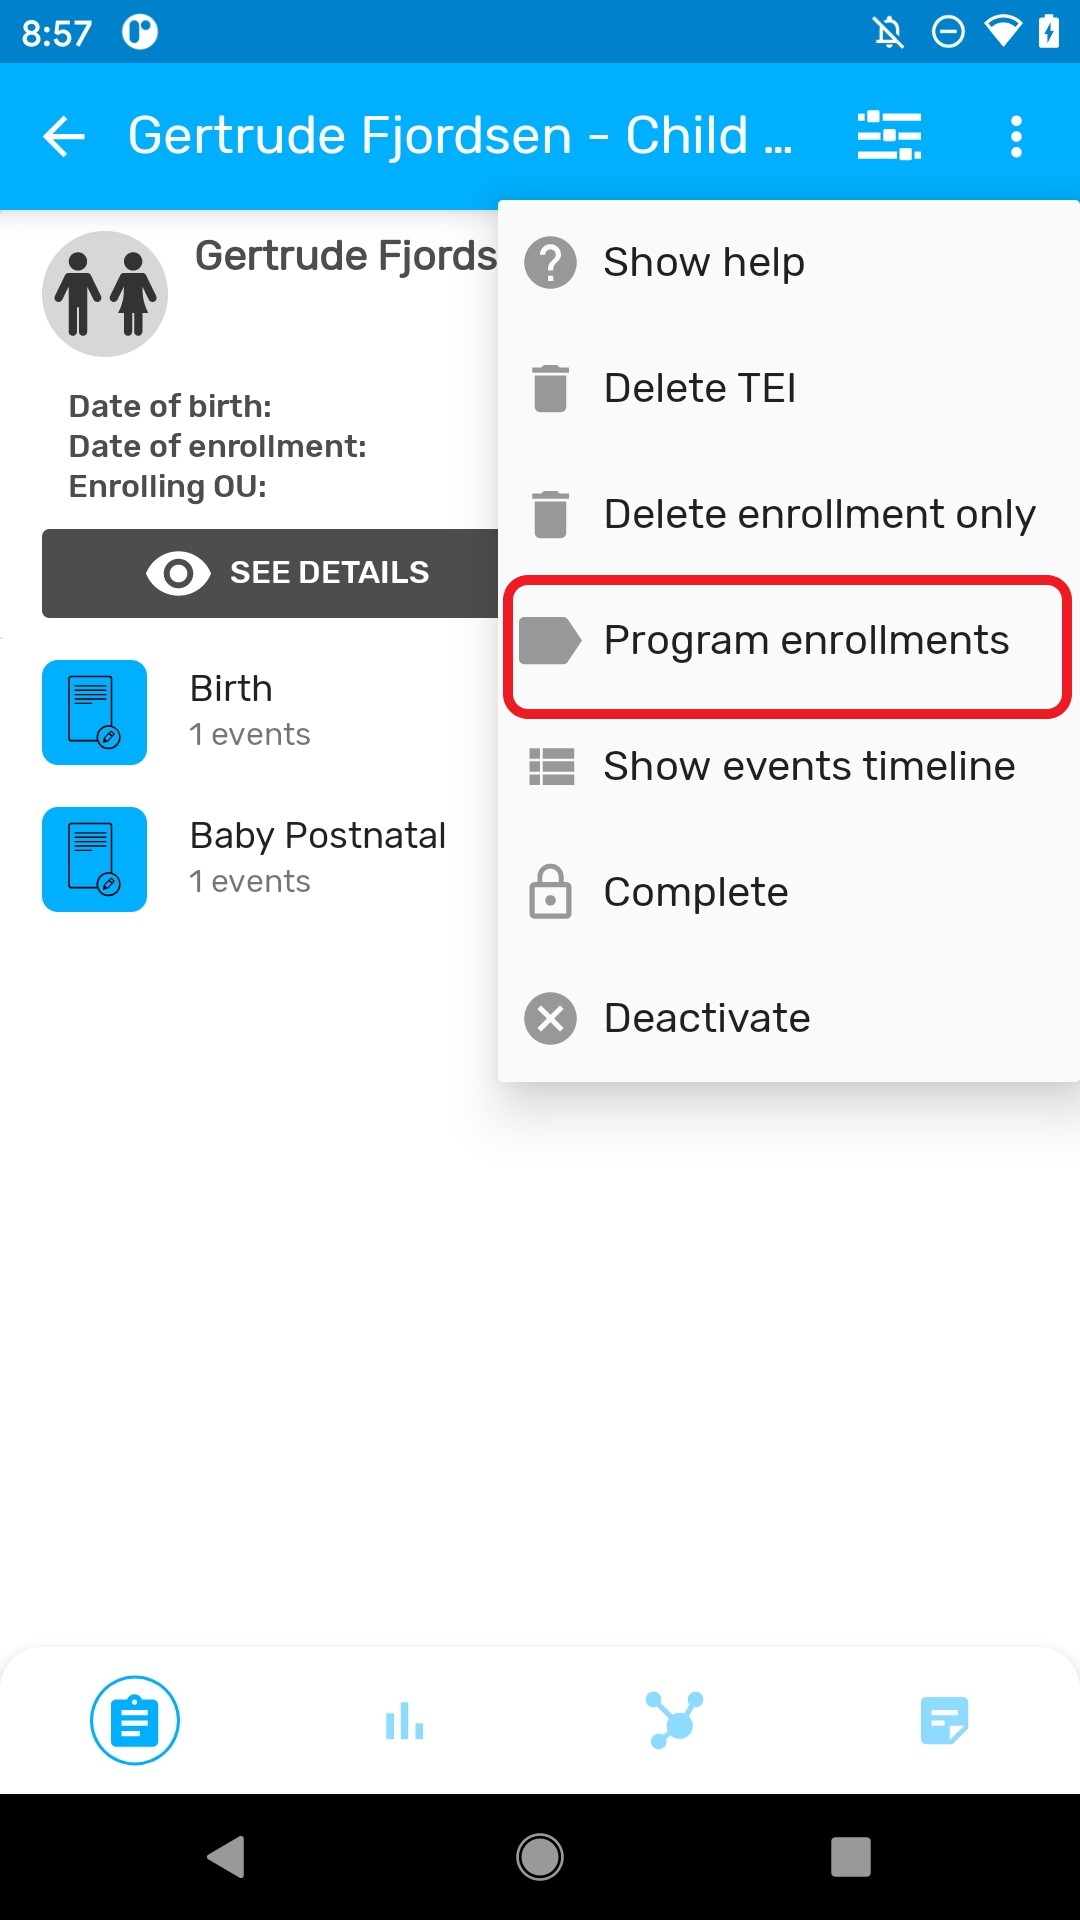
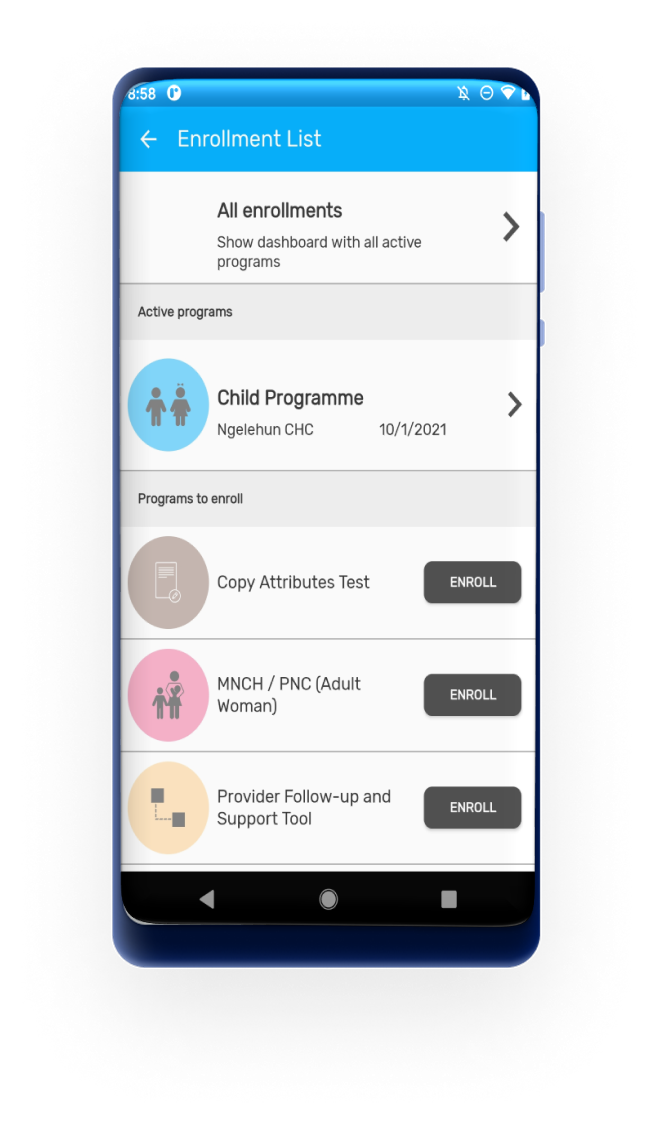
User can see the complete historical records of the TEI. Clicking on the upper right corner menu, select "Program Enrollments". A list of "Active enrollments" will be displayed, followed by a list of "Past enrollments" (completed or cancelled), followed by the programs in which the TEI could be enrolled. User can also return to the "TEI Dashboard" without any program' by selecting "All enrollments".
Smazat TEI a registrace
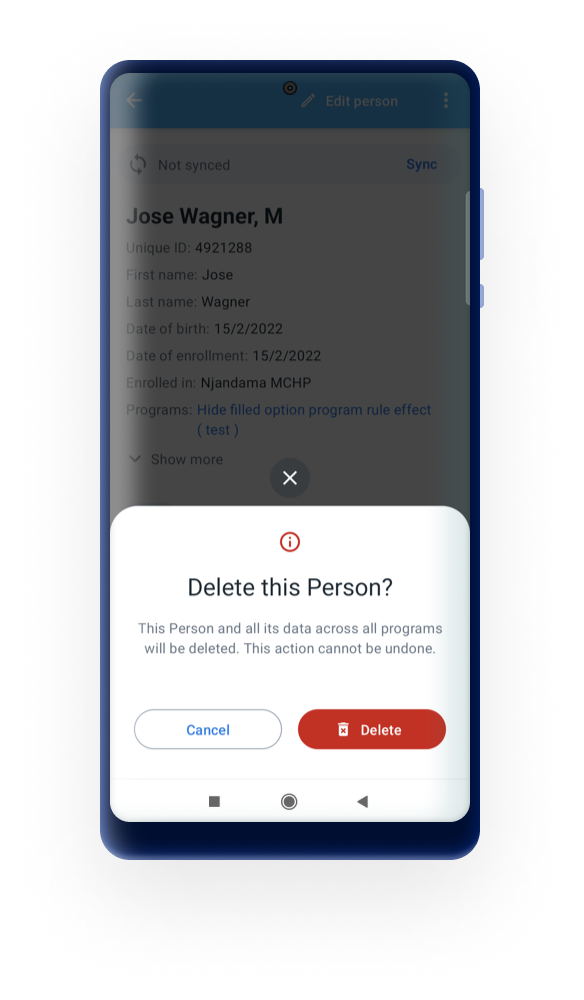
To delete a TEI or an enrollment, select the desired option in the three dots menu of TEI dashboard. Local TEI or Enrollment will be deleted from the database. Records that has been previously synced with the server will be marked for deletion if the user has the following authorities:
- F_ENROLLMENT_CASCADE_DELETE
- F_TEI_CASCADE_DELETE
V tomto případě budou zobrazeny ve vyhledávacím seznamu TEI, ale nebudou přístupné.

From 3.0, there is a confirmation message to reduce errors when tapping on the delete button.
Upozornění
Když uživatelé zadají TEI a když není synchronizováno se serverem, budou moci odstranit TEI a zápis, i když jim tato oprávnění nebyla přidělena. Toto je záměrné a umožňuje uživatelům vrátit se zpět v případě, že zadali nesprávná data (TEI a/nebo zápis), a tak zabránit jejich dosažení na server a vyžadovat jiného uživatele s vyššími oprávněními k vyřešení problému.
Skupinové zobrazení fází programu v TEI Dashboard
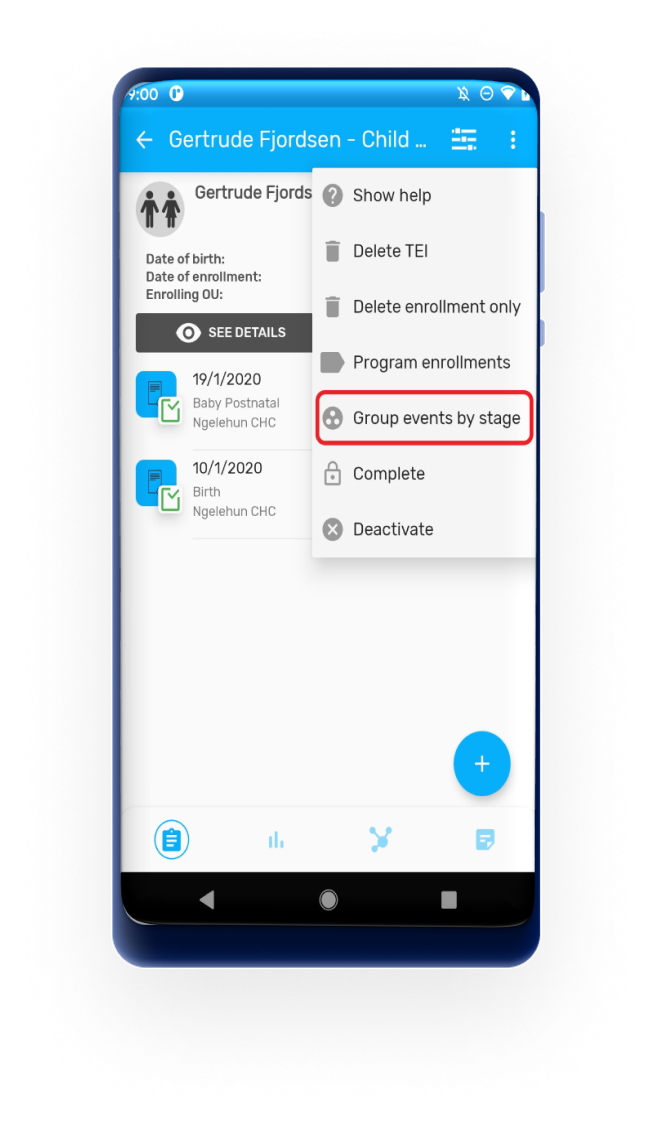
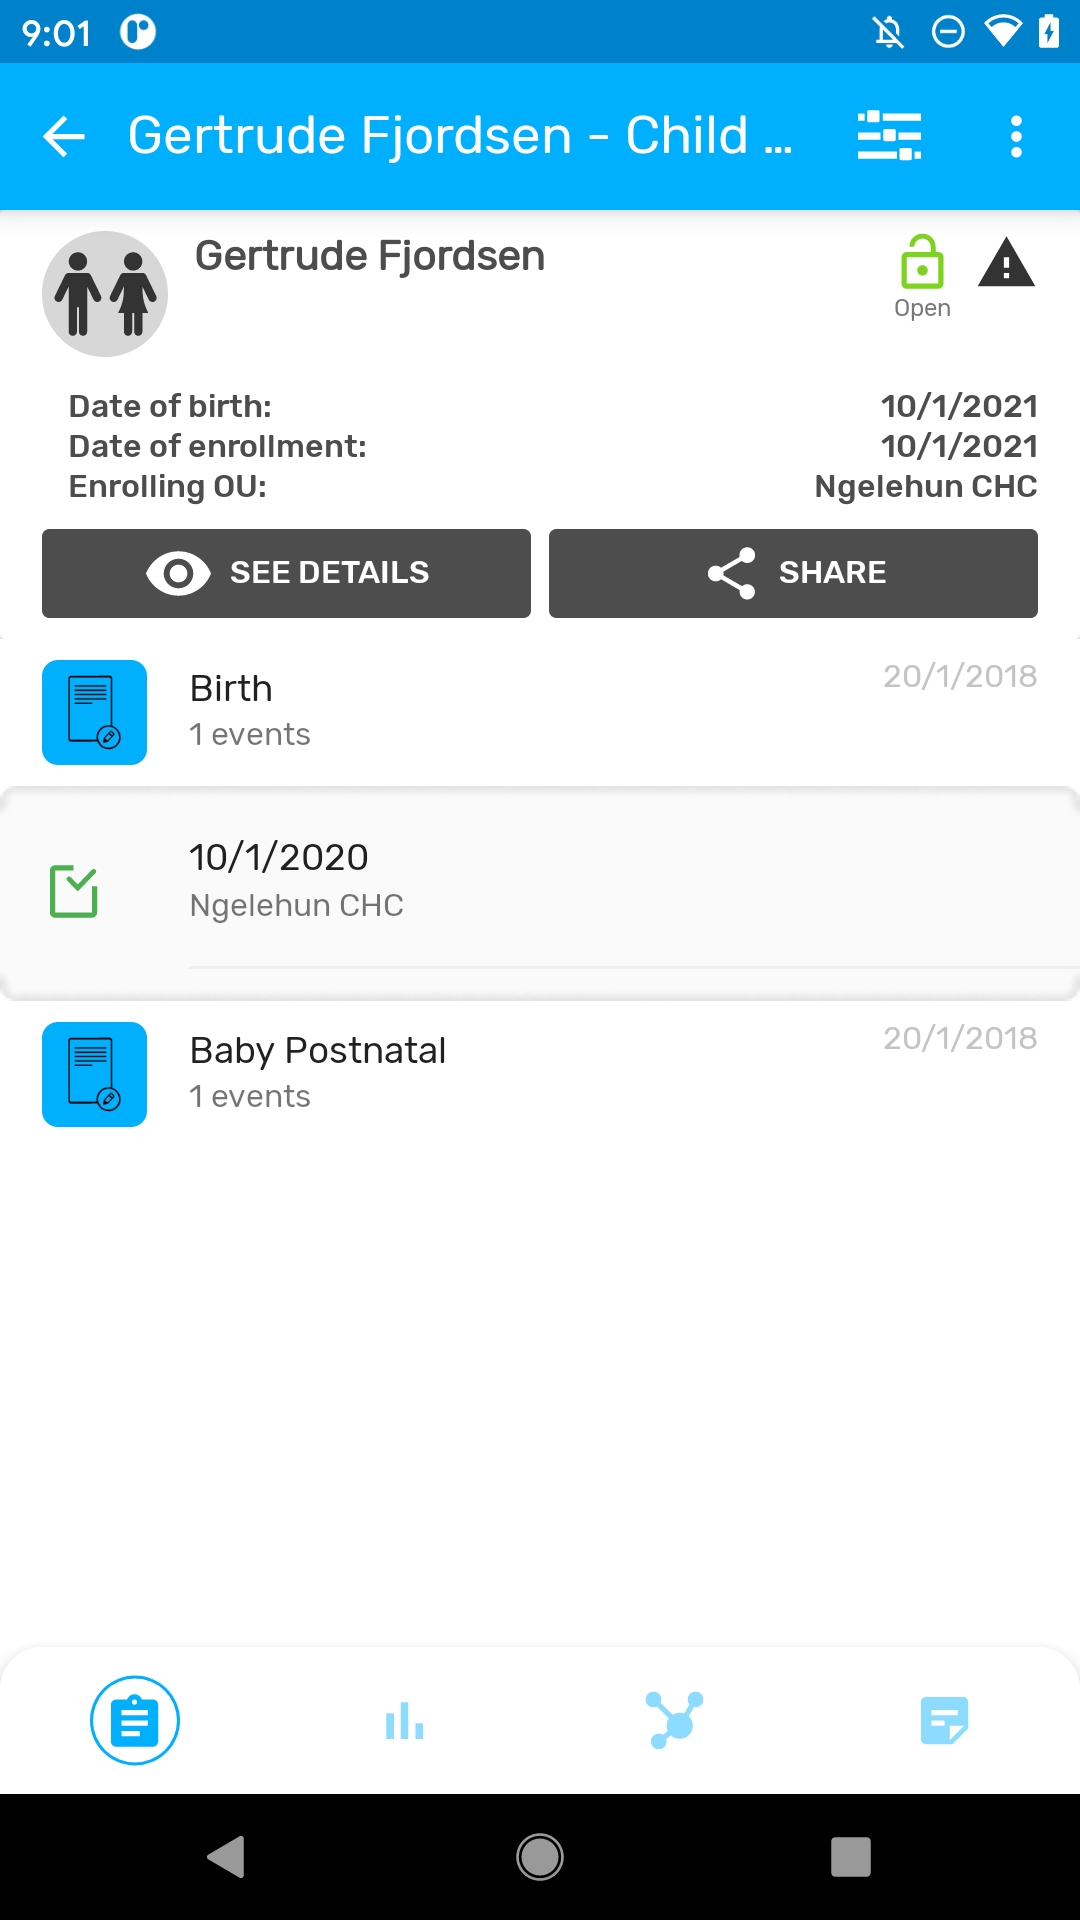
TEI Ovládací panel nabízí možnost změnit seznam událostí z chronologického zobrazení na zobrazení seskupení jevišť. Zobrazení seskupení scén seskupí a sbalí události podle fáze programu. Každou skupinu fází programu může uživatel rozšířit a události se budou zobrazovat chronologicky.
Zdědit hodnoty
Při vytváření nového TEI pro vztah zdědíte jakýkoli atribut programu označený zaškrtnutím zdědění na webu.
To znamená, že všechny existující atributy v prvním TEI by měly projít novým TEI a být zobrazeny v registračním formuláři.
Rozbití skla
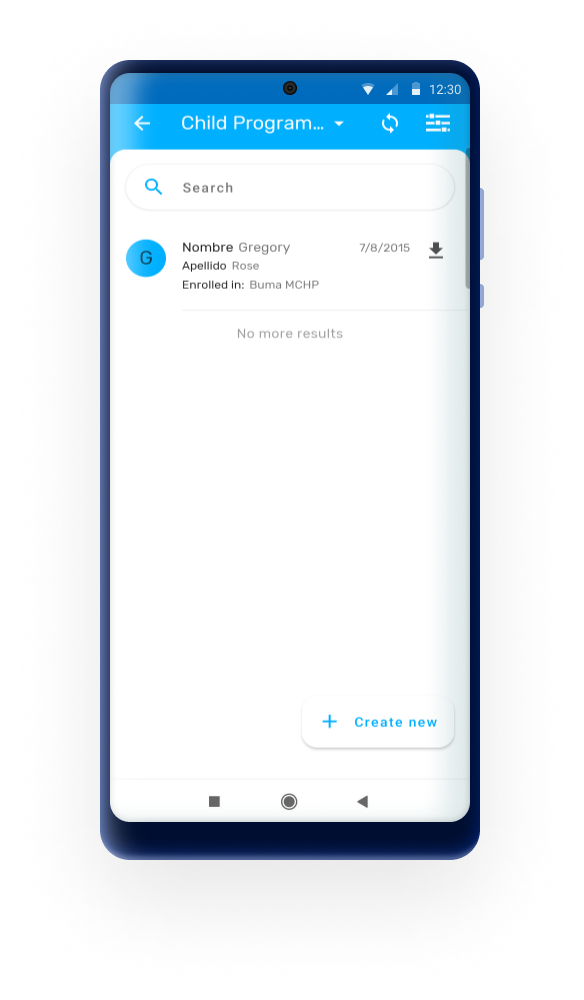
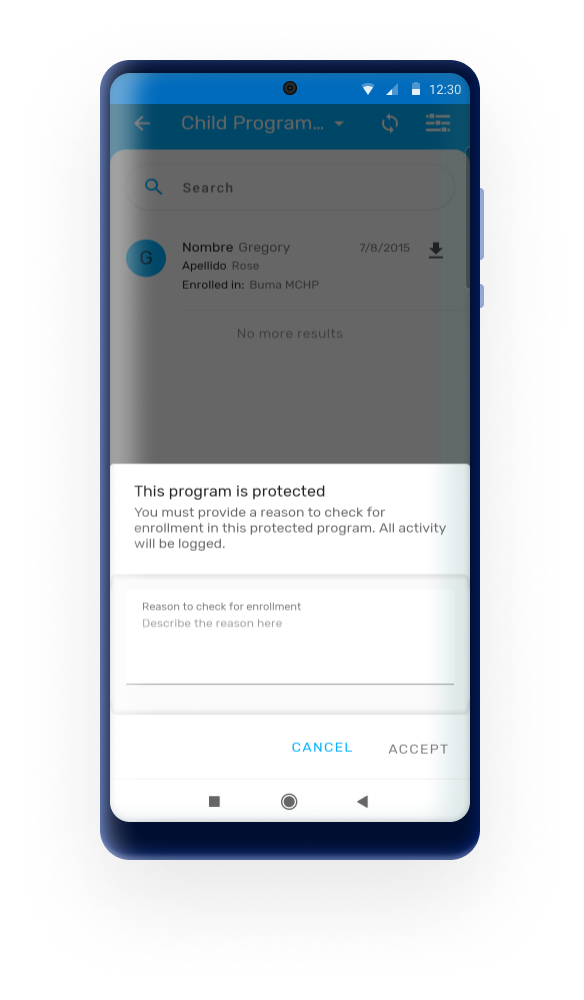
The "breaking the glass" feature is now supported in DHIS2 Android Capture App. If the program is configured with an access level of "Protected" and a search is done outside the user scope, a dialog requesting a reason for access will be displayed for the user to temporarily override the ownership privilege of the proram. This means, the user will gain access to the program related data.
After the reason is written, the app will download the TEI and the dashboard will open. If the TEI being downloaded doesn't have an enrollment in the current program, an enrollment date and organisation unit will be asked.
Analytic charts
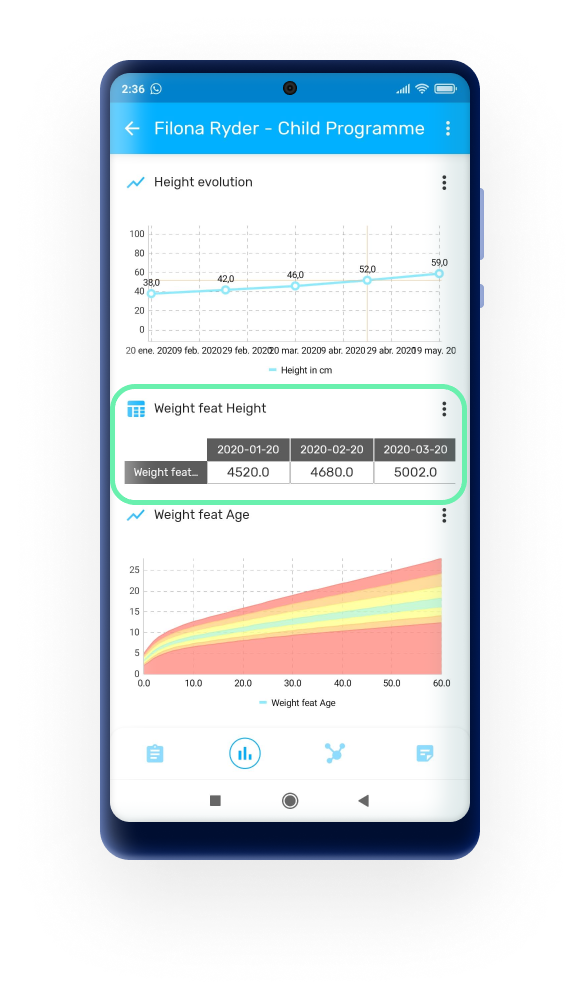
Je možné zobrazit vývoj v datových prvcích jako grafy, hodnoty nebo tabulky. Tyto datové prvky musí být typu číselné hodnoty a musí být konfigurovány v opakovatelné fázi.
- Jedna hodnota: Zobrazí nejnovější hodnotu v programu.

- Grafy: Hodnoty je možné zobrazit jako spojnicový graf nebo jako sloupcový graf.

The Nutrition Growth charts are shown according to the WHO standards. This option will render a background image and apply the axis (0 to 5 monthly)according to the WHO model.

- Tabulky: Zobrazí datové prvky nebo indikátory v řádcích a období ve sloupcích.
Referrals
when a user makes a permanent referral of a TEI, the ownership will be updated accordingly on the server.
From 2.9, admin users can now enable or disable the referrals in the DHIS2 Android Capture App through the Android Settings WebApp.
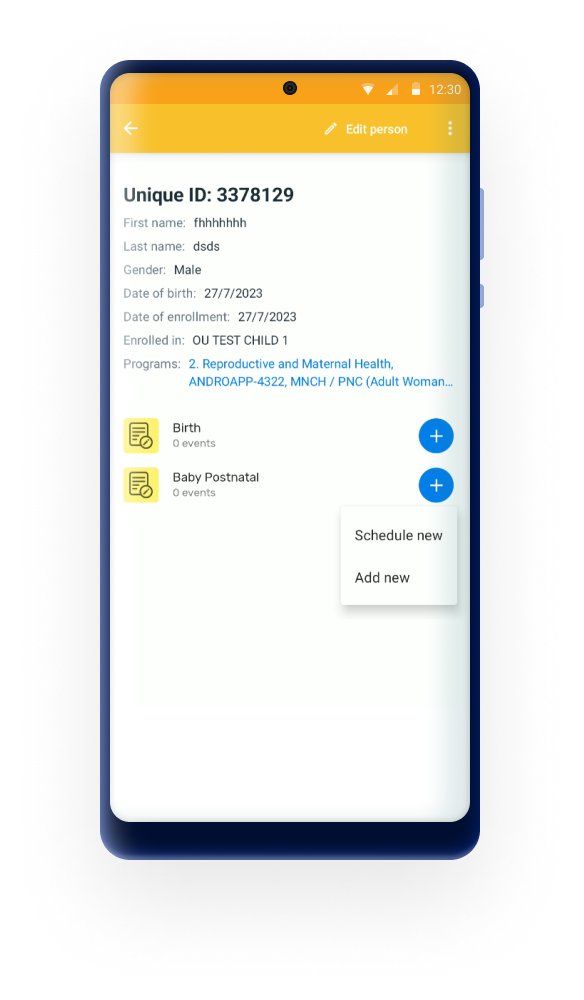
When users add events (tapping on the + icon) in a tracker program, the DHIS2 Android Capture App offers three options: Add (for new events), Schedule (for planning future events) and Refer (for referrals or transfers). IF the referral option is not needed, then the admin user can remove the option from the menu to simplify the user experience. The removal can be general (for all the programs) or for specific programs.
Transfers
Significant enhancements to the transfer flow, aimed at making the process more user-friendly and transparent. The transfer button has been moved to a more accessible location within the three dot menu in the TEI Dashboard, ensuring that users can easily find and initiate transfers without unnecessary navigation.
Also, the ownership organisation unit has been added as a parameter in the TEI card. If the ownership org unit and enrollment org unit are the same, then the enrollment one will be hidden.
Once the transfer process has started, the user will see a dialog with all the org units available (search scope), once an org unit is selected, the transfer button will be activated. After tapping on the button, the ownership org unit will change to the new one. The user must sync data to reflect the changes in the instance.
[EXPERIMENTAL] TEI Header
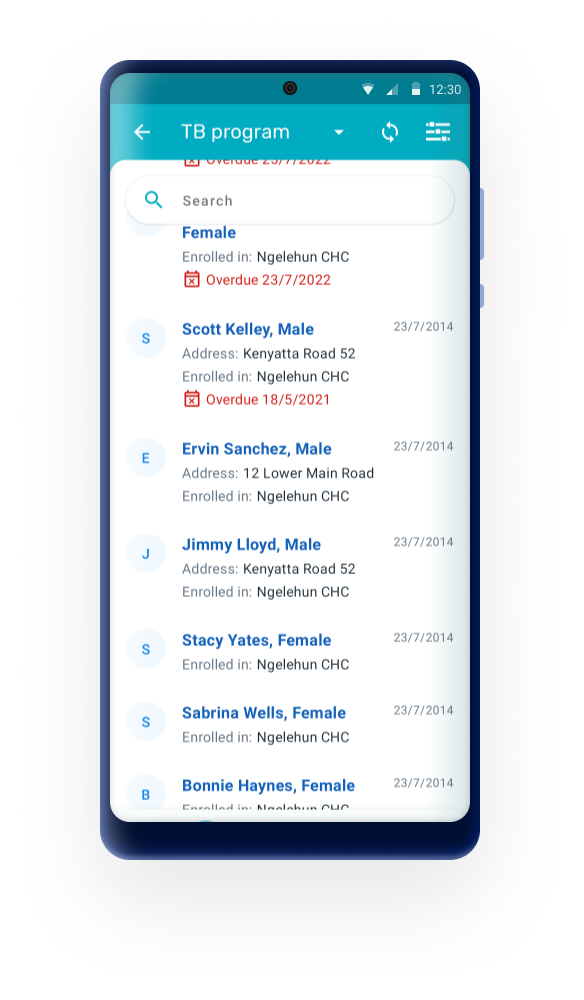
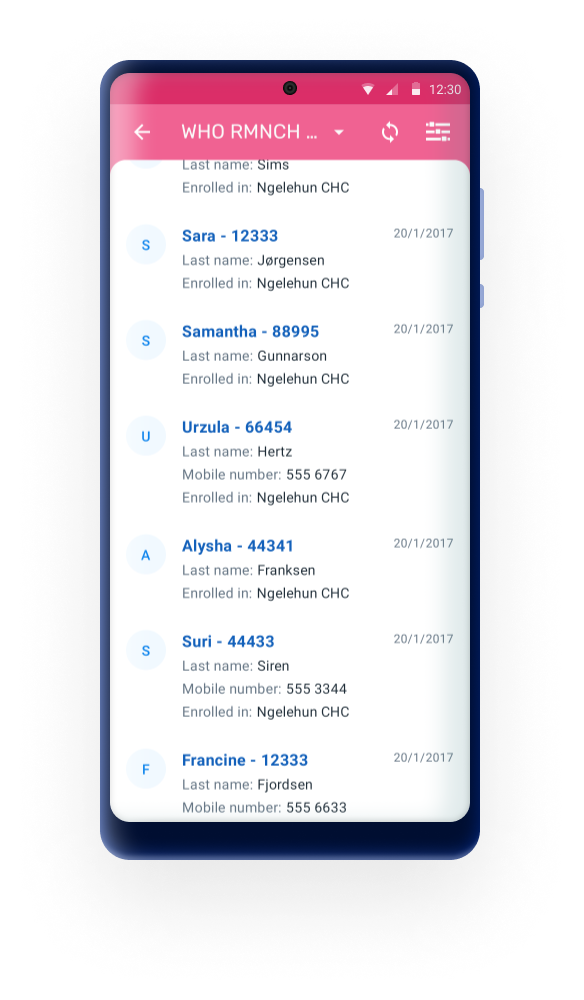
The TEI Header is a title that can be added to the TEI cards and dashboards in the app. The title helps identify a TEI by displaying a summary of key information. It is formed by a concatenation of Tracked Entity Atributes and fixed text. The title is configured through a Program Indicator in the maintenance app and its assigned to the tracker program in the Android settings webapp. This feature is experimentan and depending on feedback and adoption it will be refined and incorporated in the Web Capture app.
Attention
In the Maintenace app, text expressions aren't valid. Even though the error is display in the dialog, save the program indicator and assign it in the Android Settings Web App, the DHIS2 Android capture app will read the expression accordingly.
For more information on how to configure the TEI header, click here.
Scheduling
Schedule after completion
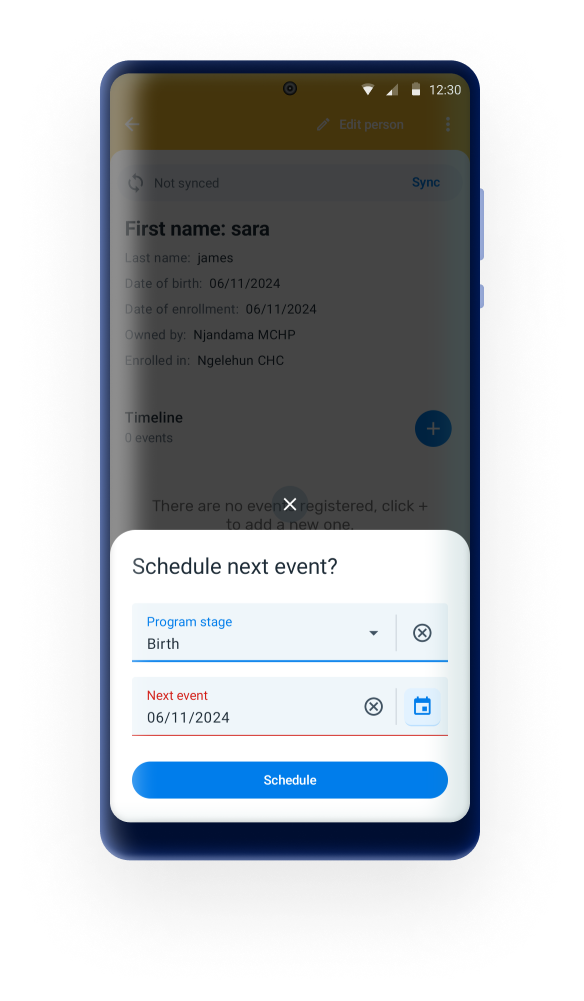
In 3.0, the schedule dialog after completion has been redisigned to facilitate the creation of the event.

Schedule events dialog
As a continuation of the new schedule dialog introduced in the version 3.0, a new intuitive and user-friendly schedule dialog has been implemented to enhance the overall user experience, making it easier to book, reschedule, or cancel events.
Once an event has been scheduled, when the user taps on it, the app will display a dialog with the following:
- Due date field: Allows the user to open the calendar by tapping on the icon or change the date manually. This will facilitate the process of re-scheduling an event.
- Enter event button: after tapping on this button, the app will open the event with the current date and the user can start filling the form.
- Cancel event button: after tapping on this button, the app will close the event and mark it as "skipped". As before, the user can always enter the event, add a report date, changing the status from skipped to open.

Dashboard quick actions
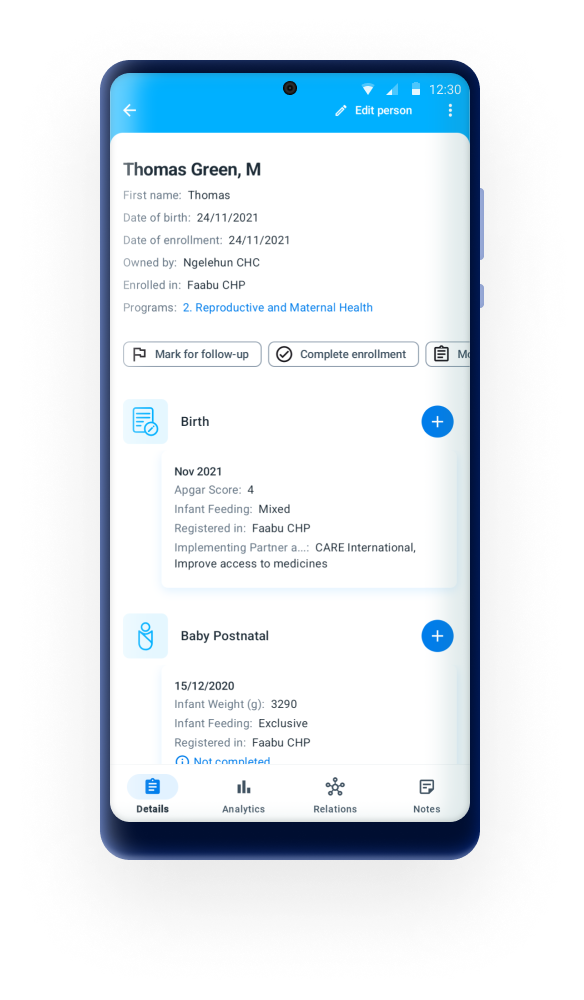
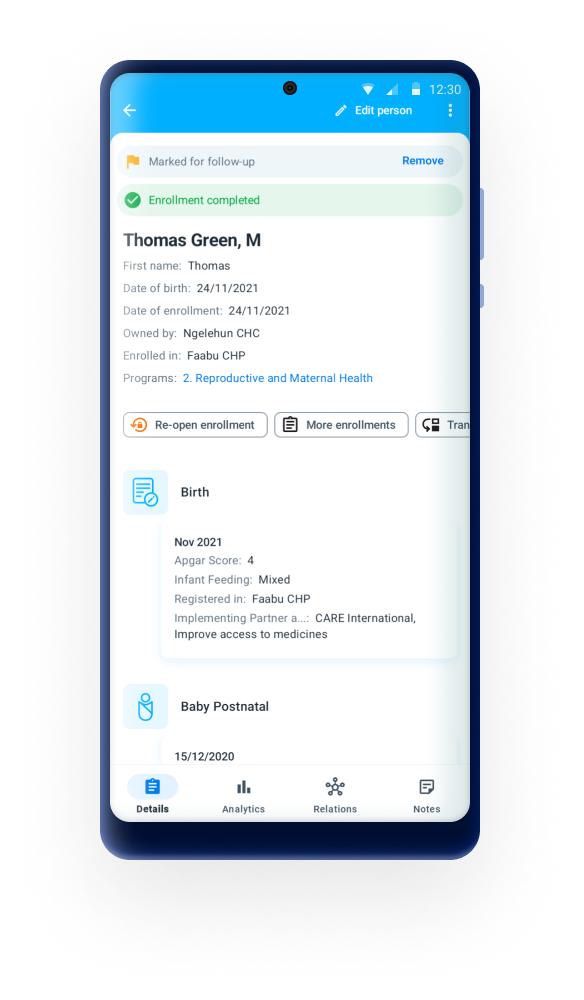
The Quick Actions bar is a new feature in the DHIS2 Android Capture App that enables users to access frequently used actions directly from the Tracked Entity Instance (TEI) Dashboard. These actions are displayed as customizable chips, streamlining workflows and reducing the number of taps needed to perform routine tasks.
Each action is displayed as a chip in the TEI Dashboard. By default, all chips are unselected, and the Quick Actions bar is not displayed in the app. When tapped, the chip performs a predefined function. The available actions include:
- Mark for follow-up
- Transfer
- Complete
- Cancel
- More enrollments
The chips cannot be reordered. The order of appearance is as the list above.
Limitations and considerations
- Quick Actions are available only when configured via Android Settings WebApp (v2.4.2)
- Each program must be configured individually.
- Feature parity is maintained: actions remain available in the TEI Dashboard 3-dot menu even when Quick Actions are disabled.
Přehled podporovaných funkcí
Následuje úplný seznam všech funkcí dostupných pro programy s registrací a bez registrace v DHIS2 a poznámky o tom, zda byly nebo nebyly implementovány v aplikaci Android Capture.
V poznámkách výraz „admin“ označuje někoho, kdo vyvíjí a konfiguruje systém DHIS2, a „user“ označuje někoho, kdo používá aplikace k pořizování dat, jejich aktualizaci a kontrole zpráv.
| Legenda | Popis |
|---|---|
 | Funkce implementována |
 | Funkce není implementována (bude ignorována) |
 | Nelze použít |
 | Ve vývoji. Funkce ještě není zcela implementována nebo již bylo hlášeno neočekávané chování. |
Program
| Funkce | Popis funkce | Program s registrací | Program bez registrace | Poznámky k provádění |
|---|---|---|---|---|
| Metoda zadávání dat pro sady možností | Umožňuje správci zvolit, jak se budou možnosti zobrazovat na obrazovce v celém programu (tj. Jako rozevírací seznamy nebo jako přepínače) | | | To bude nahrazeno novými možnostmi vykreslení. |
| Kombinace kategorií (atribut CatCombo) | Umožňuje správci připojit kategorii (sadu voleb) k programu a vyžaduje, aby uživatelé kategorizovali každý zápis. (Tomu se v DHIS 2 říká kombinace kategorií atributů.) | | | |
| Pracovní postup schválení dat | Pokud správce vybere předem nakonfigurovaný pracovní postup schvalování dat, použije se k vynucení kaskády „schvalování“ nebo „přijímání a schvalování“, která uživatelům umožní odhlásit a uzamknout data. | | | |
| Zobrazit seznam titulních stránek | Je-li tato možnost zaškrtnuta, zobrazí se na vstupní stránce po výběru organizační jednotky a programu seznam aktivních registrací. (Zobrazené atributy jsou ty, které jsou zaškrtnuty jako "zobrazit v seznamu".) | | | |
| První fáze se objeví na registrační stránce | Pokud je vybrána tato možnost, pak se během registrace programu zobrazí také obrazovka pro první fázi programu (registrace a první událost jsou zachyceny společně na jedné obrazovce). | | | V Androidu se to implementuje otevřením události automaticky po dokončení registrace, místo přidání formuláře na stejnou obrazovku. |
| Dny vypršení platnosti dokončených událostí | Umožňuje správcům uzamknout zadávání dat určitý počet dní po dokončení události. | | | |
| Typ doby platnosti + dny platnosti | Umožňuje správcům nastavit období (např. týdenní, měsíční) a zamknout zadávání dat určitý počet dní po skončení období. | | | |
| Povolit budoucí data zápisu | Pokud je zaškrtnuto, umožňuje to uživateli zadat budoucí data registrace během registrace do programu; jinak jsou uživatelé omezeni na dnešní nebo minulá data. | | | |
| Povolit budoucí data incidentu | Pokud je zaškrtnuto, umožňuje to uživateli zadat budoucí data incidentu během registrace do programu; jinak jsou uživatelé omezeni na dnešní nebo minulá data. | | | |
| Zaregistrovat se pouze jednou (za dobu životnosti instance trasované entity) | Pokud je zaškrtnuto, brání tomu, aby TEI (např. osoba) byla zapsána do tohoto programu více než jednou. | | | |
| Zobrazit datum incidentu | Pokud je zatrženo, zobrazí se uživateli data zápisu i incidentu pro sběr dat; jinak se zobrazí / zachytí pouze datum zápisu. | | | |
| Popis data incidentu | Umožňuje správci přizpůsobit štítek, který se používá pro datum incidentu. | | | |
| Popis data zápisu | Umožňuje správci přizpůsobit štítek, který se používá pro datum zápisu. | | | |
| Zachyťte souřadnice (zápis) | Umožňuje uživatelům zachytit zeměpisné souřadnice během zápisu do programu. | | | |
| Zachycení polygonu (zápis) | Umožňuje uživatelům zaznamenávat umístění (uzavřené oblasti) během zápisu do programu. | | | |
| Souřadnice TEI | Umožňuje uživatelům zaznamenávat zeměpisné souřadnice TEI během zápisu do programu. | | | |
| Vztahy: vytváření a aktualizace | Umožňuje uživatelům vytvářet a aktualizovat vztahy. | | | |
| Vztahy - odkaz na přidání příbuzného | To umožňuje správcům přidat odkaz na jeden konkrétní vztah na ovládací panel, což uživatelům umožňuje přímo vytvořit propojený TEI (např. „dětský“ pacient). | | | |
| Atributy: zobrazit v seznamu | Toto nastavení určuje, zda lze atribut zobrazit v seznamech, například ve výsledcích vyhledávání, a zda jej lze zobrazit v užším seznamu atributů zobrazeném v části „Profil“ na hlavním panelu. | | | Zobrazí se první tři atributy |
| Atributy: povinné | To umožňuje správci označit atribut jako „povinný“, což znamená, že zápis nelze uložit, dokud není zachycena hodnota. | | | |
| Atributy: datum v budoucnosti | U atributů data to umožňuje správci zabránit nebo povolit zachycení budoucích dat. | | | |
| Registrační formulář - výchozí | Výchozí formulář pro zadávání dat jednoduše uvádí všechny atributy definované pro TEI. | | | |
| Registrační formulář - vlastní | To umožňuje správci definovat vlastní rozložení (pomocí HTML) pro registrační formulář. | - | | V aplikaci pro Android nejsou vlastní rozvržení podporována |
| Oznámení o programu | Můžete nastavit automatická oznámení, kdy dojde k registraci nebo dokončení programu, nebo v nastaveném intervalu před / po incidentu nebo datu registrace. Ty lze odesílat jako interní zprávy DHIS 2, e-maily nebo SMS. | | | Tato funkce se provádí na straně serveru, jakmile jsou přijata data. Nefunguje, když aplikace pracuje offline. |
| Activate/deactivate TE | Deactivating a TE dashboard will cause the TE to become “read-only”. This means you cannot enter data, enrol the TE or edit the TE profile. | | | |
| Dokončení povoleno, pouze pokud ověření proběhne | Zaškrtnutím políčka vynutíte, aby událost vytvořená tímto programem byla dokončena, až když prošly všechna pravidla ověřování. | | | |
| Data otevření / zavření organizační jednotky | Umožňuje správci nastavit otevírací a uzavírací data pro organizační jednotku, která uživatelům blokuje přidávání nebo úpravy událostí mimo tato data. | | | |
| Úrovně sdílení dat / Může zachytit data | Umožňuje uživateli přidávat nové události, upravovat data a mazat události v programu. | | | |
| Úrovně sdílení dat / Může zobrazit data | Umožňuje uživateli zobrazit seznam událostí v rámci programu. | | | |
| Úrovně sdílení dat / Žádný přístup | Uživatel nebude moci program vidět | | |
Fáze programu
| Funkce | Popis funkce | Program s registrací | Program bez registrace | Poznámky k provádění |
|---|---|---|---|---|
| Formulář události - výchozí | Výchozí formulář pro zadávání dat jednoduše uvádí všechny atributy patřící k registraci programu | | | |
| Formulář akce - formuláře sekcí | Formuláře oddílů umožňují rozdělit existující formuláře do segmentů | | | |
| Formulář události - vlastní | Definujte vlastní formulář události jako stránku HTML. | | | V aplikaci pro Android nejsou vlastní rozvržení podporována. |
| Oznámení fáze programu | Můžete nastavit automatická upozornění na dokončení fáze programu nebo v nastaveném intervalu před / po naplánovaných datech událostí. Ty lze odesílat jako interní zprávy DHIS 2, e-maily nebo SMS zprávy. | | | Tato funkce se provádí na straně serveru, jakmile jsou přijata data. Nefunguje, když aplikace pracuje offline. |
| Opakovatelný | Pokud je zaškrtnuto Opakovatelné, lze tuto fázi opakovat během jedné registrace programu. Pokud to není, pak se fáze může stát pouze jednou během registrace programu. | | | |
| Opakovatelný | Pokud je zaškrtnuto Opakovatelné, lze tuto fázi opakovat během jedné registrace programu. Pokud to není, pak se fáze může stát pouze jednou během registrace programu. | | | |
| Opakovatelné + standardní intervalové dny | Systém navrhne datum vypršení termínu jako výpočet poslední události + standardní data intervalu. | | | |
| Typ období | Umožňuje správci nakonfigurovat sadu období (např. týdnů nebo měsíců) pro každou událost ve fázi programu, nikoli pouze datum. Při vytváření událostí jsou uživatelé požádáni, aby si vybrali období (místo data) pro každou novou událost, kterou vytvoří v dané fázi programu. | | | |
| Automaticky generovat událost | Pokud je zatrženo, vygeneruje se při zápisu pro tuto programovou fázi „rezervace“ na základě „plánovaných dnů od začátku“. | | | |
| Generovat události na základě data registrace (nikoli data incidentu) | Zkontrolujte na něm automatické generování termínů událostí z programových fází tohoto programu na základě data registrace. Pokud není zaškrtnuto, jsou termíny vygenerovány na základě data incidentu. | | | |
| Otevřete formulář pro zadávání údajů po registraci + datum hlášení, které chcete použít | Pokud je tato možnost vybrána, po dokončení registrace by se měl ihned poté otevřít formulář pro zadání dat události. | | | |
| Po dokončení fáze požádejte uživatele o dokončení programu | Pokud je tato možnost vybrána, po dokončení fáze programu by měl být uživatel vyzván k dokončení programu. (Toto nastavení je ignorováno, pokud je zaškrtnuto také „Požádat uživatele o vytvoření nové události“.) | | | |
| Až bude fáze dokončena, požádejte uživatele o vytvoření nové události | Pokud je tato možnost vybrána, po dokončení fáze programu je uživatel vyzván k rezervaci. | | | |
| Skrýt termín | Zobrazuje pouze skutečné datum událostí, skrývá datum konce platnosti. | | | |
| Zachycuje souřadnice (událost) / bod typu prvku | Enables the user to capture geographical coordinates when each event is created particularly useful in devices that have GPS (eg Android), as instead of having to type in coordinates, the user can automatically populate them with the press of a button. | | | |
| Zachytit Polygon (událost) / Polygon typu objektu | Umožňuje uživatelům po vytvoření každé události zachytit umístění (uzavřené oblasti). Polygon musí obsahovat alespoň 4 body. | | | |
| Popis data zprávy | Umožňuje správci přizpůsobit štítek, který se používá pro datum události. | | | |
| Datové prvky - povinné | To umožňuje správci označit datový prvek jako „povinný“, což znamená, že událost nelze uložit, dokud není zachycena hodnota. | | | |
| Datové prvky - povoleny poskytované jinde | Ve formuláři toto umístí zaškrtávací políčko vedle vybraného datového prvku a umožní načtení předchozích dat do datového prvku. | | | |
| Datové prvky - zobrazení v hlášeních zpráv | Zobrazí hodnotu tohoto datového prvku do jediné události bez funkce zadávání registračních dat. | | | |
| Datové prvky - datum v budoucnosti | U Datových prvků umožňuje datum správci buď zabránit, nebo povolit zachycení budoucích dat. | | | |
| Možnosti vykreslení datových prvků jako rádio | Umožňuje správci zvolit, jak se budou možnosti zobrazovat na obrazovce pro každý datový prvek (tj. Buď jako rozevírací seznam nebo jako přepínací tlačítka). | | | |
| Po vyplnění zablokujte přihlašovací formulář | Zabrání všem úpravám událostí po jejich dokončení. | | | |
| Komentáře k události | Umožňuje uživateli přidat k události celkové komentáře. Tyto komentáře jsou kumulativní (nové komentáře jsou přidány pod existující komentáře). | | |
Program s registrací: Ovládací panel trasované entity
| Funkce | Popis funkce | Status | Poznámky k provádění |
|---|---|---|---|
| Zprávy | Umožňuje uživatelům odesílat ad hoc volné textové zprávy TEI (např. Pacientům) prostřednictvím SMS nebo e-mailu. | | |
| Značka pro sledování (tlačítko s vykřičníkem) | Umožňuje uživateli označit TEI (např. Pacienta) jako vyžadující sledování. | | |
| Zobrazí historii auditu TEI | Umožňuje uživateli zobrazit historii všech úprav atributů pro tuto TEI (např. Pacienta). | - | |
| Indikátory vloženého programu | Pokud je zaškrtnuto políčko „zobrazit ve formuláři“ indikátoru programu, indikátor se zobrazí na ovládacím panelu Tracker Capture a je aktualizován živě, jakmile dojde k zachycení dat. | | |
| Smazat události | Umožňuje uživateli odstranit událost. | | |
| Naplánujte události | V dialogu pro generování události by se uživateli měla zobrazit také možnost naplánovat událost. Proces je jako vytvoření události, ale uživatel bude po naplánování události odeslán zpět na ovládací panel TEI. | | |
| Doporučení pacientů | V dialogu generování událostí by se uživateli měla zobrazit také možnost odkázat pacienta. Proces je jako vytváření / plánování události, ale uživatel může změnit organizační jednotku a musí určit, zda jde o jednorázové nebo trvalé doporučení. Jednou se událost vytvoří pouze v zadané organizační jednotce. | | |
| Resetujte vyhledávací pole | Uživatel je schopen vyčistit vyhledávací pole stisknutím ikony se zaoblenou šipkou v pravém horním rohu obrazovky vyhledávání. | | |
| Obrazovka vyhledávání všech typů TE | Uživatel je schopen vyhledávat ve všech programech jednoho typu trasované entity (TET). Na obrazovce Hledání je rozevírací seznam, který zobrazuje všechny programy dostupné pro aktivní TET (aktivní TET je definován výběrem programu na domovské obrazovce). Tato rozevírací nabídka by měla mít také možnost s názvem TET. (Osoba na našem serveru). Když uživatel vybere tuto možnost, vyhledávací pole, která jsou k dispozici, budou pouze atributy TET (žádné atributy specifické pro program). Všechna omezení vyhledávání neplatí, protože patří k programům. | | |
| Ovládací panel TEI bez programu | Uživatel může zobrazit ovládací panel TEI bez jakéhokoli programu výběrem TEI v seznamu, pokud bylo vyhledávání bez programu. Ovládací panely zobrazují atributy TET na kartě podrobností a seznam aktivních registrací. | | |
| Historie zápisu TEI a nový zápis | Uživatel je schopen zobrazit kompletní záznam historie TEI. Kliknutím na ikonu v pravém horním rohu se jim zobrazí seznam aktivních zápisů, následovaný seznamem minulých zápisů (dokončených nebo zrušených) a programy, do kterých lze TEI zapsat. Uživatelé by měli být schopni přejít na různé zápisy ze seznamu. | | |
| Přístupová úroveň - rozbití skla | Pokud je program nakonfigurován s chráněnou úrovní přístupu a uživatel prohledá a najde trasované instance entit, které jsou vlastněny organizační jednotkou, pro kterou uživatel nemá oprávnění pro sběr dat, je uživateli nabídnuta možnost porušení zabezpečení. Uživatel zjistí důvod porušení zabezpečení a poté získá dočasné vlastnictví trasované instance entity. | |
Program bez registrace: Program jedné události
| Funkce | Popis funkce | Status | Poznámky k provádění |
|---|---|---|---|
| Výpis událostí (mřížka) | Seznam existujících událostí, který se zobrazí po výběru programu. | | |
| Třídit a filtrovat události v mřížce | Umožňuje uživateli třídit uvedené události nebo filtrovat události na základě klíčových slov nebo konkrétních rozsahů dat / čísel. | | Události jsou řazeny chronologicky. Uživatel může filtrovat podle období a organizační jednotky. |
| Úpravy událostí v mřížce | Umožňuje uživateli přímo upravit datové prvky zobrazené v seznamu událostí / mřížce. | | |
| Zobrazit historii auditu událostí | Umožňuje uživateli zobrazit historii všech změn datových prvků události. | | |
| Zobrazit / skrýt sloupce (v seznamu událostí / mřížce) | Umožňuje uživateli upravit datové prvky zobrazené v seznamu událostí / mřížce (platí pouze pro daného uživatele). | | |
| Procento dokončení pole | Procento dat dokončených v každé události se zobrazuje v pravém horním rohu události, když je otevřena po první registraci. Procenta by měla být přizpůsobena účinkům pravidel programu ve formulářích. | | Procento dokončení nebere v úvahu nepodporované typy hodnot ve formulářích. |
| Smazat události | Umožňuje uživateli odstranit událost. | |