مدير المسار
The core team has developed the Route Manager app to provide a user interface to manage routes through the Route API.
It is an optional app that is available on the App Hub, and can be downloaded there or installed on an instance through the App Management app.
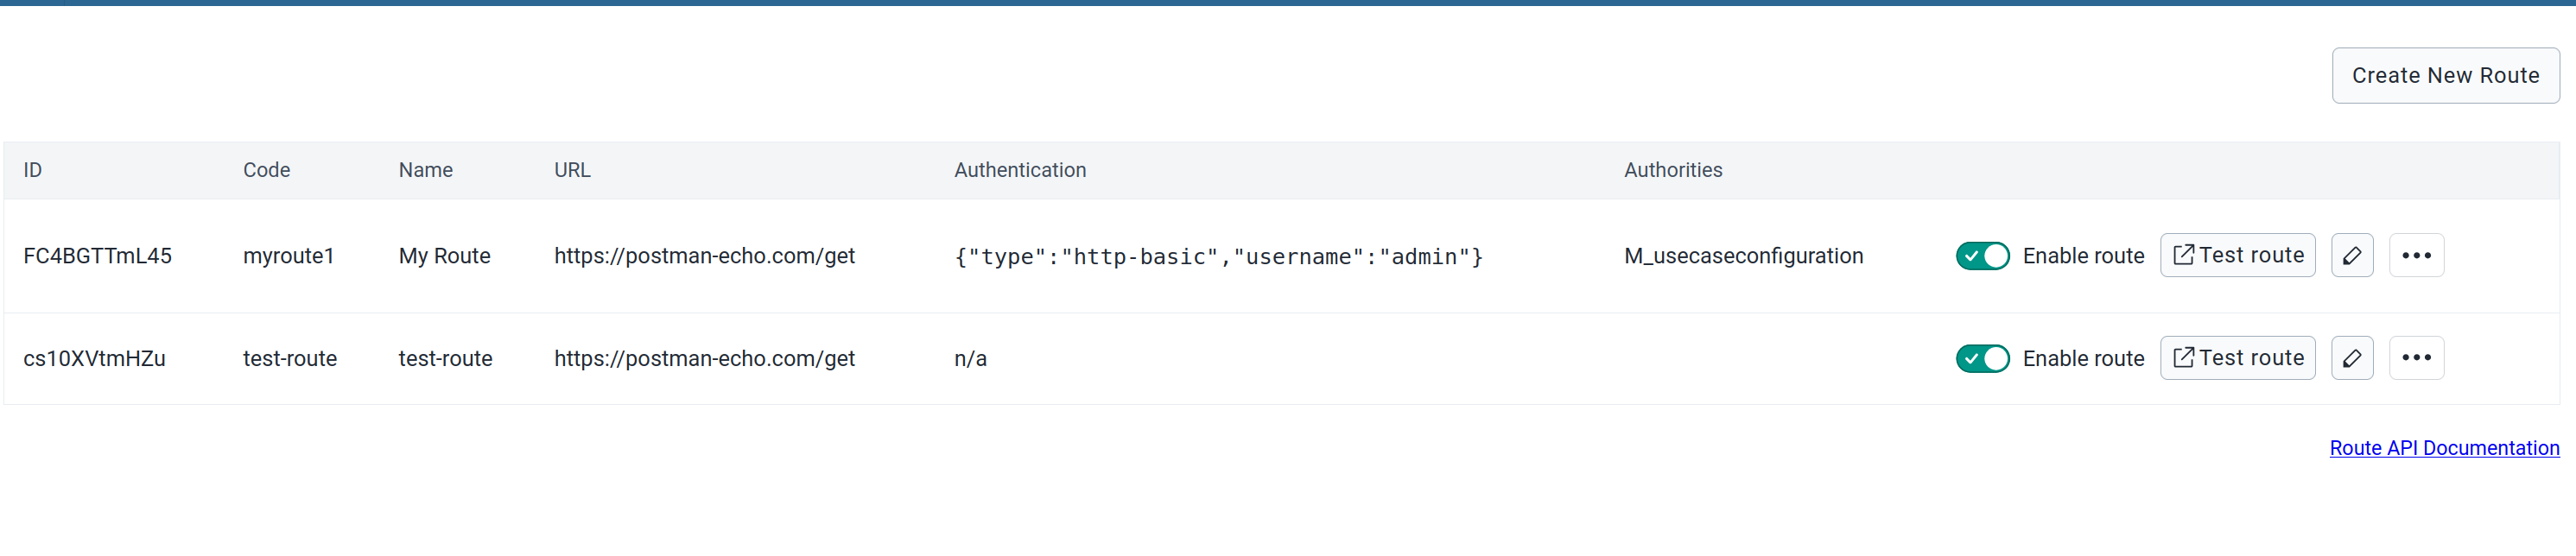
App functionality
The app provides a user interface for the Route API. It is inevitable that the API will be ahead of the app at certain times, but the app is on continuous release and will catch up with the API as soon as possible. For these use cases, you can always directly use the API (or contribute to the app on GitHub - we welcome contributions!)
The following is an overview of the functionality supported by the app.
Creating new routes
Through the app, you can create a new route by going to the Create New Route page (button top-right of the Home Screen).
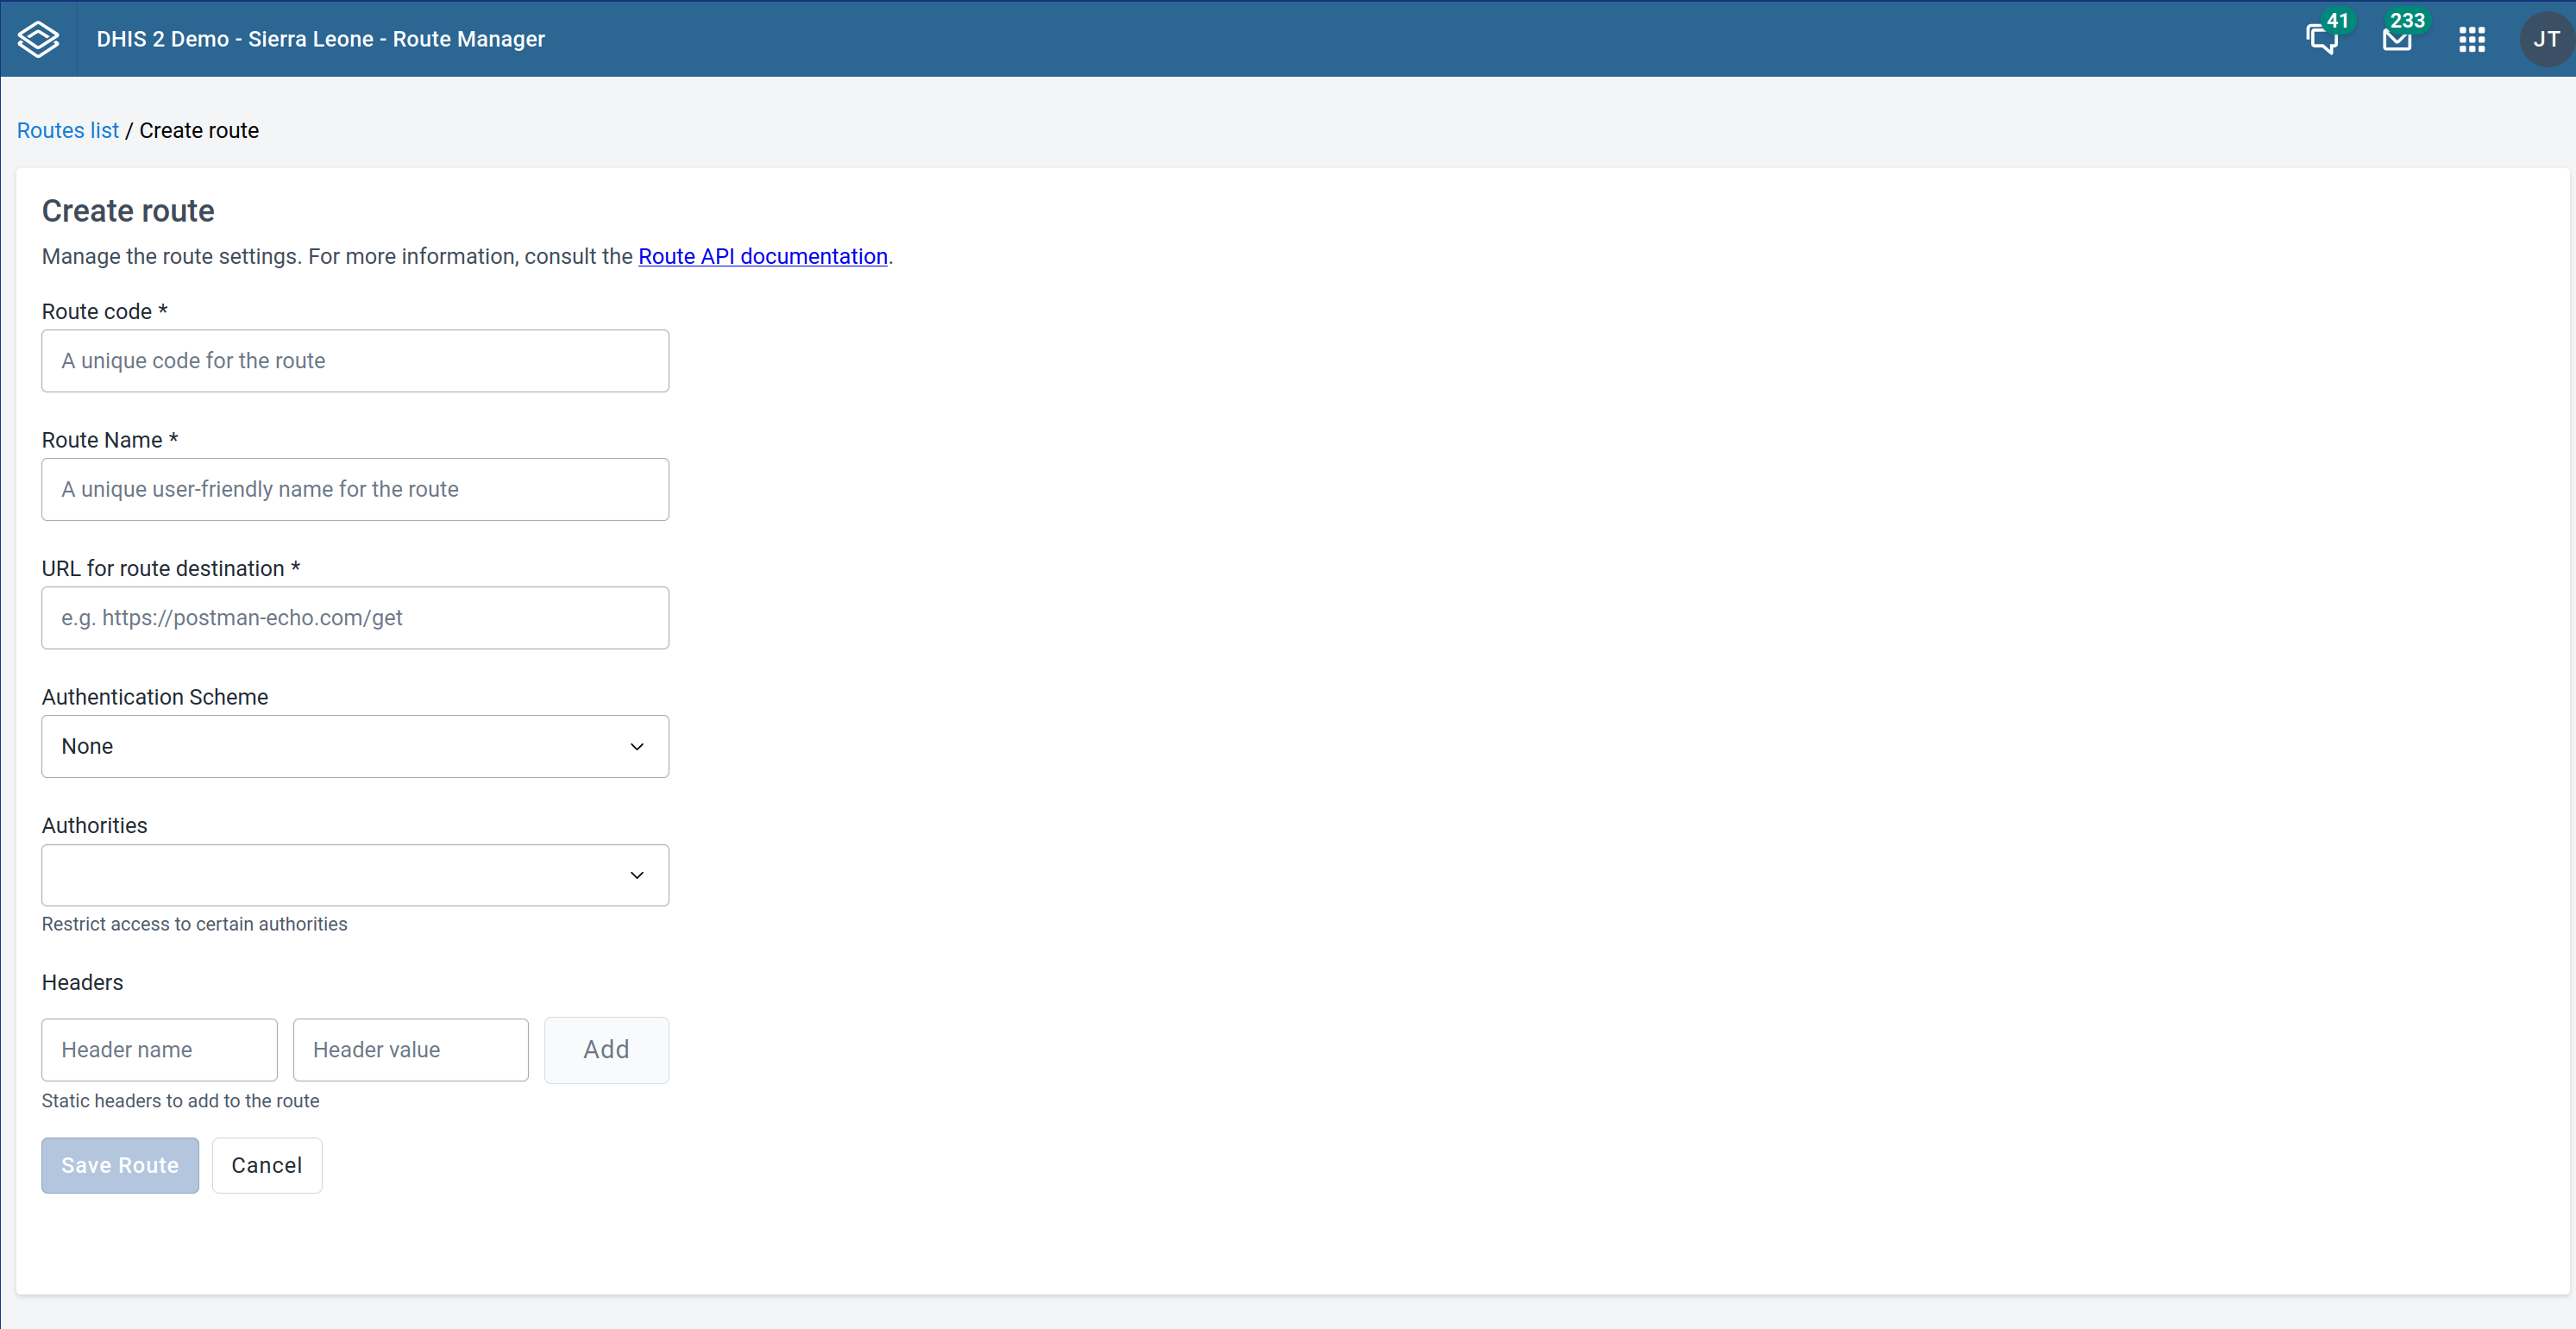
The page allows you to define the different properties of the route. You can check the Route API documentation above for more details.
Other than the basic routes parameters, you can also setup different authentication schemes, restrict the authorities that can run the route, and define static headers for the route.
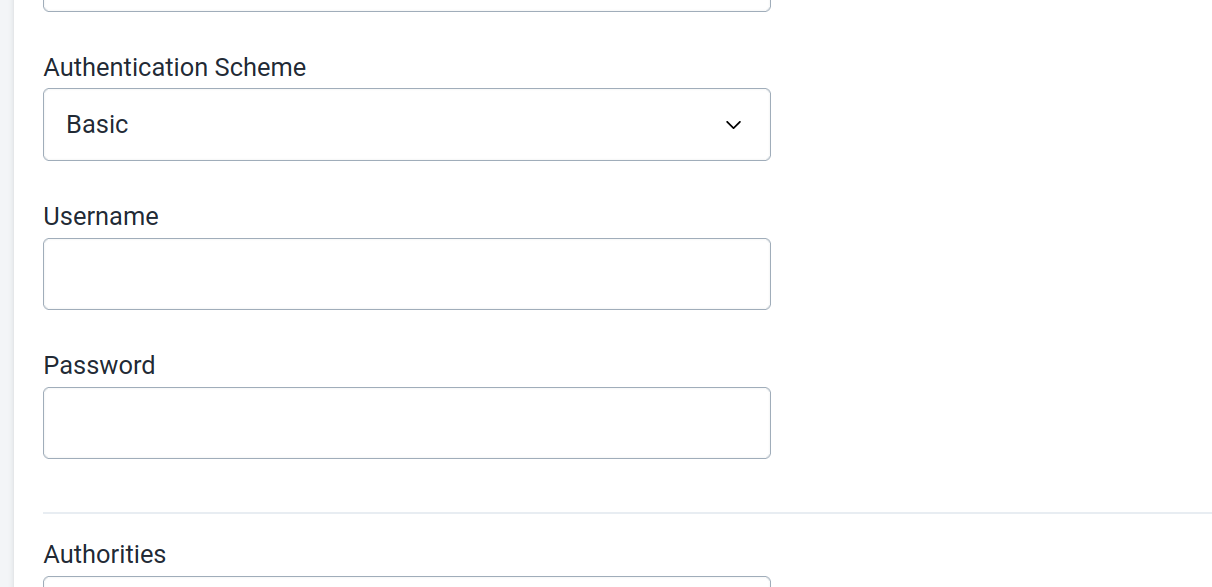

The API is ahead of the app sometimes in terms of the functionalities it provides, i.e. it supports more authentication schemes, but the app is continuously being updated to catch up with the API.
Editing, deleting and disabling existing routes
In the routes list on the home page of the app, one can perform several maintenance tasks such as editing a route, deleting it, disabling it, or sharing it.
Enabling or disabling a route can be performed with the toggle button on each row.
To edit a route, click the small pencil icon. This will take you to a page similar to the Create page where you can edit the route.
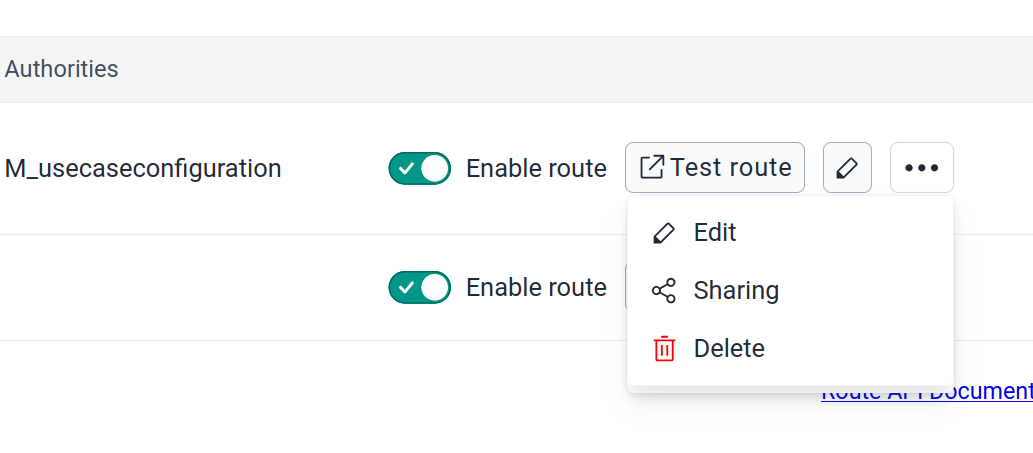
Click the three dots icon in the right column of the routes table to view extra options for the route, delete it, or edit sharing settings for it.
Testing routes
You can test a route by clicking the Test route button on the Routes List. This opens a screen where you can use the route to invoke the upstream server. It allows you to pass query params, the body of the request (for non-GET requests) or the rest of the path of the upstream server for wildcard routes.
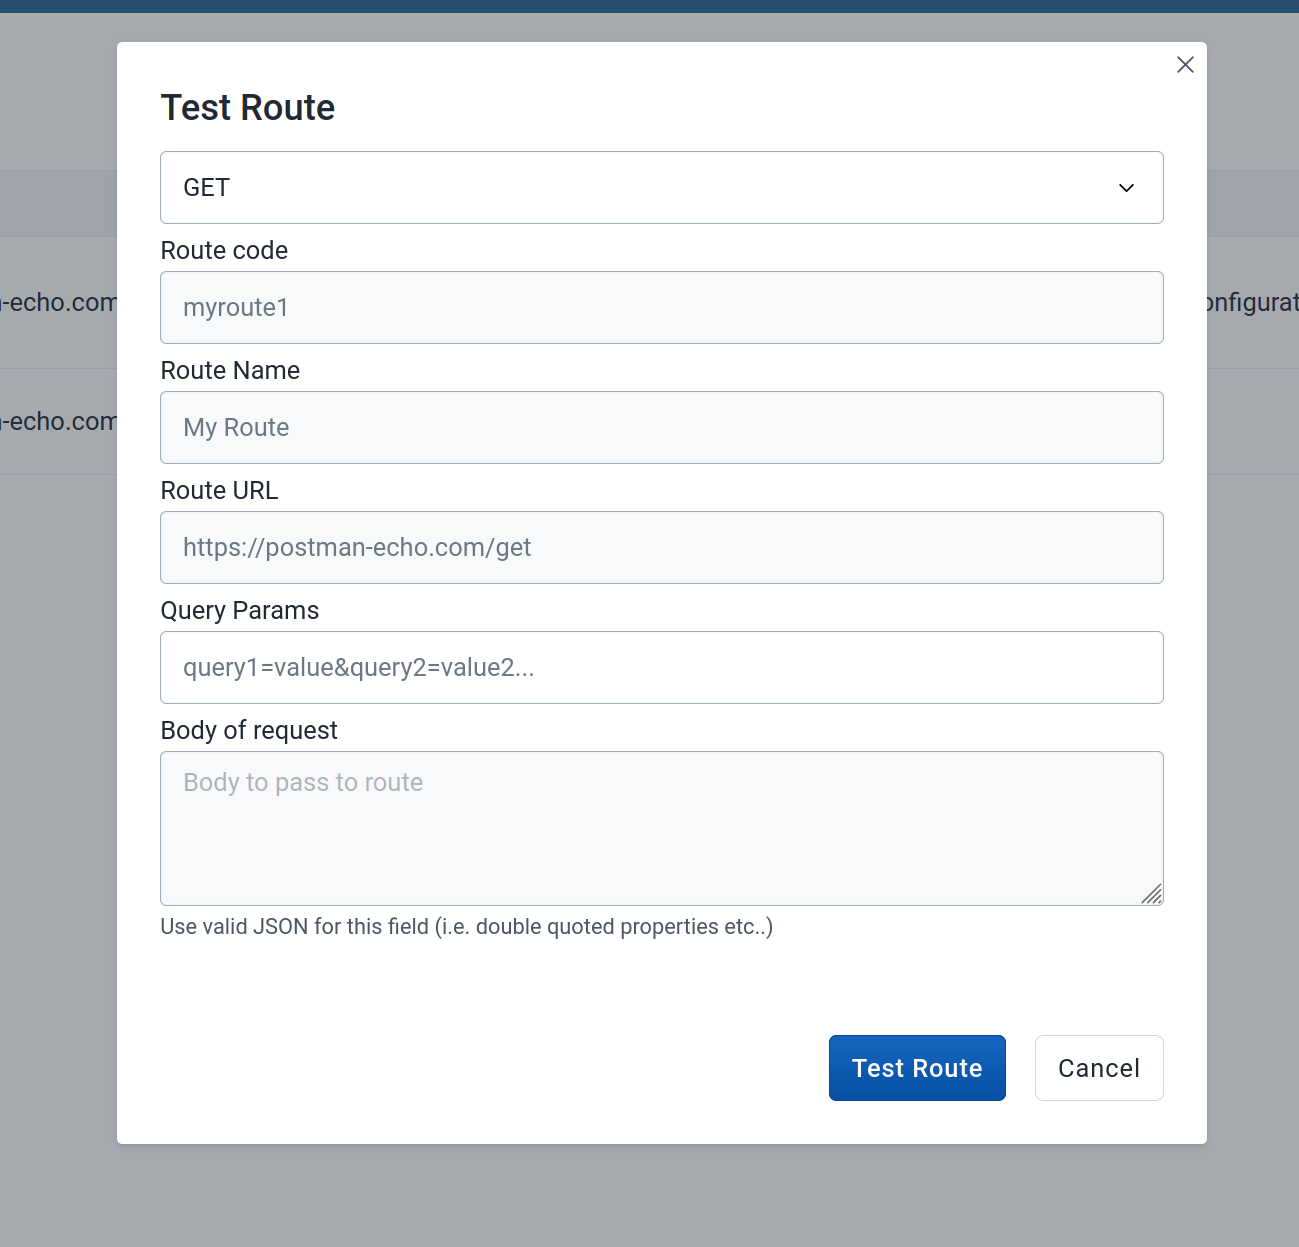
On clicking Test Route, the upstream endpoint will be invoked and the result displayed.
Configuring the route metadata sharing
From the extended options in the Routes list (the three dots), you can open the Sharing dialog that allows to restrict access to a certain user or user group.

How to get the Route Manager app
The app is not bundled with DHIS2 but it can be installed in the App Management app under the App Hub apps.
You can also view and test the app under: https://route-manager.netlify.dhis2.org/ and pointing it, for example, to one of the dev servers on: https://debug.dhis2.org/